> For the complete documentation index, see [llms.txt](https://docs.dapta.ai/llms.txt). Markdown versions of documentation pages are available by appending `.md` to page URLs; this page is available as [Markdown](https://docs.dapta.ai/dapta-forms/getting-started/quickstart-first-form.md).

# Quickstart: Your First Form in 5 Minutes

Build, preview and publish your first Dapta Form in about five minutes: create the form, add three questions, check it on mobile, publish it and share the public link.

This guide walks you from an empty workspace to a live, shareable form. You will create a short lead qualification form with three questions, preview it on a phone, publish it and copy the public link.

You only need a Dapta account. Dapta Forms is free and has no plans or limits to unlock.

***

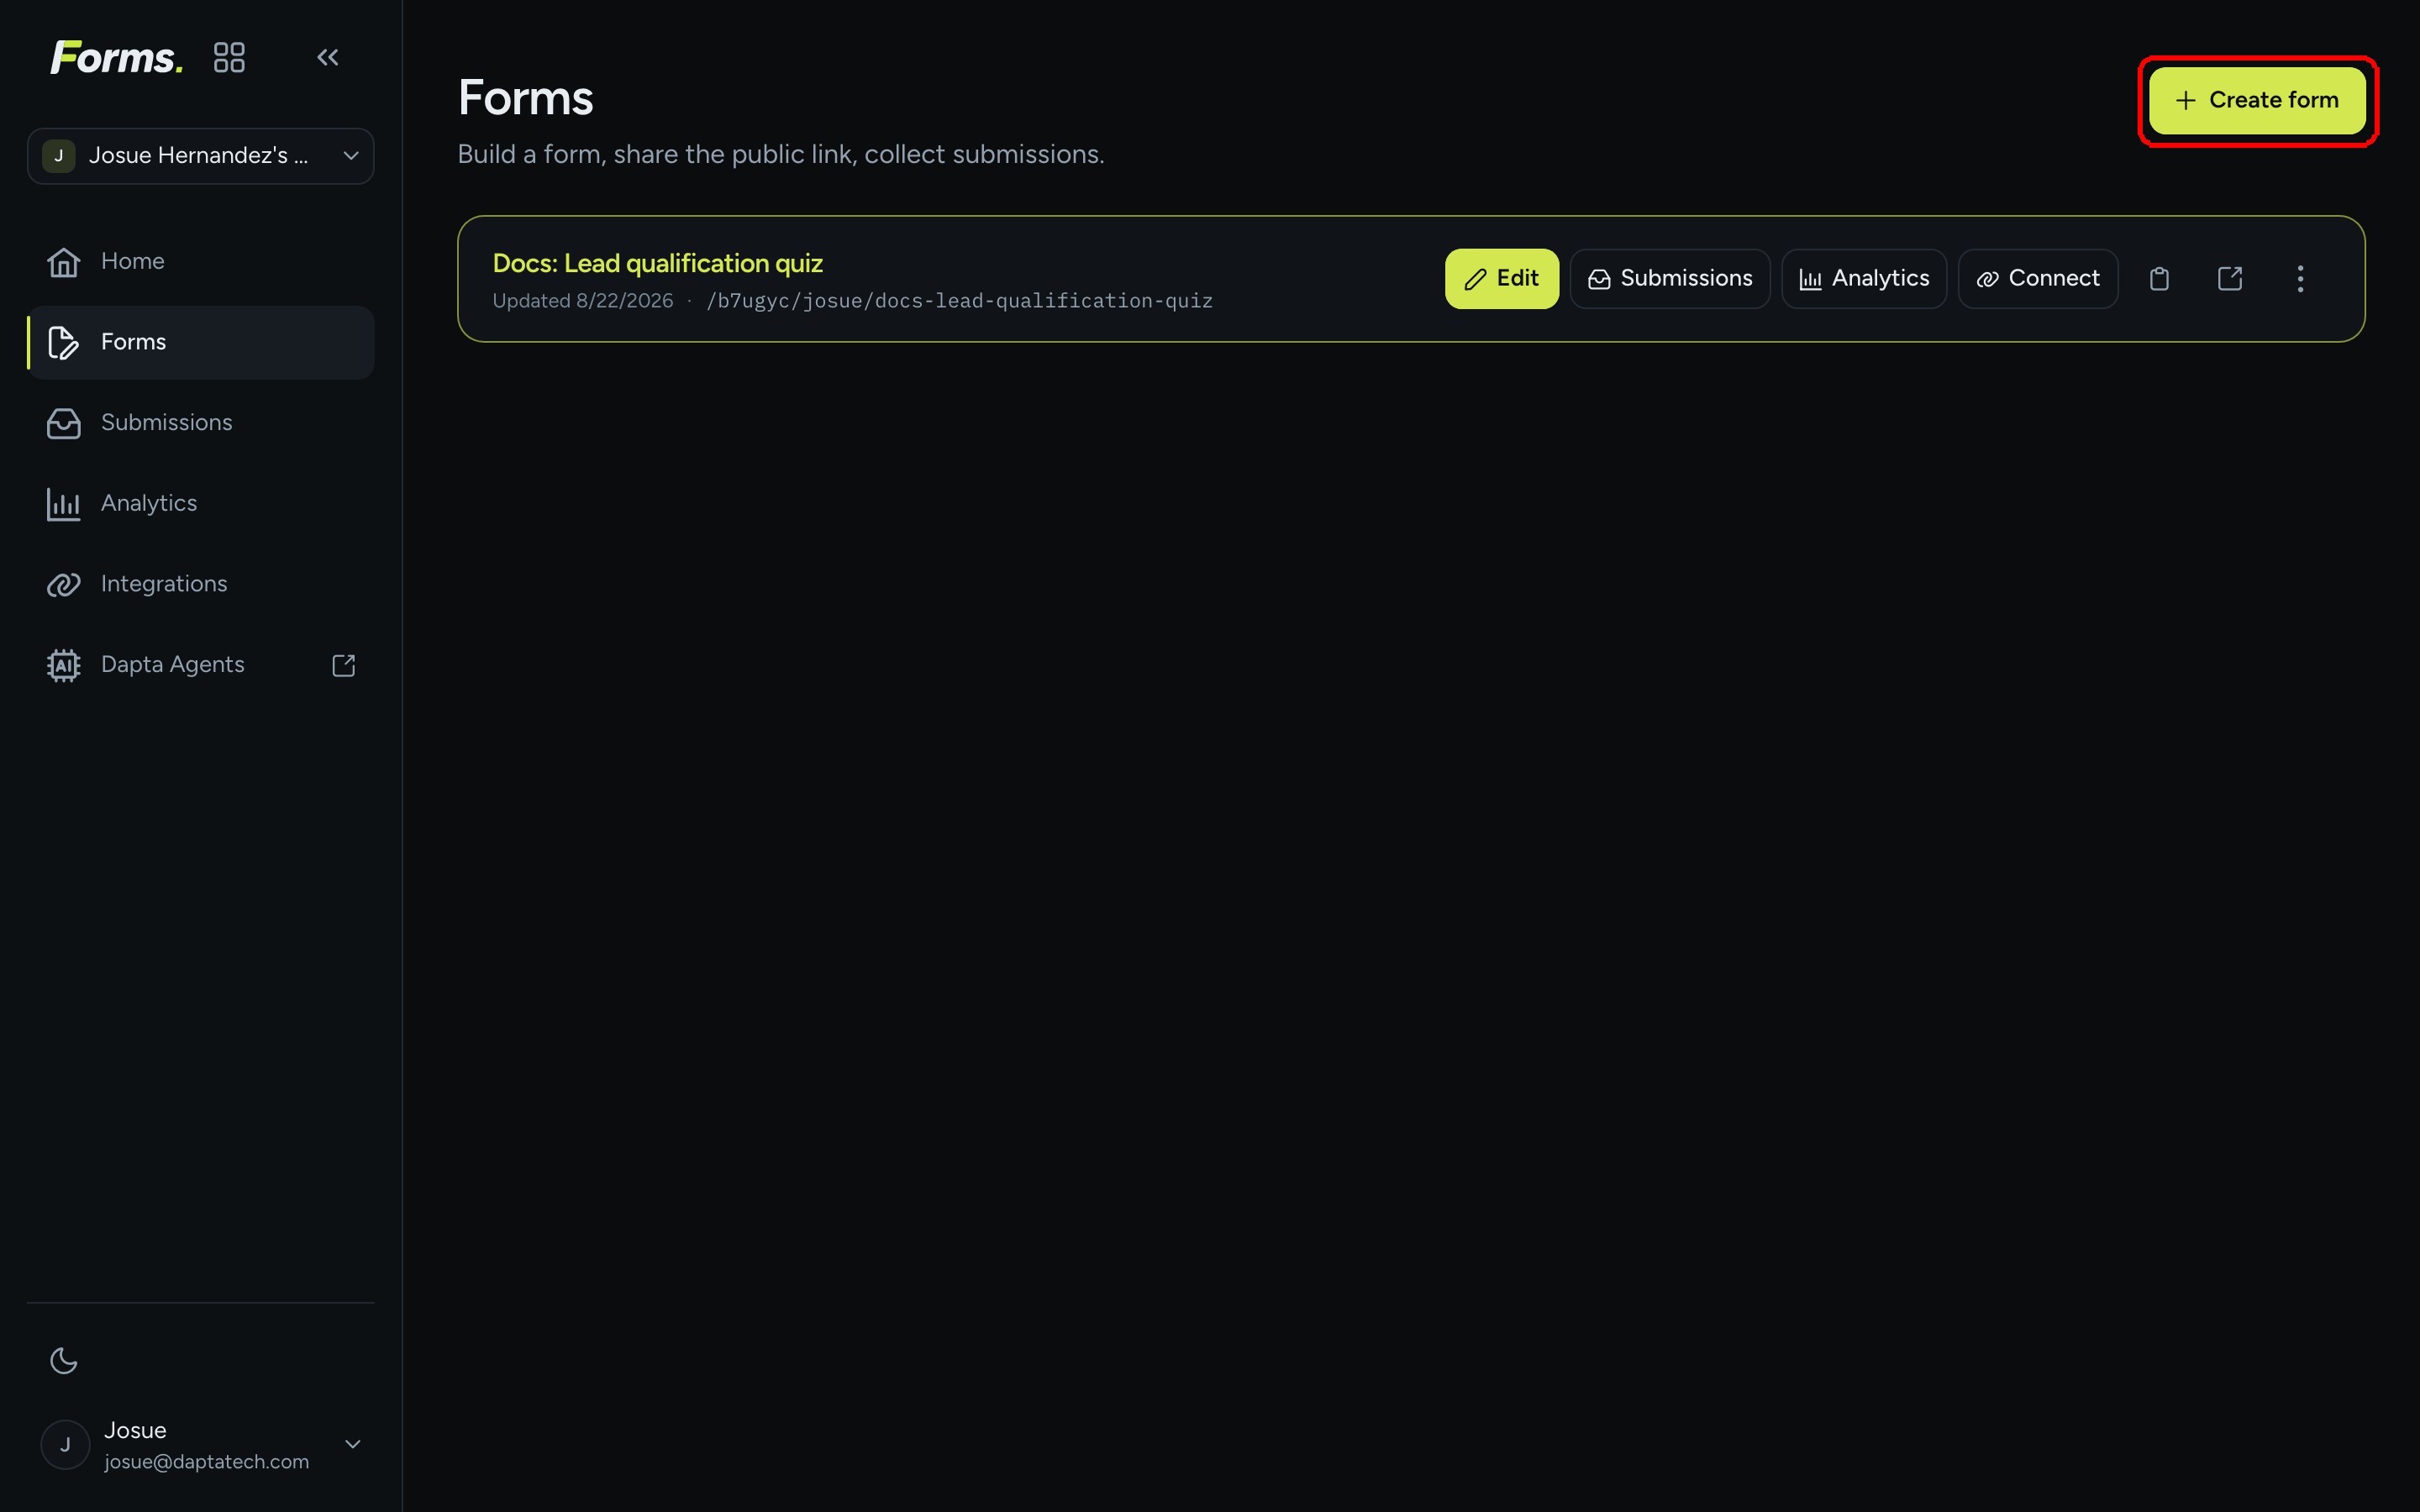
**Step 1:** Go to [forms.dapta.ai](https://forms.dapta.ai) and sign in with your Dapta account. In the left menu, open **Forms** and click **Create form**.

<figure><img src="https://3835013762-files.gitbook.io/~/files/v0/b/gitbook-x-prod.appspot.com/o/spaces%2FCy5rSNtQmtqYCGzJlNEB%2Fuploads%2Fgit-blob-2a415f25af711a2f739ab4cd3d15af8f4b80d018%2Fforms-quickstart-01-forms-list.png?alt=media" alt="The Forms page with the Create form button highlighted"><figcaption><p>Your forms live here. Click <strong>Create form</strong> to start a new one.</p></figcaption></figure>

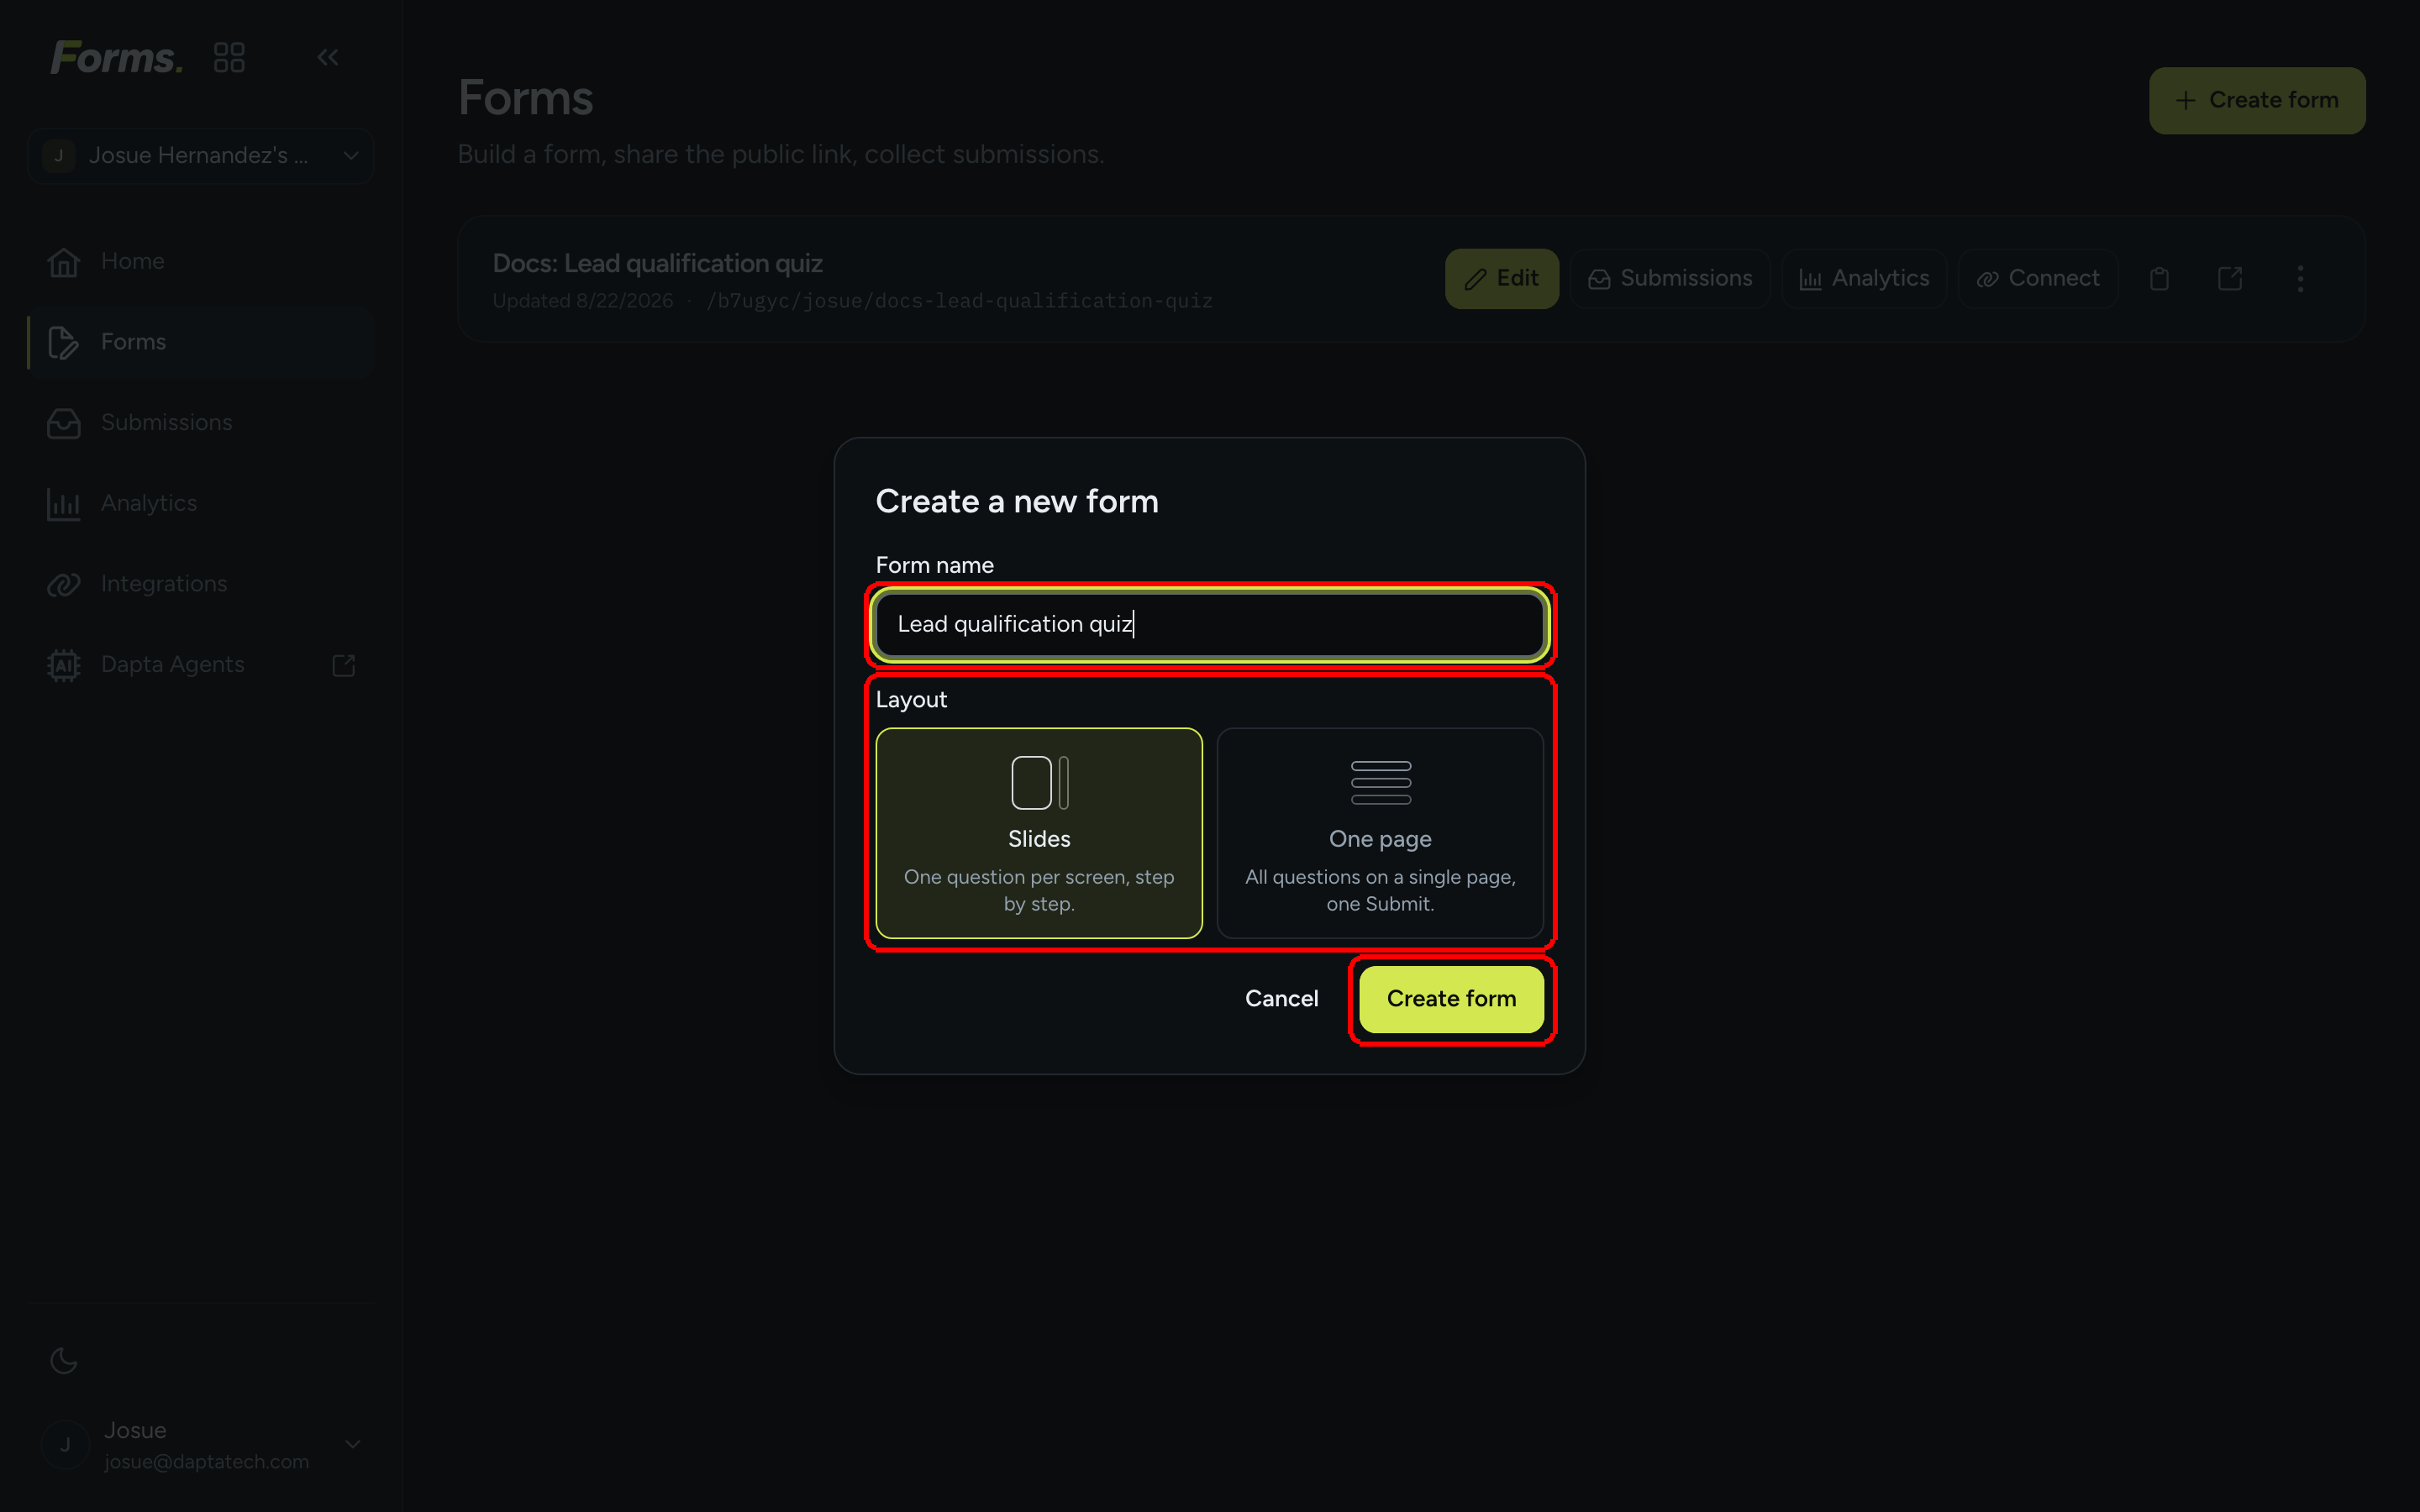
**Step 2:** Give the form a name and pick a layout. For this guide, keep **Slides** (one question per screen). Click **Create form**.

<figure><img src="https://3835013762-files.gitbook.io/~/files/v0/b/gitbook-x-prod.appspot.com/o/spaces%2FCy5rSNtQmtqYCGzJlNEB%2Fuploads%2Fgit-blob-025e12fce164ed850be0105f9b305725114ac698%2Fforms-quickstart-02-create-form.png?alt=media" alt="Create a new form dialog with a form name and the Slides layout selected"><figcaption><p>Name the form and choose how questions are shown.</p></figcaption></figure>

> **💡 Tip:** **Slides** shows one question at a time, like a conversation. **One page** shows every question on a single page with one **Submit** button. You can switch later from the **Design** panel.

***

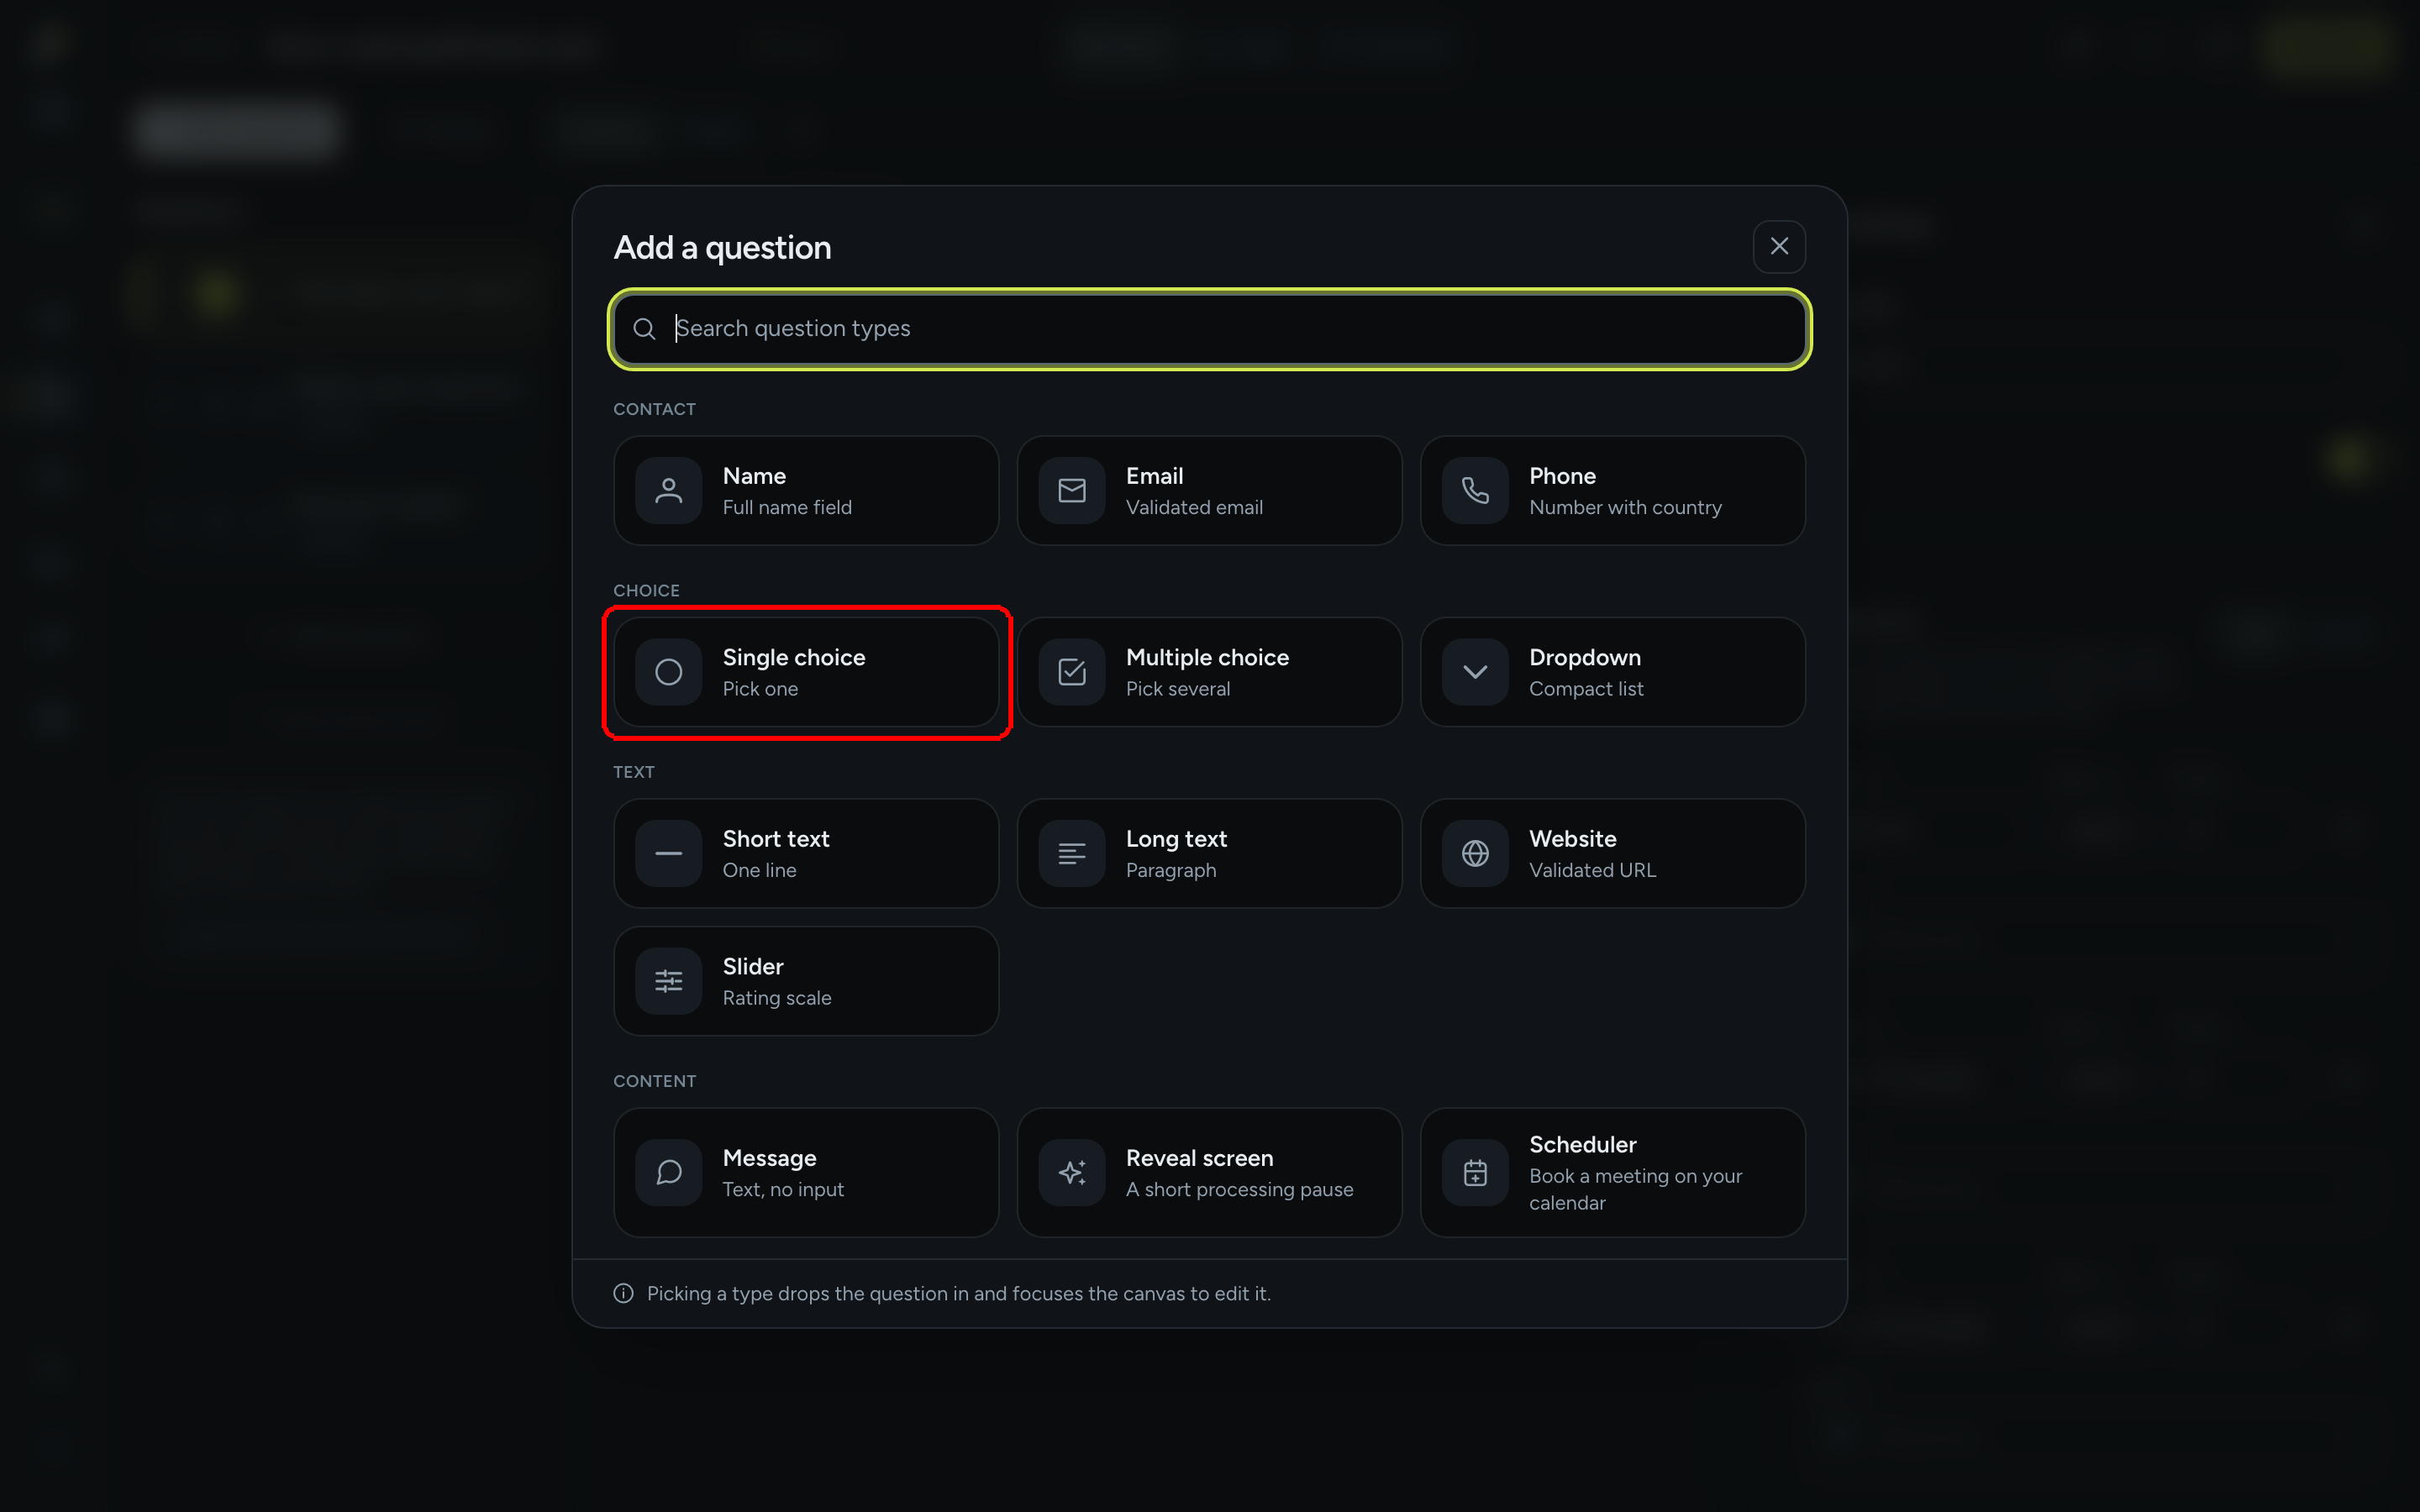
**Step 3:** The editor opens with an empty canvas. Click **Start from scratch**, then pick **Single choice** from the question gallery.

<figure><img src="https://3835013762-files.gitbook.io/~/files/v0/b/gitbook-x-prod.appspot.com/o/spaces%2FCy5rSNtQmtqYCGzJlNEB%2Fuploads%2Fgit-blob-17641192c473e891f54d9e9eb61accf82f09f6f9%2Fforms-quickstart-03-add-question.png?alt=media" alt="Add a question dialog showing the question types grouped as Contact, Choice, Text and Content"><figcaption><p>The question gallery. Click a type to drop it into the form.</p></figcaption></figure>

You can also pick one of the ready-made templates (Lead qualifier, Contact form, Feedback survey, RSVP) and edit it live instead of starting empty.

***

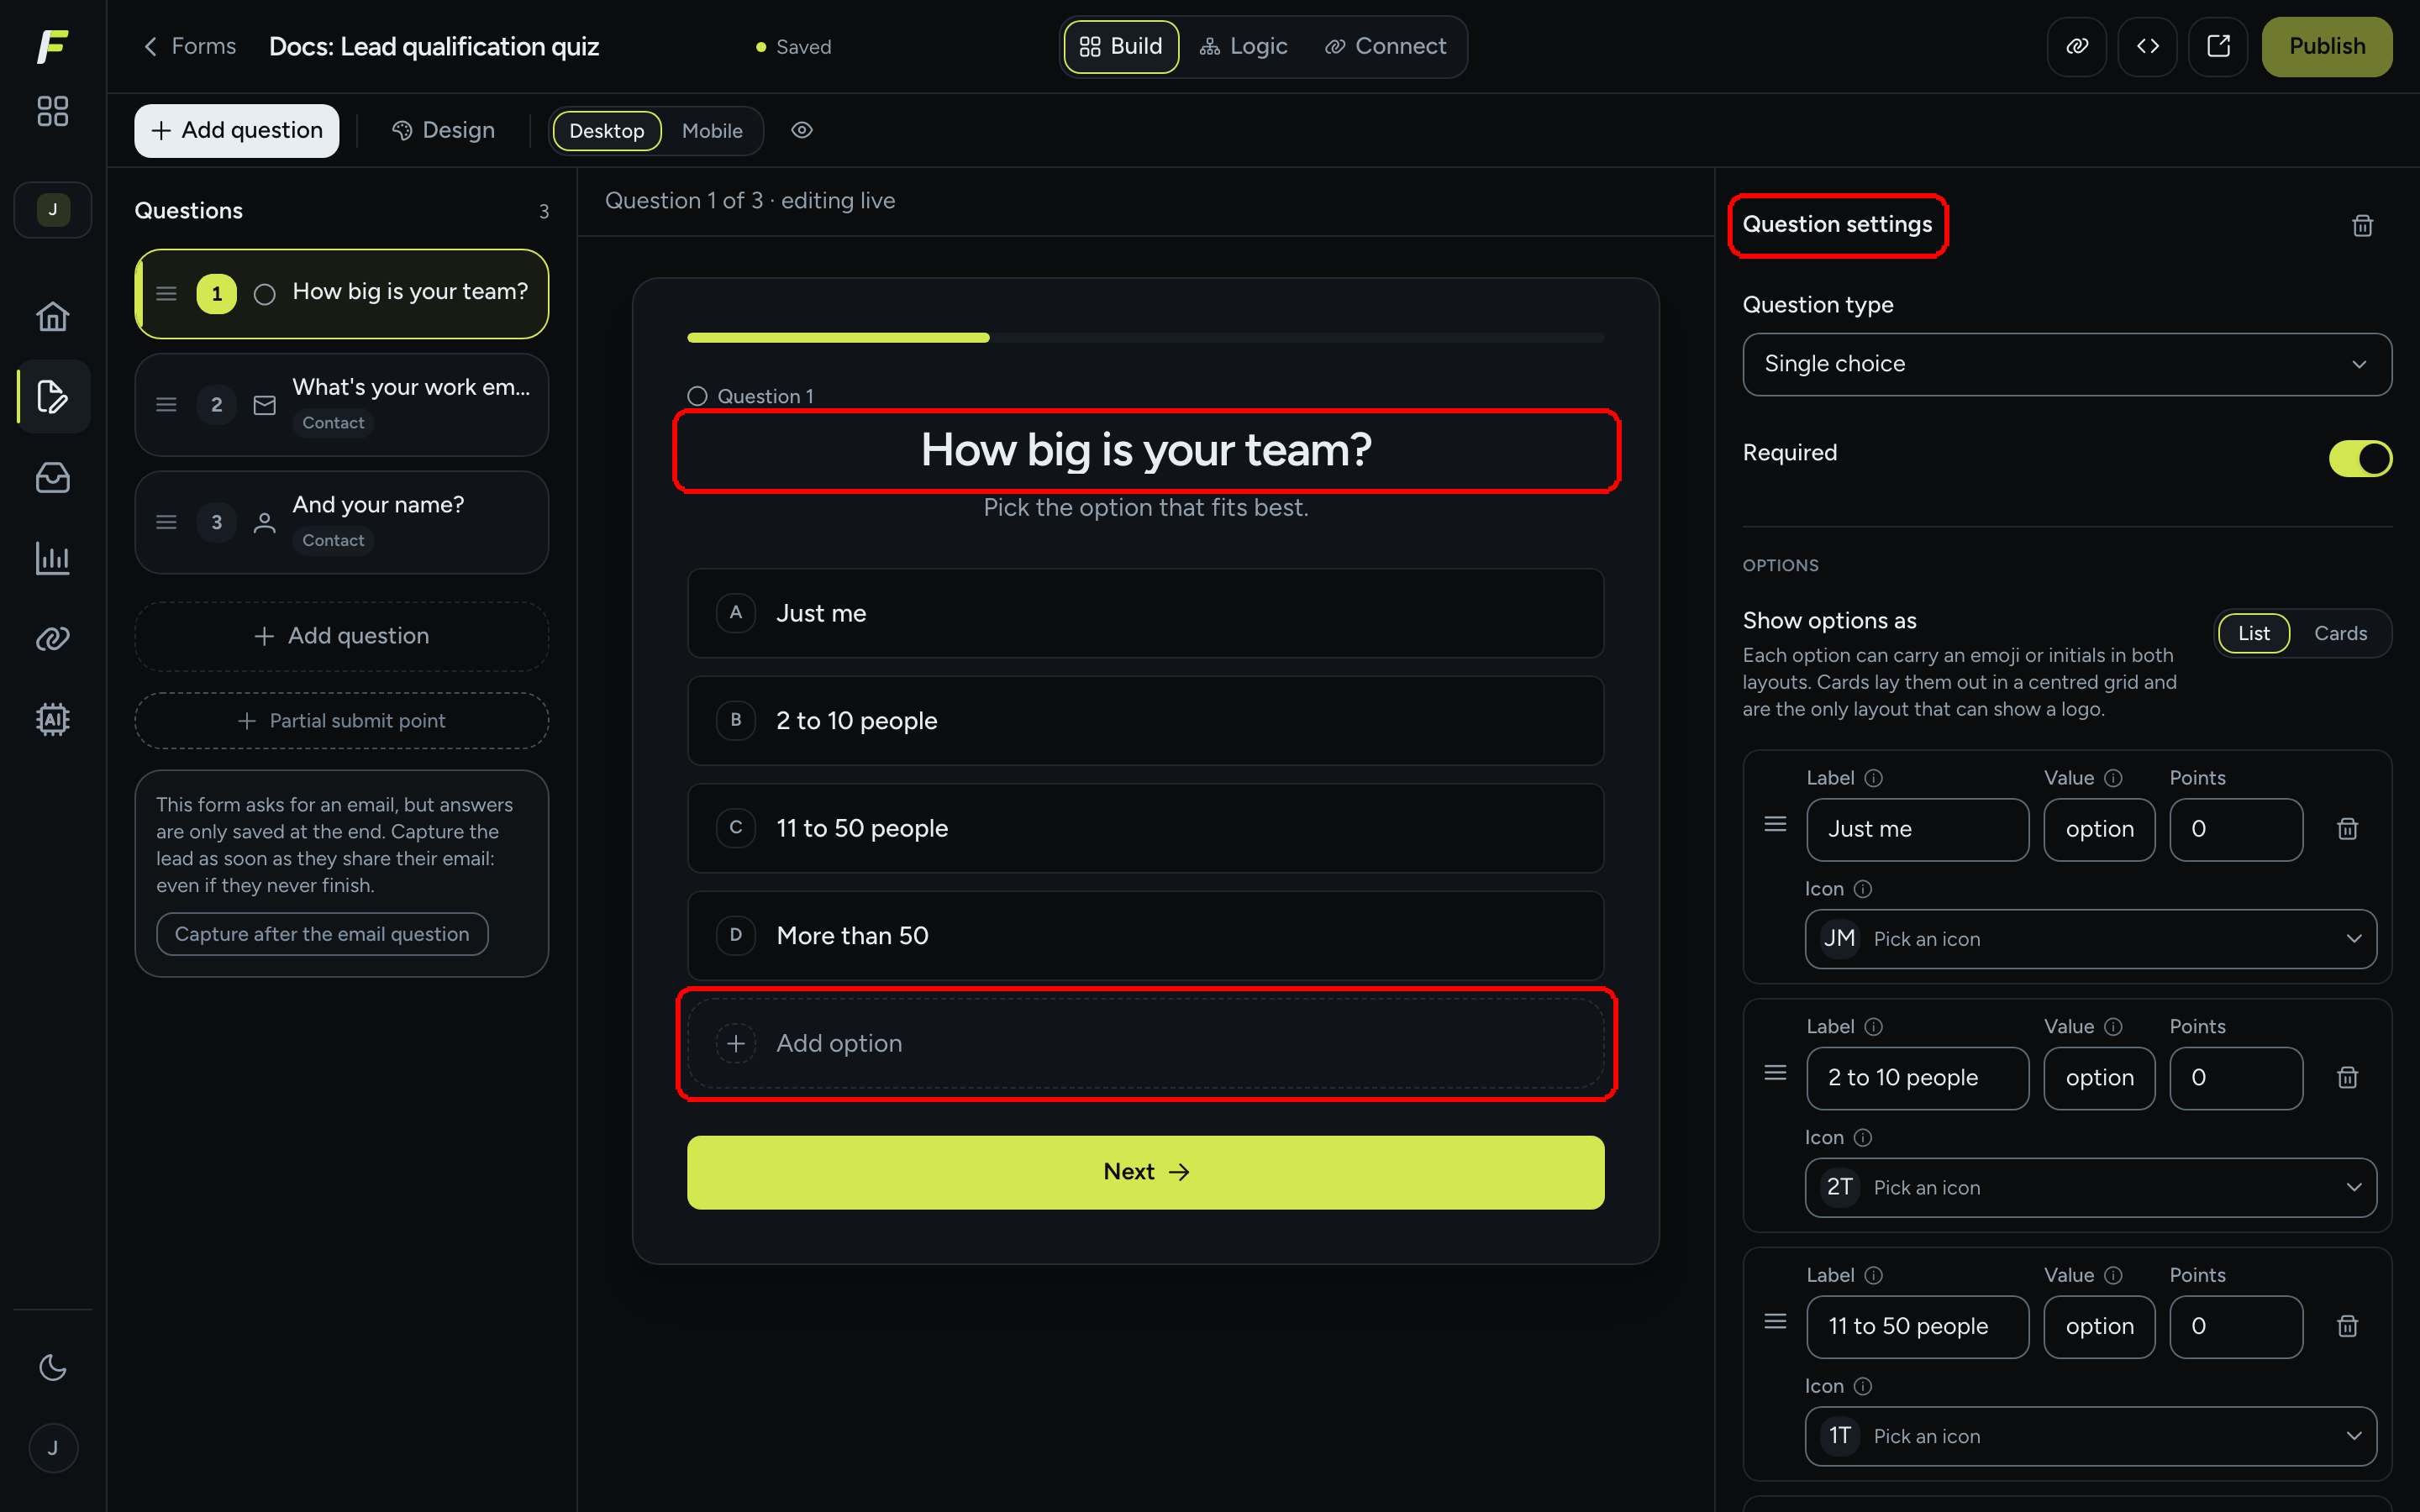
**Step 4:** Type directly on the canvas. Click **Type your question…** and write your question, then fill in the options. Click **Add option** to add more. What you see on the canvas is exactly what respondents will see.

<figure><img src="https://3835013762-files.gitbook.io/~/files/v0/b/gitbook-x-prod.appspot.com/o/spaces%2FCy5rSNtQmtqYCGzJlNEB%2Fuploads%2Fgit-blob-3015c490bcd11175bc948a999e38104379fcbc6d%2Fforms-quickstart-04-edit-question.png?alt=media" alt="The form editor with a single choice question being edited on the canvas and its settings on the right"><figcaption><p>Left: the question list. Center: the live canvas. Right: settings for the selected question.</p></figcaption></figure>

The right panel holds the **Question settings**: the question type, whether it is **Required**, how options are shown (**List** or **Cards**) and, for each option, its **Label**, **Value**, **Points** and **Icon**.

***

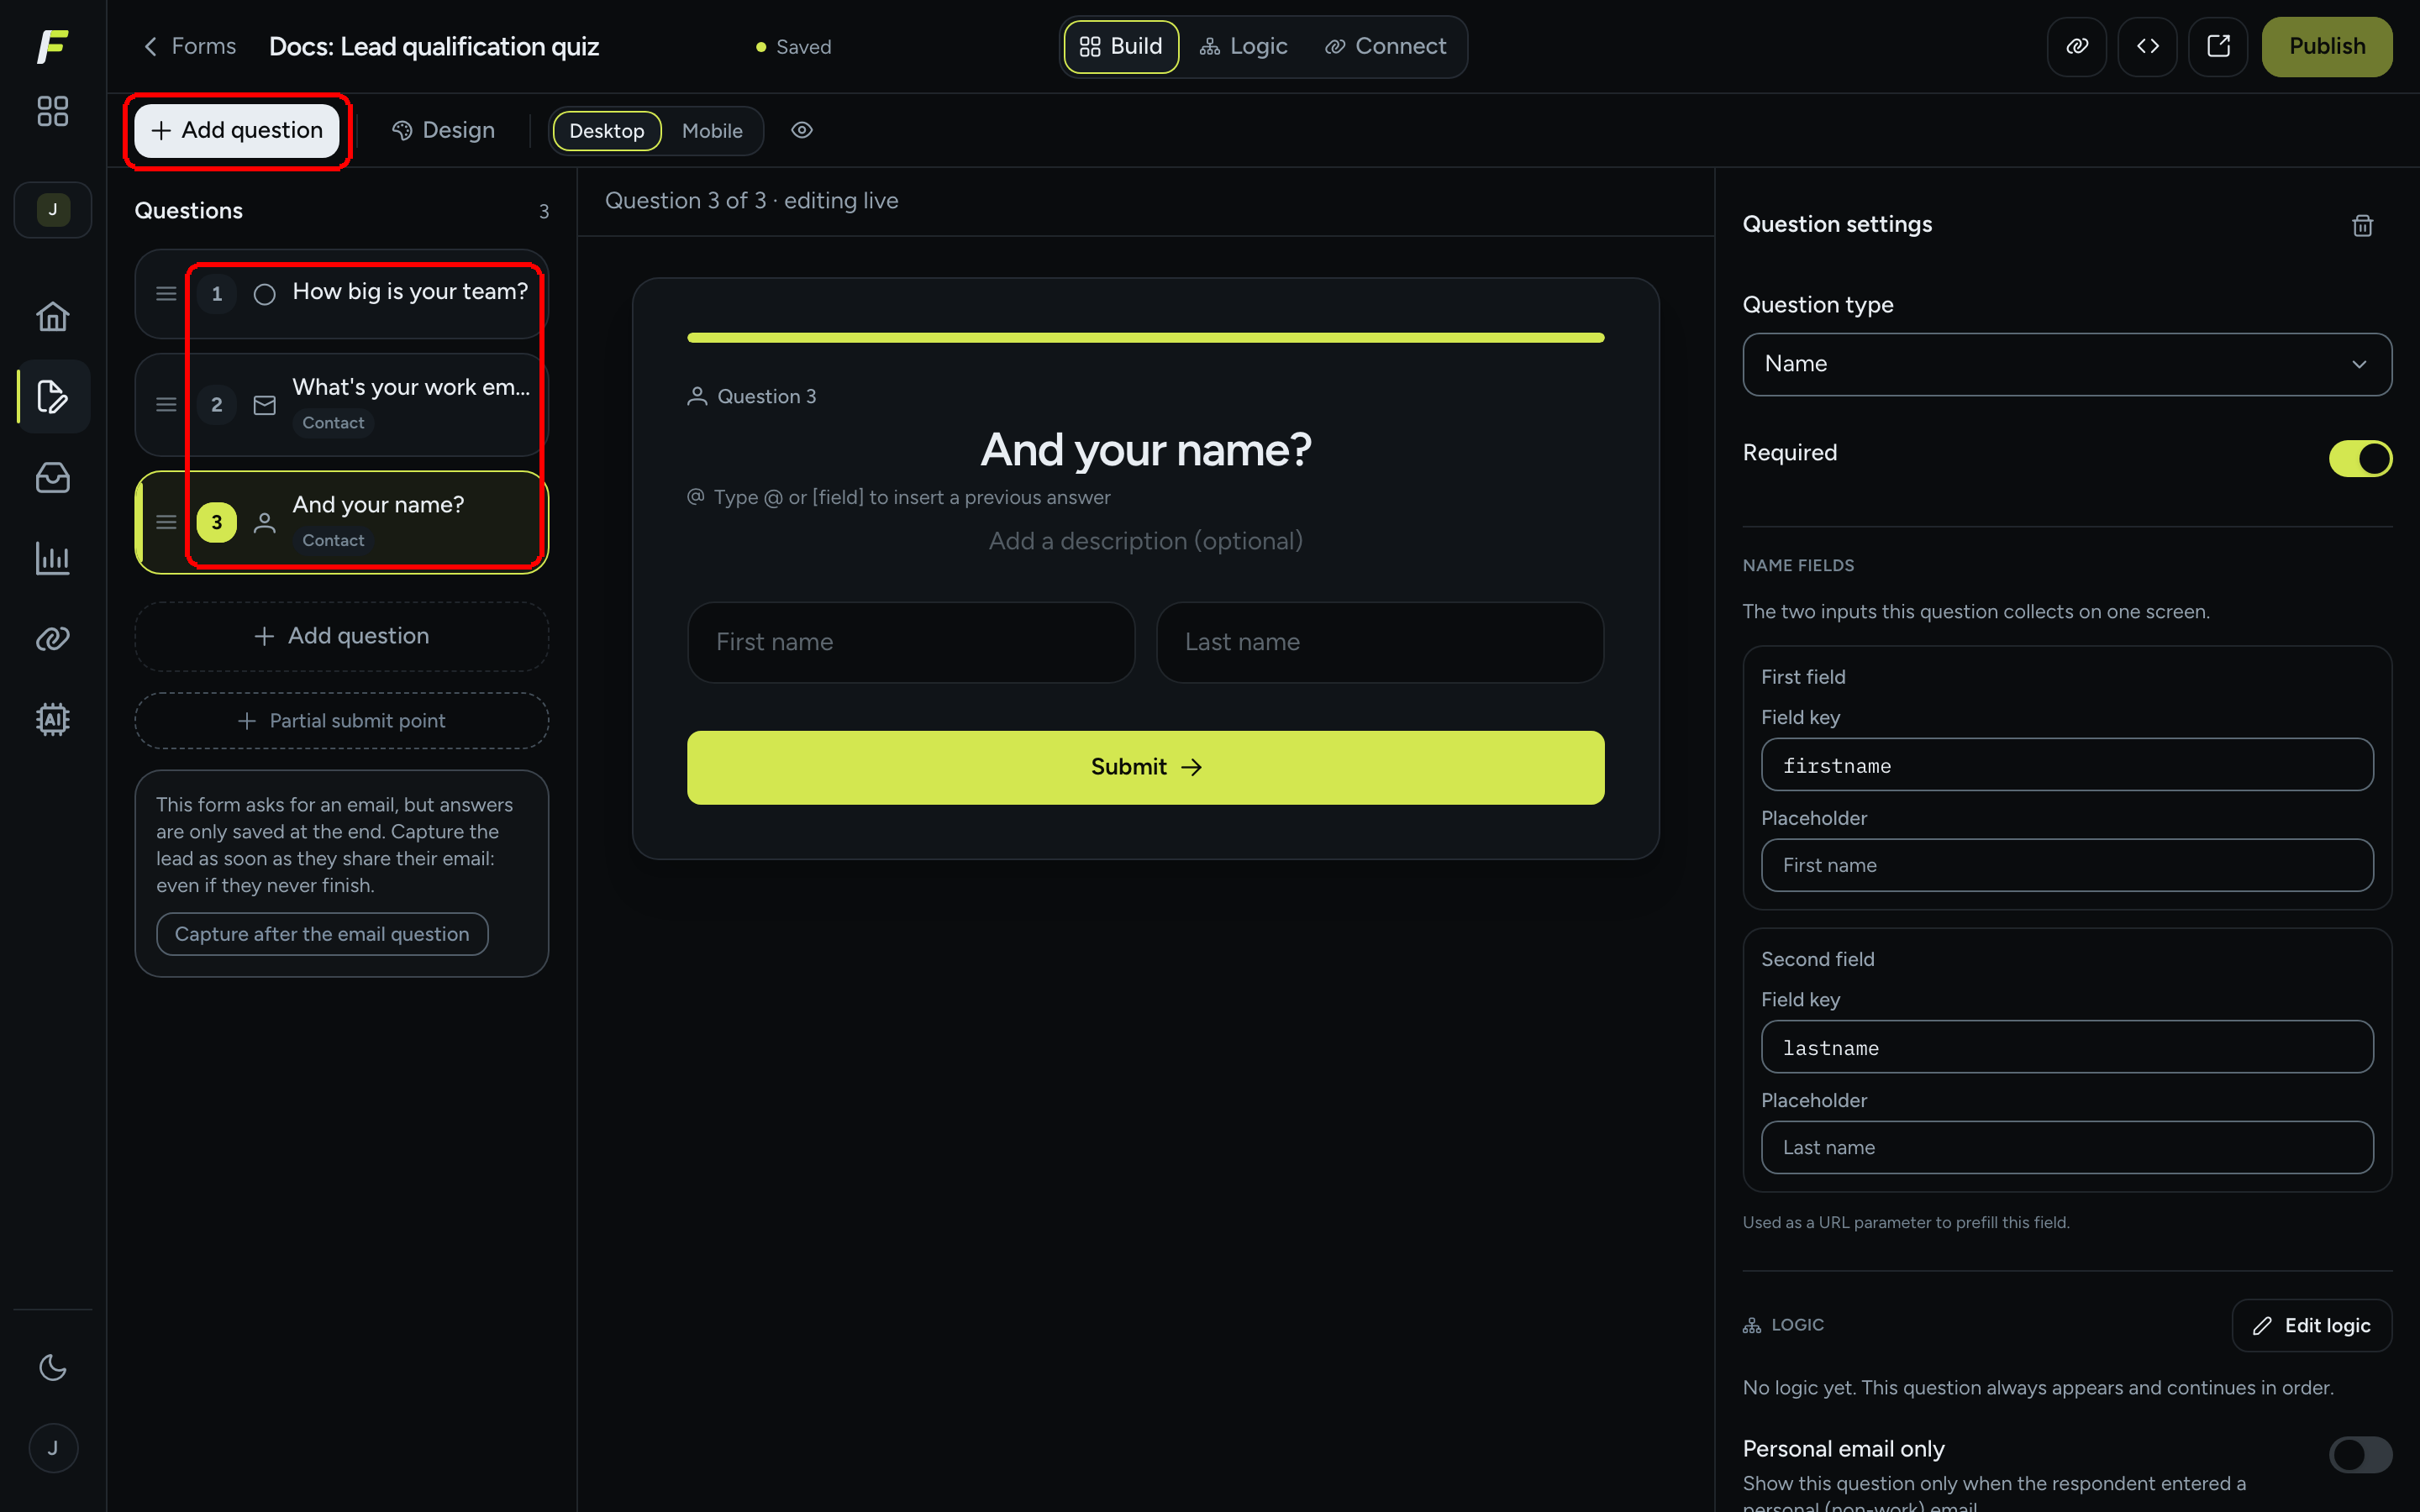
**Step 5:** Add two more questions with the **Add question** button in the toolbar: an **Email** and a **Name**. Type a question text for each one.

<figure><img src="https://3835013762-files.gitbook.io/~/files/v0/b/gitbook-x-prod.appspot.com/o/spaces%2FCy5rSNtQmtqYCGzJlNEB%2Fuploads%2Fgit-blob-0acc12a5d969414b9a47fb5c8b0b7153857a3cbc%2Fforms-quickstart-05-three-questions.png?alt=media" alt="The editor showing three questions in the list: a single choice, an email and a name question"><figcaption><p>Three questions. The Name type collects first and last name on one screen.</p></figcaption></figure>

> **💡 Tip:** As soon as your form asks for an email, the editor suggests **Capture after the email question**. Click it and the answers are saved as a partial submission the moment someone shares their email, even if they never reach the end.

Every change is saved automatically. The status next to the form name reads **Saving…** and then **Saved**. Nothing is live yet: you are editing a draft.

***

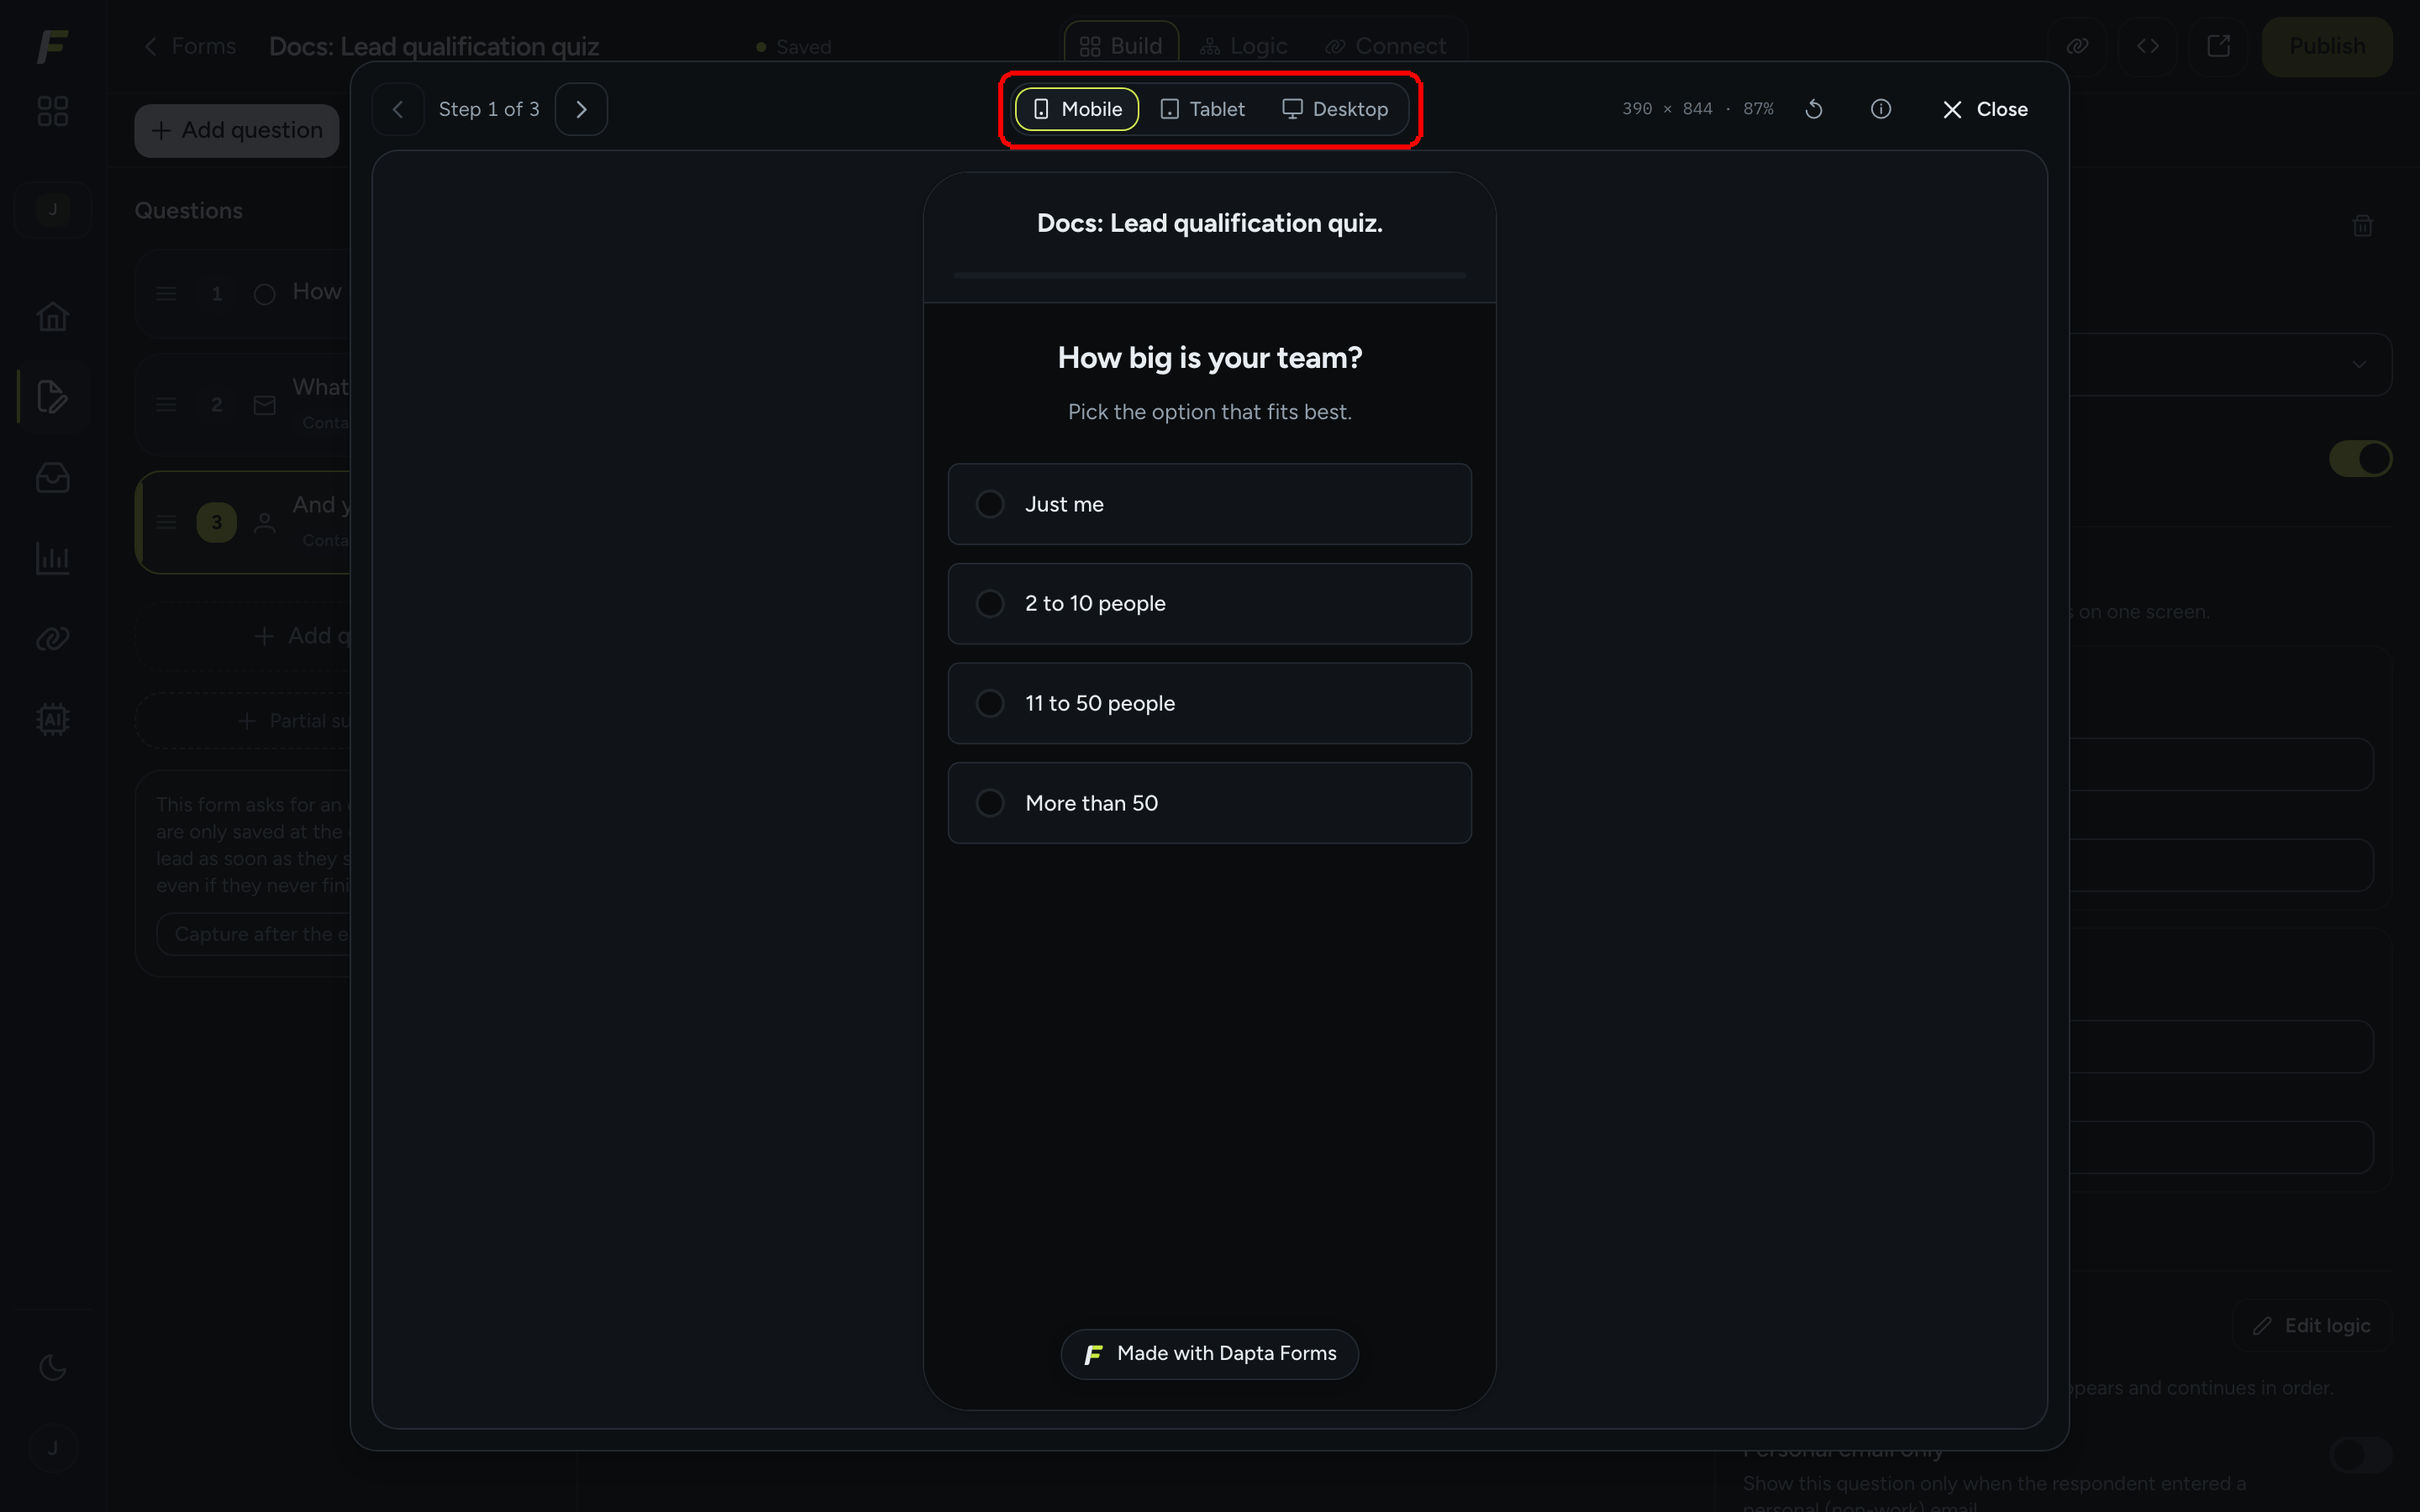
**Step 6:** Click the **Preview** icon (the eye) in the toolbar. The preview opens your draft in a real device frame. Switch between **Mobile**, **Tablet** and **Desktop**, and use the arrows to walk through the steps.

<figure><img src="https://3835013762-files.gitbook.io/~/files/v0/b/gitbook-x-prod.appspot.com/o/spaces%2FCy5rSNtQmtqYCGzJlNEB%2Fuploads%2Fgit-blob-ceff7b93037297969e09968b2b493f93582f8eb0%2Fforms-quickstart-06-preview.png?alt=media" alt="Preview modal showing the form inside a mobile phone frame with Mobile, Tablet and Desktop switches"><figcaption><p>Preview shows unsaved edits. Nothing is submitted from here.</p></figcaption></figure>

***

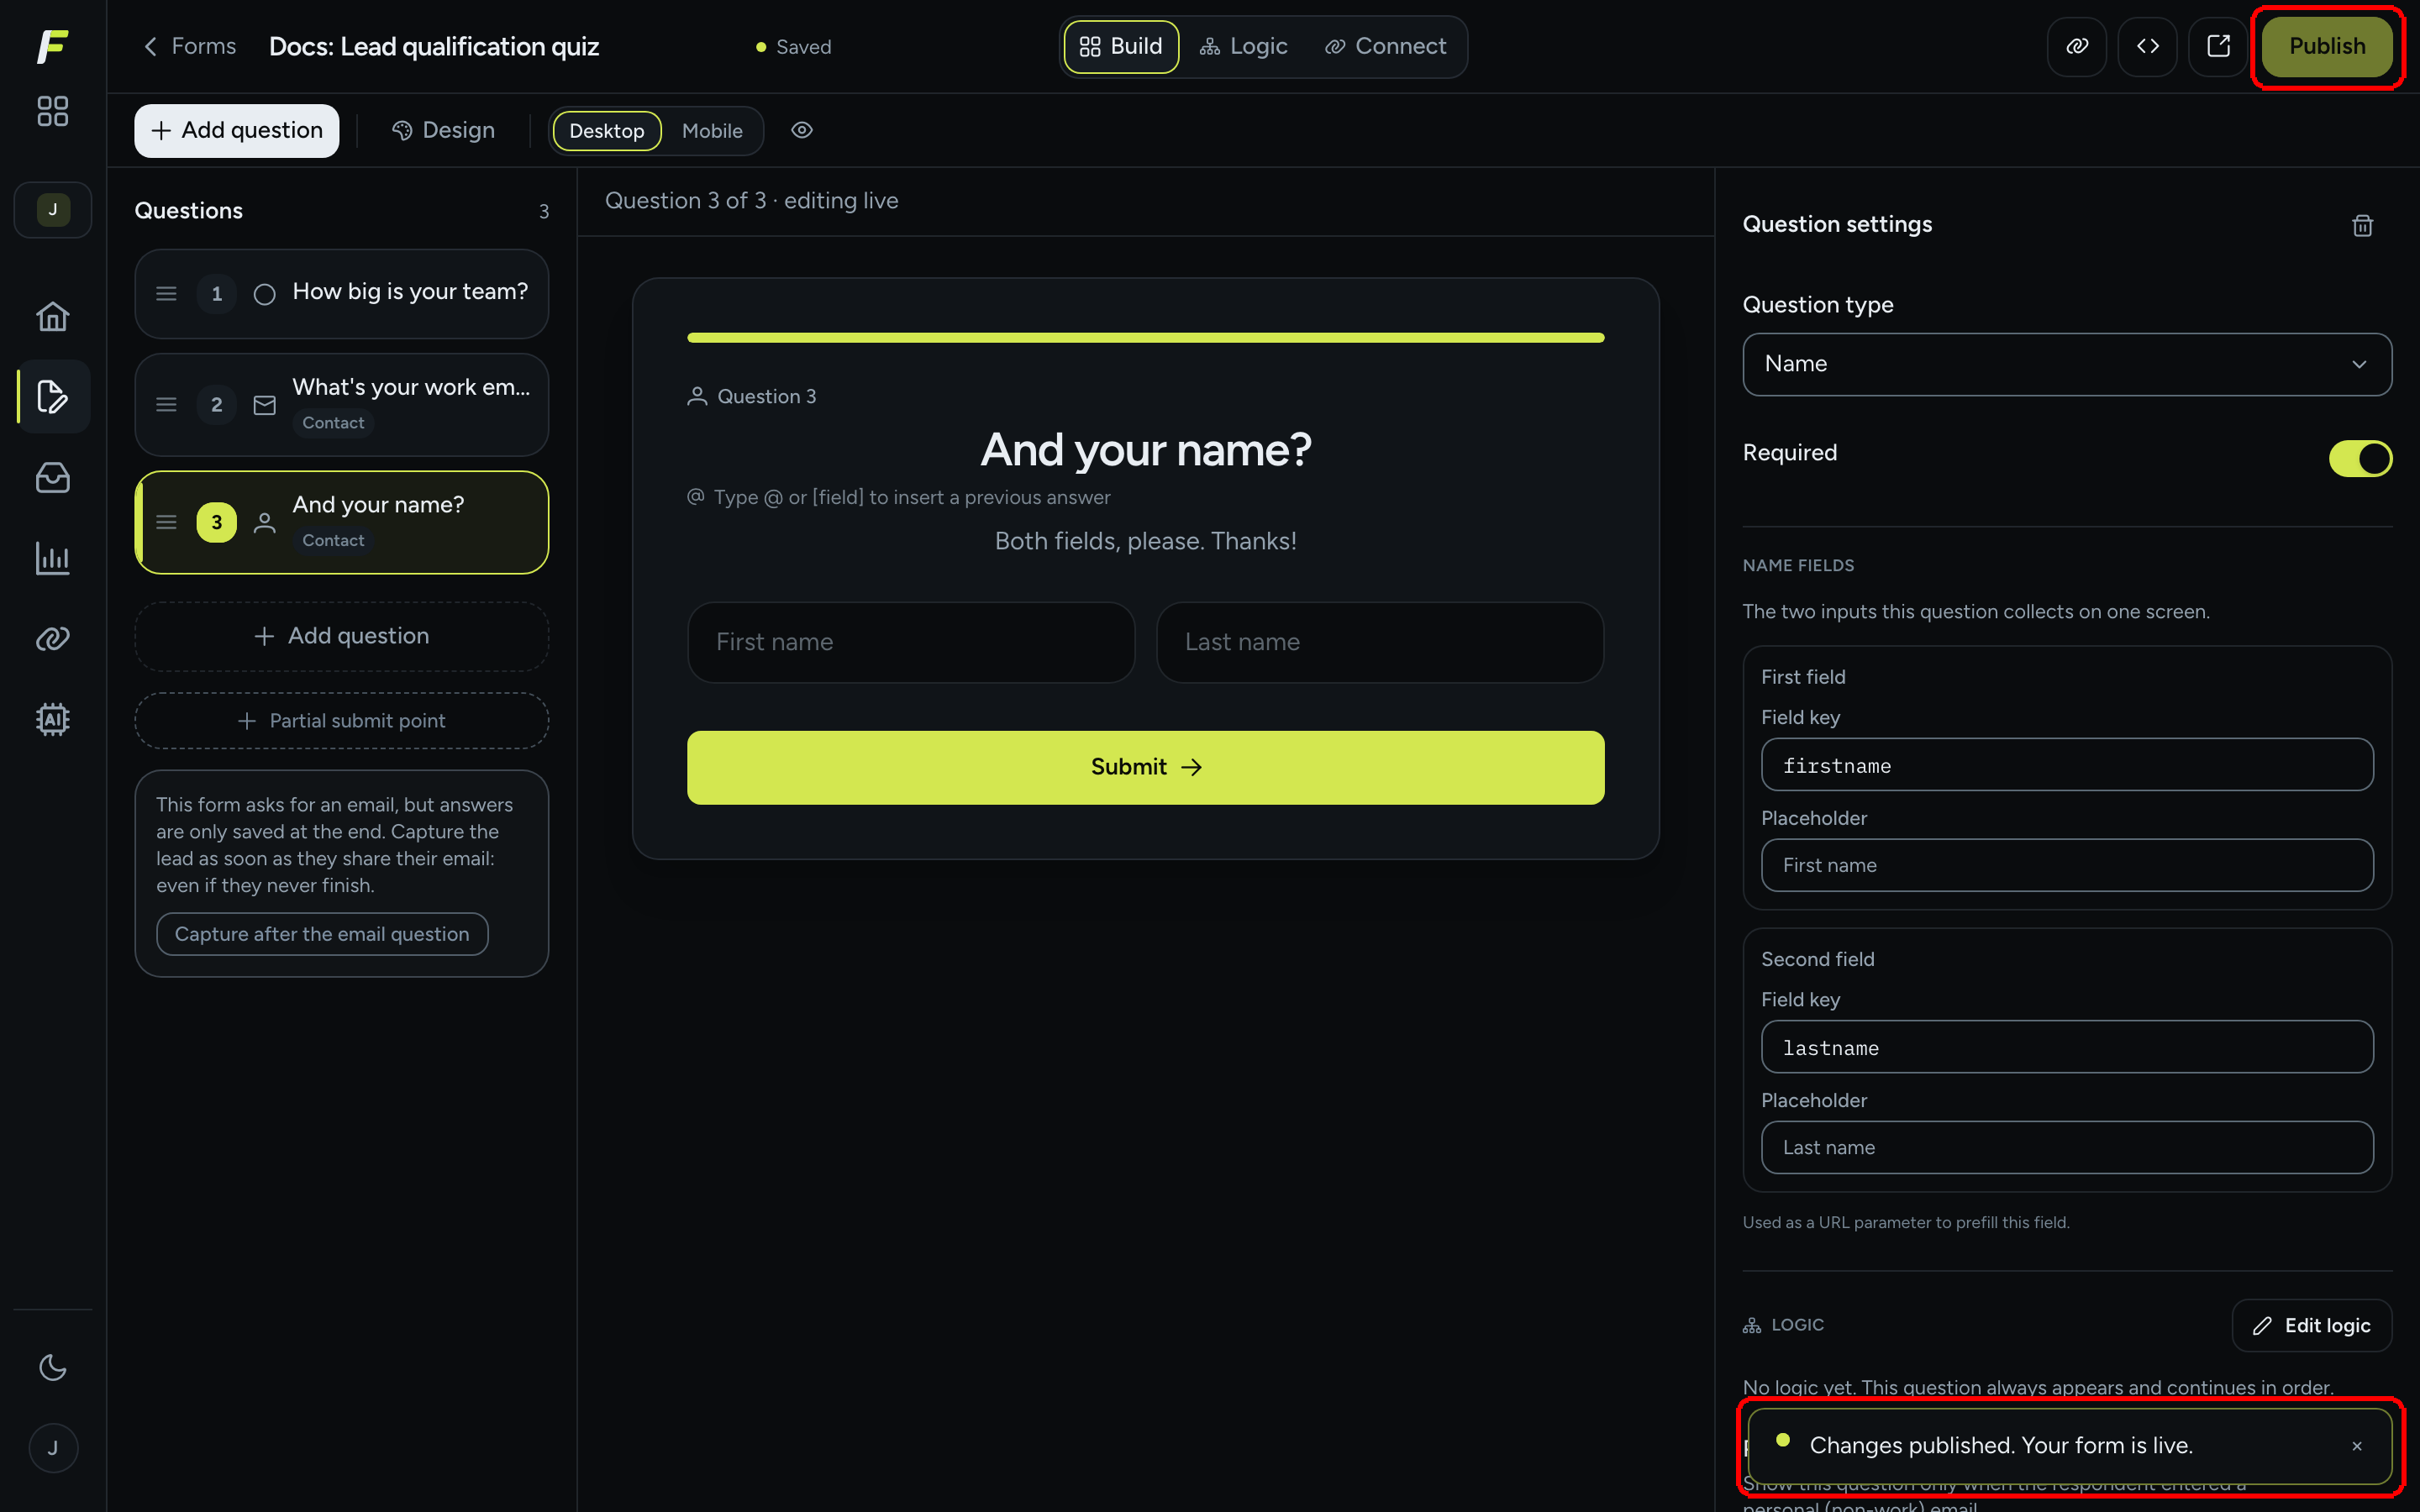
**Step 7:** Click **Publish** in the top right corner. You will see the message **Changes published. Your form is live.**

<figure><img src="https://3835013762-files.gitbook.io/~/files/v0/b/gitbook-x-prod.appspot.com/o/spaces%2FCy5rSNtQmtqYCGzJlNEB%2Fuploads%2Fgit-blob-d35266d0b02eb21a2e24bfbf148e77e8568c88a7%2Fforms-quickstart-07-published.png?alt=media" alt="The editor after publishing, with a confirmation toast that reads Changes published. Your form is live."><figcaption><p>Publishing makes the draft live. Until you publish again, new edits stay private.</p></figcaption></figure>

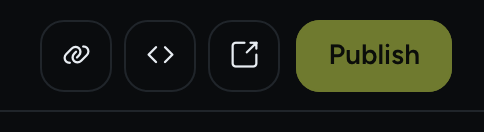
The three icons next to **Publish** are your sharing tools:

<figure><img src="https://3835013762-files.gitbook.io/~/files/v0/b/gitbook-x-prod.appspot.com/o/spaces%2FCy5rSNtQmtqYCGzJlNEB%2Fuploads%2Fgit-blob-507f2fafaa2ed54b8c7b68fd095c71cf67bf9377%2Fforms-quickstart-08-share-buttons.png?alt=media" alt="The Copy link, Embed and Open form buttons next to Publish" width="375"><figcaption><p>The share cluster in the editor topbar: <strong>Copy link</strong>, <strong>Embed</strong> and <strong>Open form</strong>.</p></figcaption></figure>

* **Copy link** copies the public URL.
* **Embed** gives you a snippet to paste on your website.
* **Open form** opens the live form in a new tab.

***

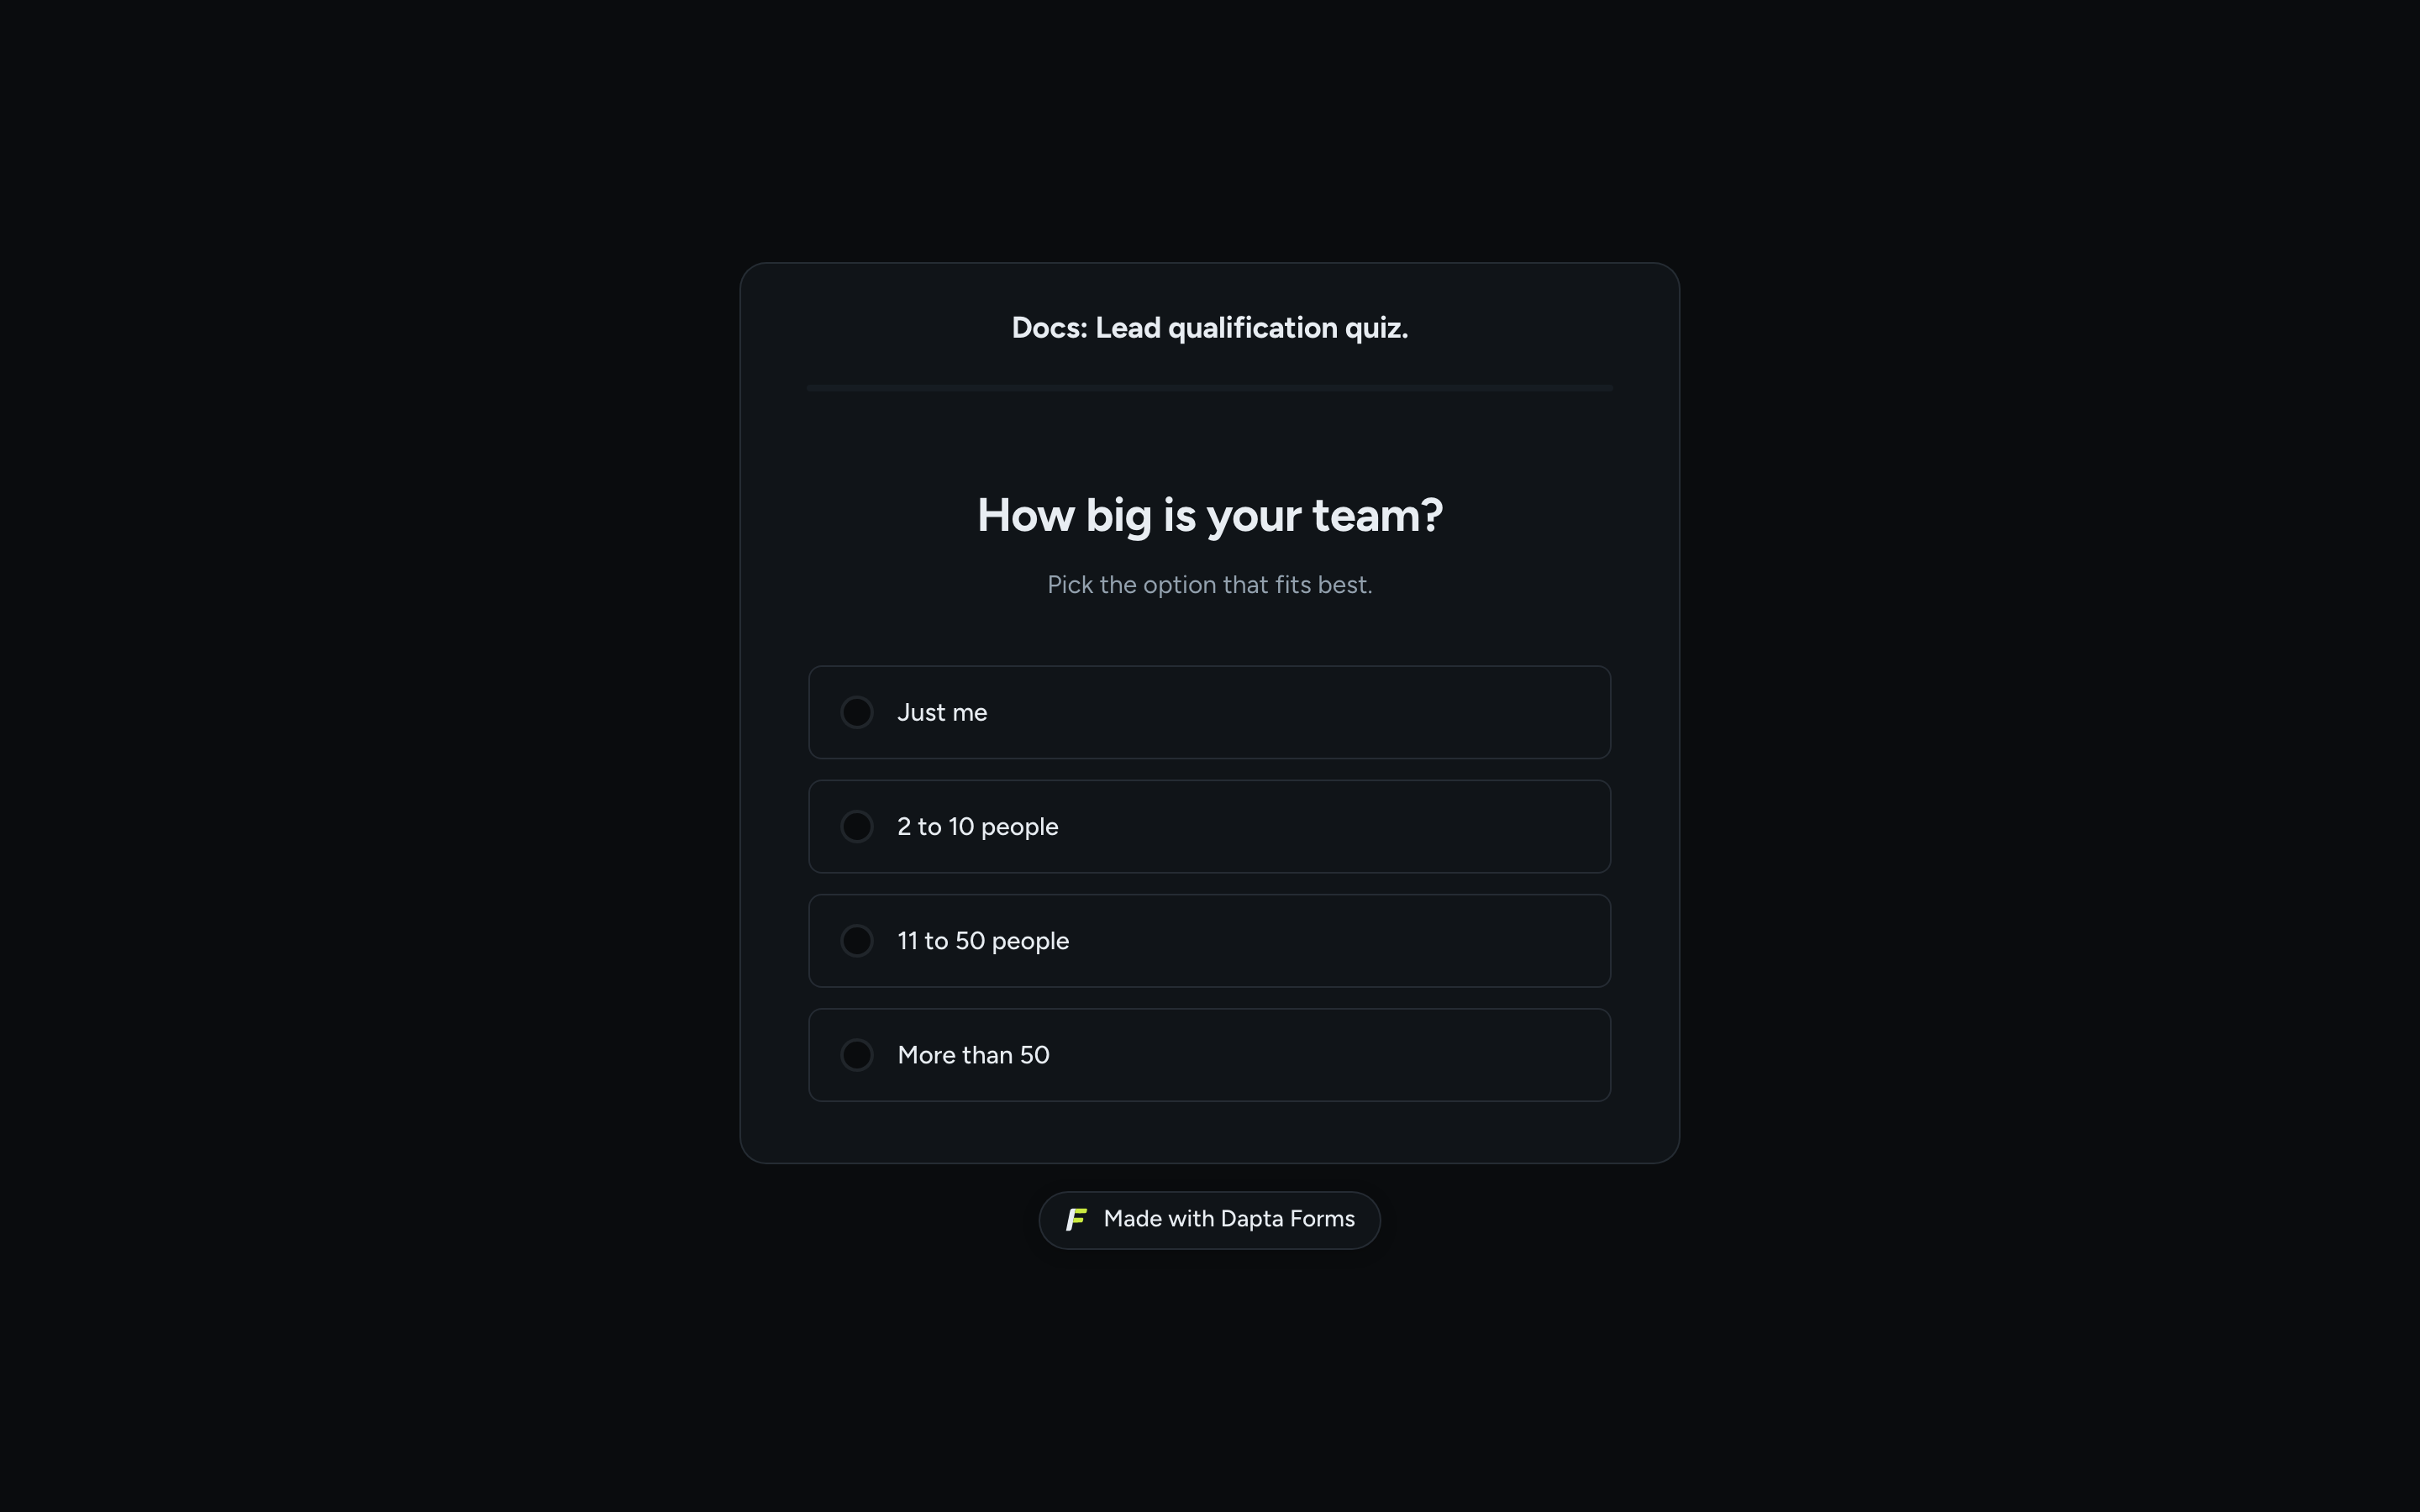
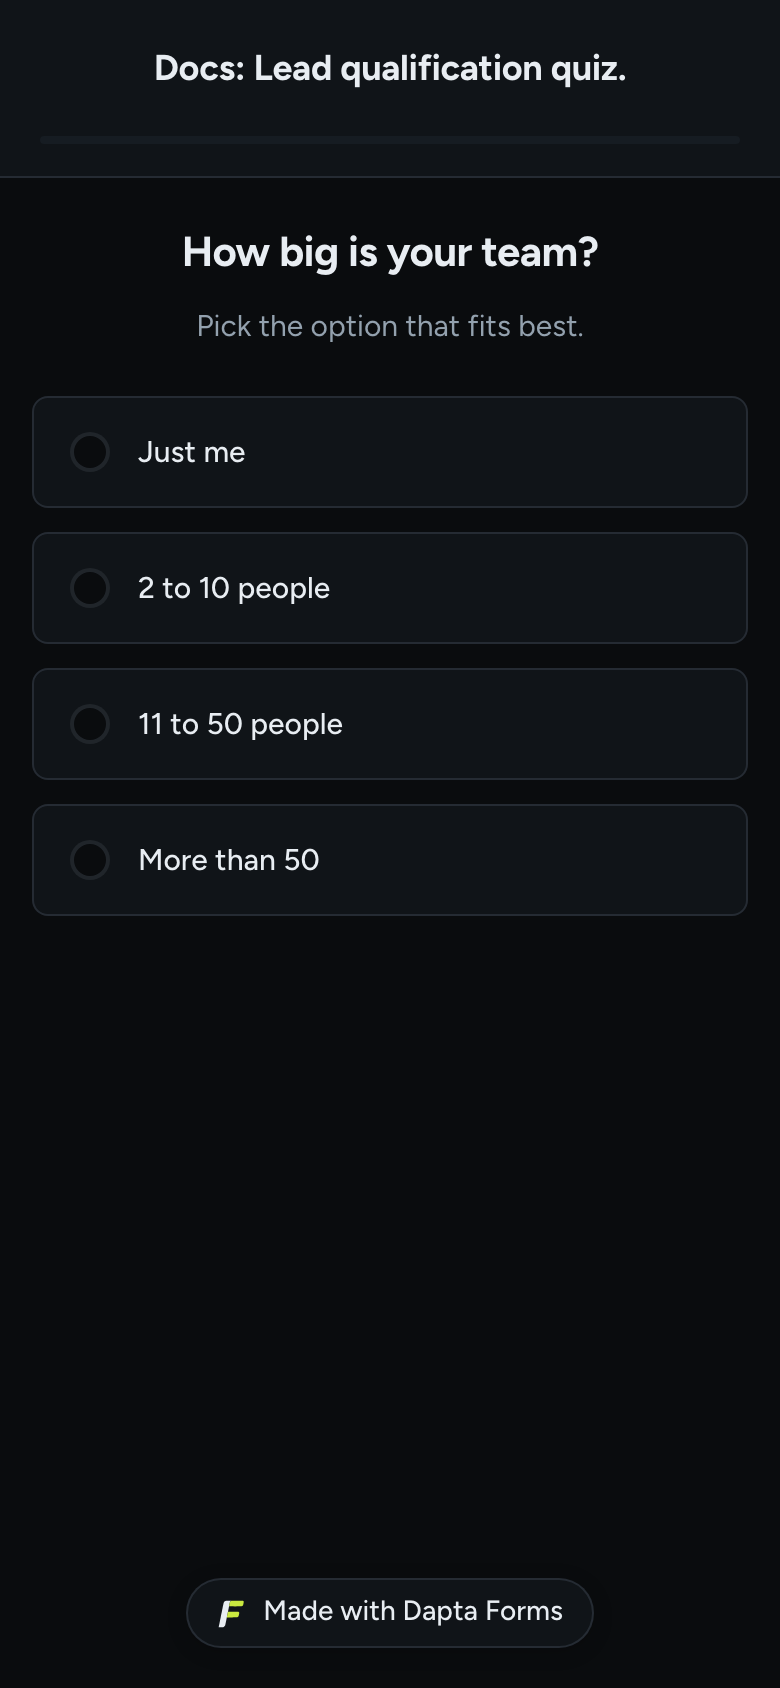
**Step 8:** Open the public link. This is what your respondents see, on any device.

<figure><img src="https://3835013762-files.gitbook.io/~/files/v0/b/gitbook-x-prod.appspot.com/o/spaces%2FCy5rSNtQmtqYCGzJlNEB%2Fuploads%2Fgit-blob-8f89efe62157aae9e2d6b69e0c2ddb0a8ac229d2%2Fforms-overview-02-public-form.png?alt=media" alt="The published form on desktop showing the first question with four options"><figcaption><p>The live form on desktop.</p></figcaption></figure>

<figure><img src="https://3835013762-files.gitbook.io/~/files/v0/b/gitbook-x-prod.appspot.com/o/spaces%2FCy5rSNtQmtqYCGzJlNEB%2Fuploads%2Fgit-blob-8c5badb8a2f8c7597e9990286e7fa8a9e73247ef%2Fforms-respondent-experience-08-mobile.png?alt=media" alt="The published form on a mobile screen" width="375"><figcaption><p>The same form on mobile.</p></figcaption></figure>

The public URL has the shape `forms.dapta.ai/{account code}/{handle}/{form slug}`. The slug is created from the form name.

***

## What's next

* [Scoring](/dapta-forms/logic/scoring.md) and [Outcomes](/dapta-forms/logic/outcomes.md): add points to options and show a different ending by score.
* [Themes, colors & background](/dapta-forms/design/themes-colors-background.md) and [Cover screen & banner](/dapta-forms/design/cover-screen-and-banner.md): make the form look like your brand.
* [Connect & Integrations](/dapta-forms/connect.md): send every submission to HubSpot, a webhook or your inbox.
* [Submissions](/dapta-forms/results/submissions.md) and [Analytics](/dapta-forms/results/analytics.md): read the answers and the funnel.
* [Dashboard tour](/dapta-forms/getting-started/dashboard-tour.md): find your way around the rest of the app.


---

# Agent Instructions
This documentation is published with GitBook. GitBook is the documentation platform designed so that both humans and AI agents can read, navigate, and reason over technical content effectively. Learn more at gitbook.com.

## Querying This Documentation
If you need additional information that is not directly available in this page, you can query the documentation dynamically by asking a question.

Perform an HTTP GET request on the current page URL with the `ask` query parameter, and the optional `goal` query parameter:

```
GET https://docs.dapta.ai/dapta-forms/getting-started/quickstart-first-form.md?ask=<question>&goal=<endgoal>
```

`ask` is the immediate question: it should be specific, self-contained, and written in natural language.
`goal` is optional and describes the broader end goal you are ultimately trying to accomplish on behalf of the user. GitBook uses it to tailor the answer towards what is most useful for that goal.

The response will contain a direct answer to the question and relevant excerpts and sources from the documentation.

Use this mechanism when the answer is not explicitly present in the current page, you need clarification or additional context, or you want to retrieve related documentation sections.