π Scoring
Turn a Dapta Form into a scored quiz or lead qualifier: enable scoring, give every option a point value (negative numbers allowed), award points from a slider by value range, switch scoring on or off
Scoring turns answers into a number. Every option of a choice question can carry points, a slider can award points by value range, and the points a respondent collects add up to their score. That score is what Outcomes use to decide which ending a respondent sees, what Score so far conditions read, and what reaches HubSpot, webhooks and notification emails.
This page uses a demo form with three scored questions (a Single choice about team size, a Slider about monthly demos and a Single choice about timing), followed by an Email and a Name question. Points were chosen so the highest possible score is 14 and the lowest is -3.
Which questions can score
Single choice, Multiple choice, Dropdown
Yes
Each option has a Points value. With Multiple choice, the points of every selected option are added together.
Slider
Yes
Points are awarded by value range (Slider scoring).
Name, Email, Phone
No
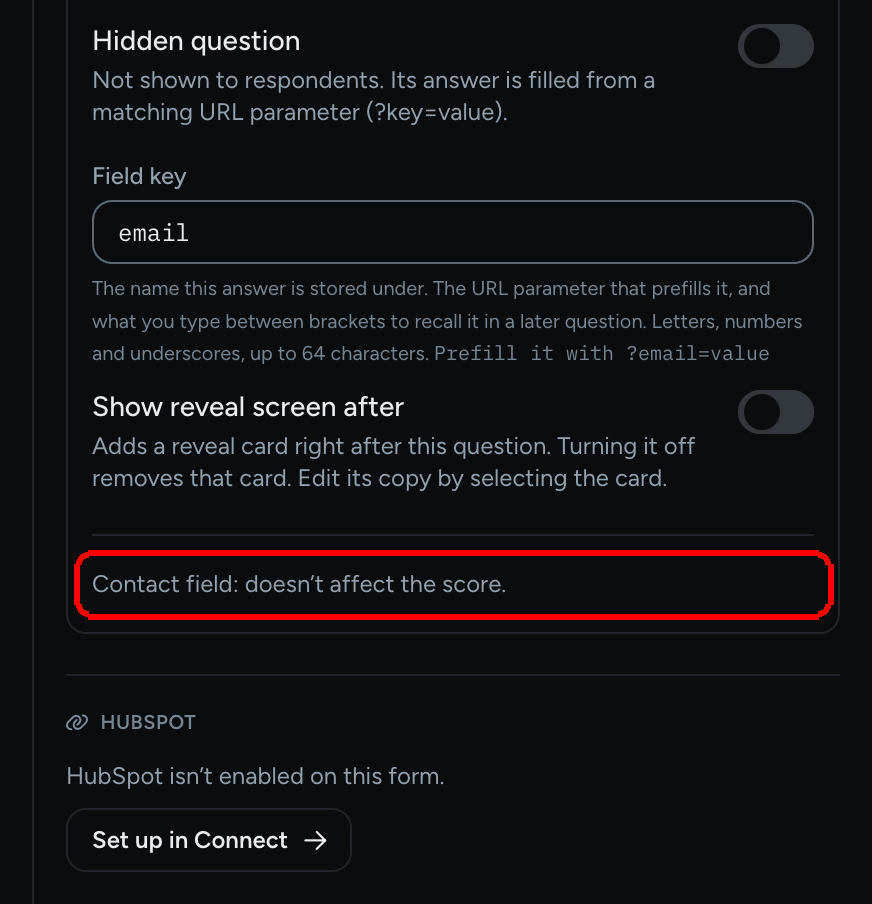
Contact fields never affect the score.
Short text, Long text, Website
No
Free-text answers cannot be scored.
Message, Reveal screen, Scheduler
No
No answer value to score.
Points are whole numbers. Negative numbers are allowed and subtract from the score, which is useful to penalize a disqualifying answer without ending the form.
Step 1: Give each option its points
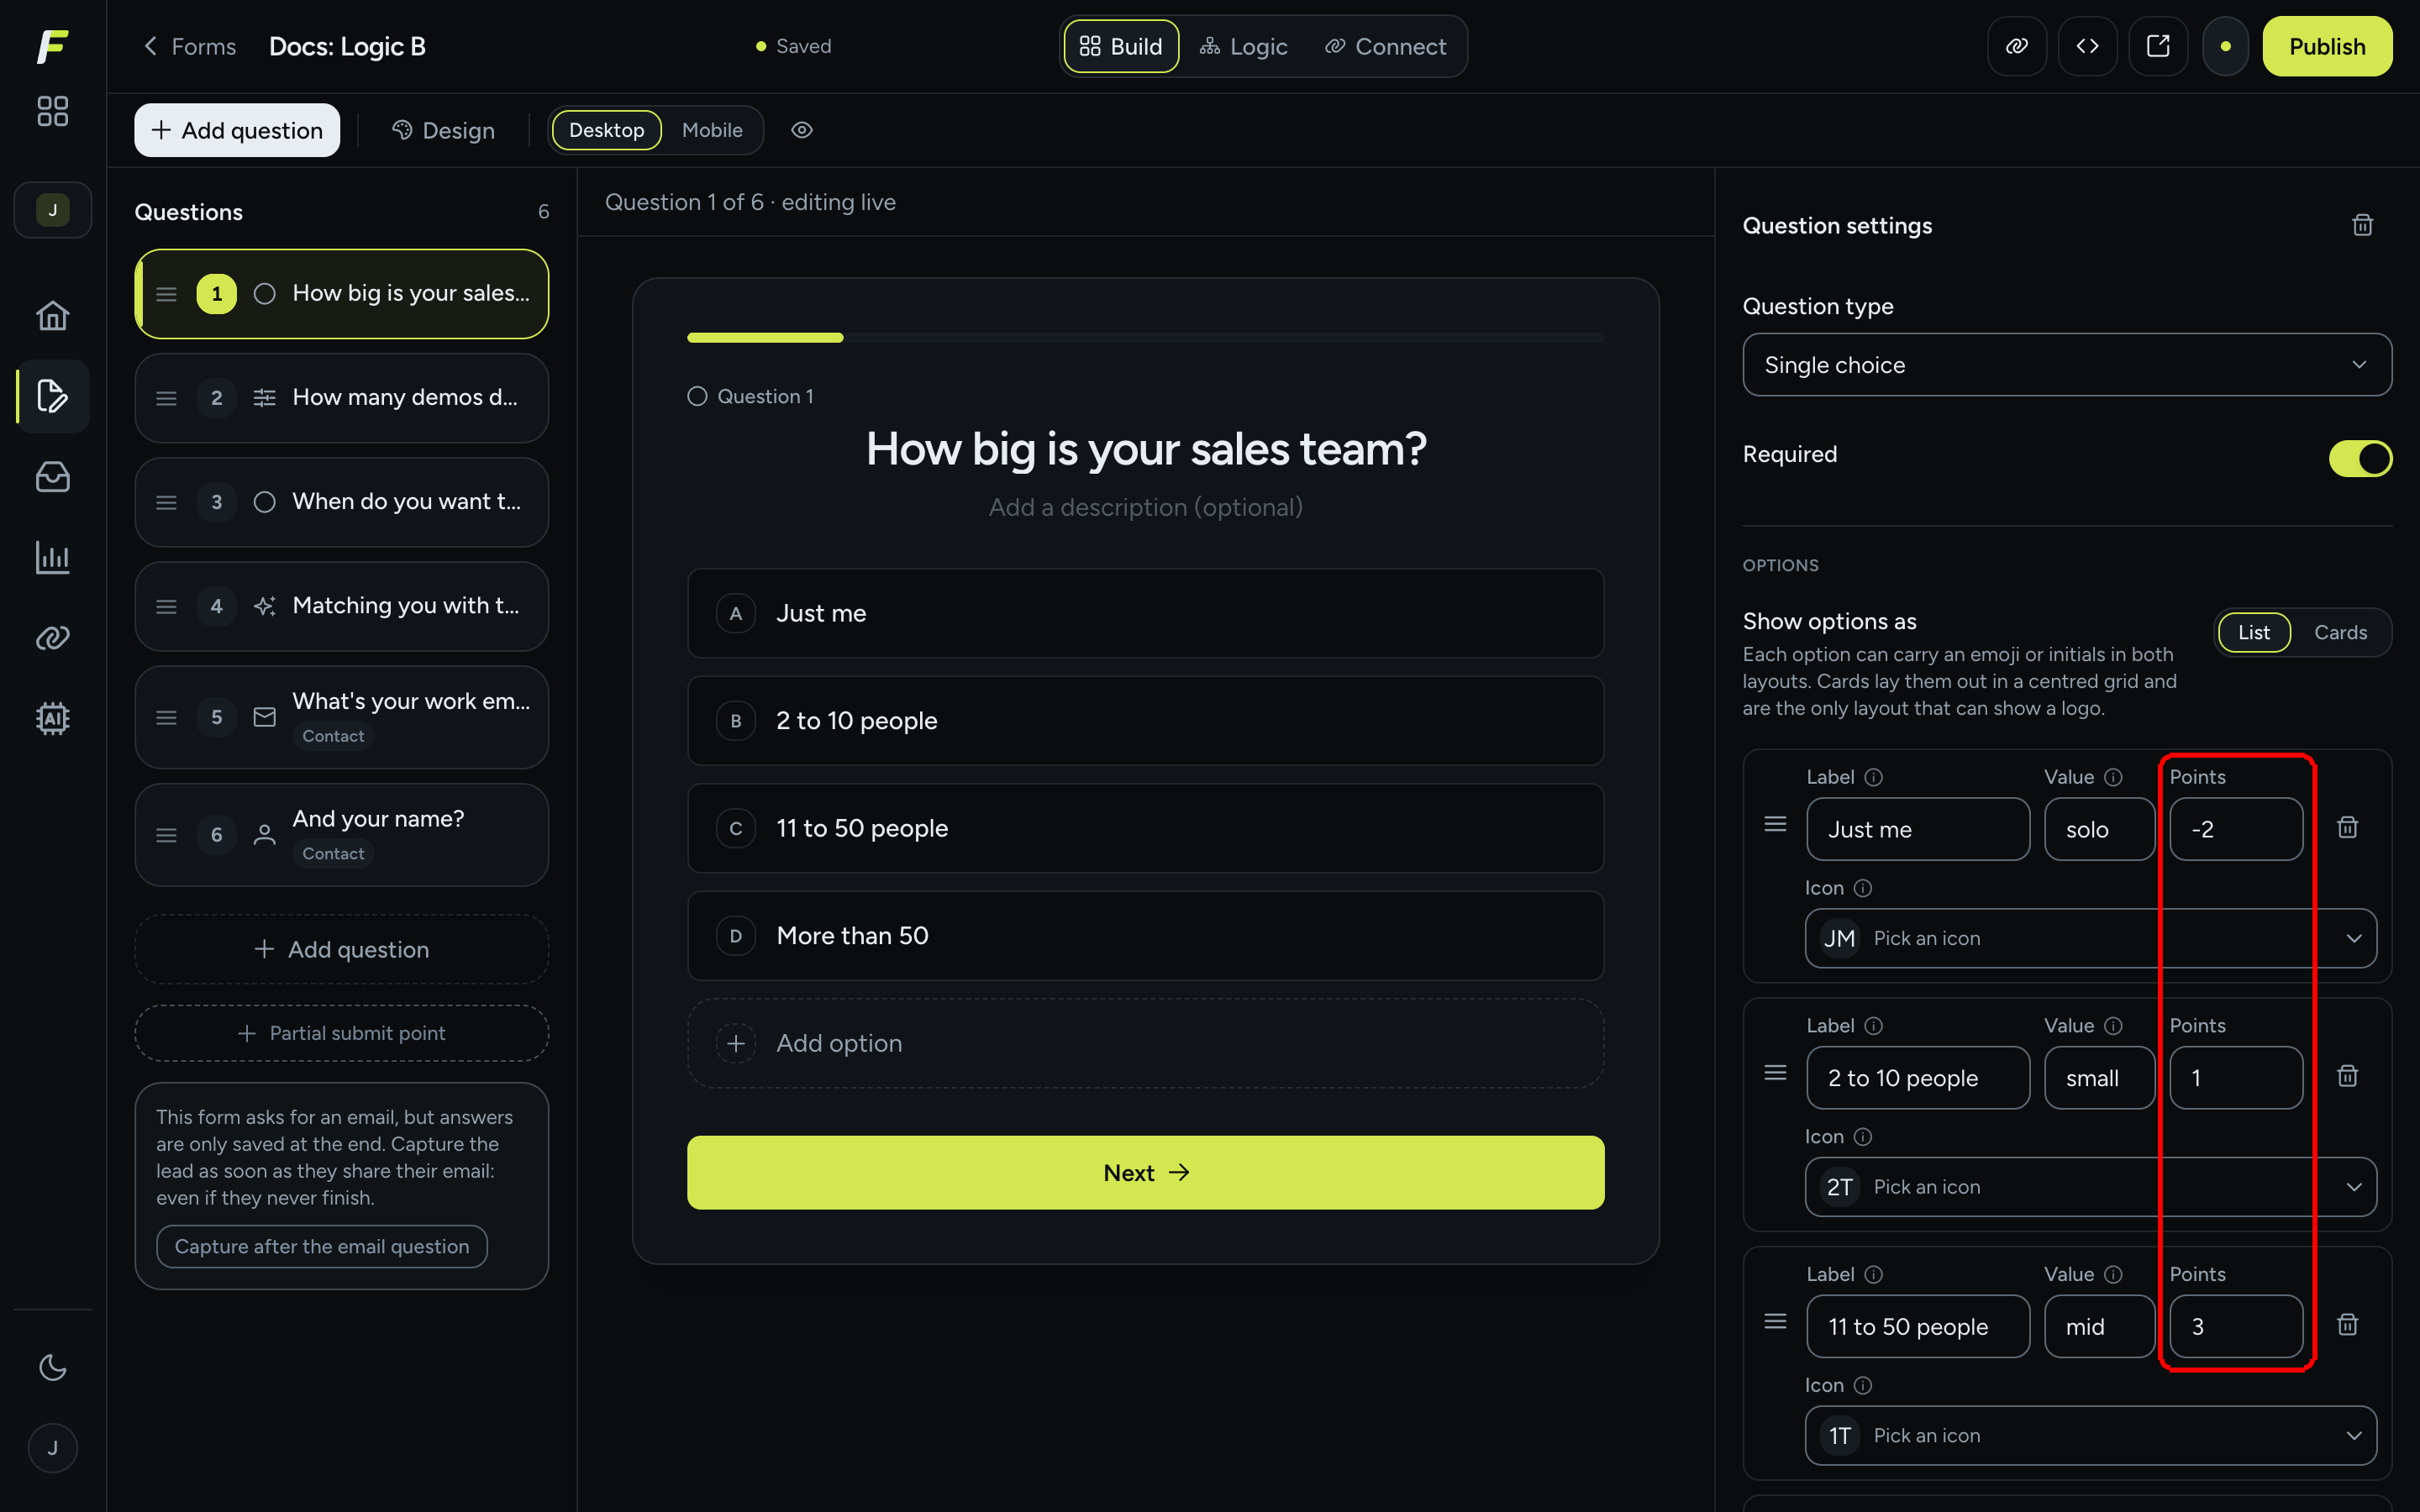
Step 1: Open your form in the Build tab and select a Single choice, Multiple choice or Dropdown question. In the Question settings panel, under Options, every option has three fields: Label, Value and Points.
Step 2: Type a number in Points for each option. Use 0 for neutral answers and a negative number (for example -2) for answers that should lower the score. The hint under the list reads Added to the score when this option is picked. Use a negative number to subtract.

π‘ Tip: If you already have the answers and their scores in a spreadsheet, click Import options and paste two columns (option and score). The preview flags duplicates and invalid scores before anything is written.
Step 2: Score a slider by range
A slider has no options, so it scores by value range instead.
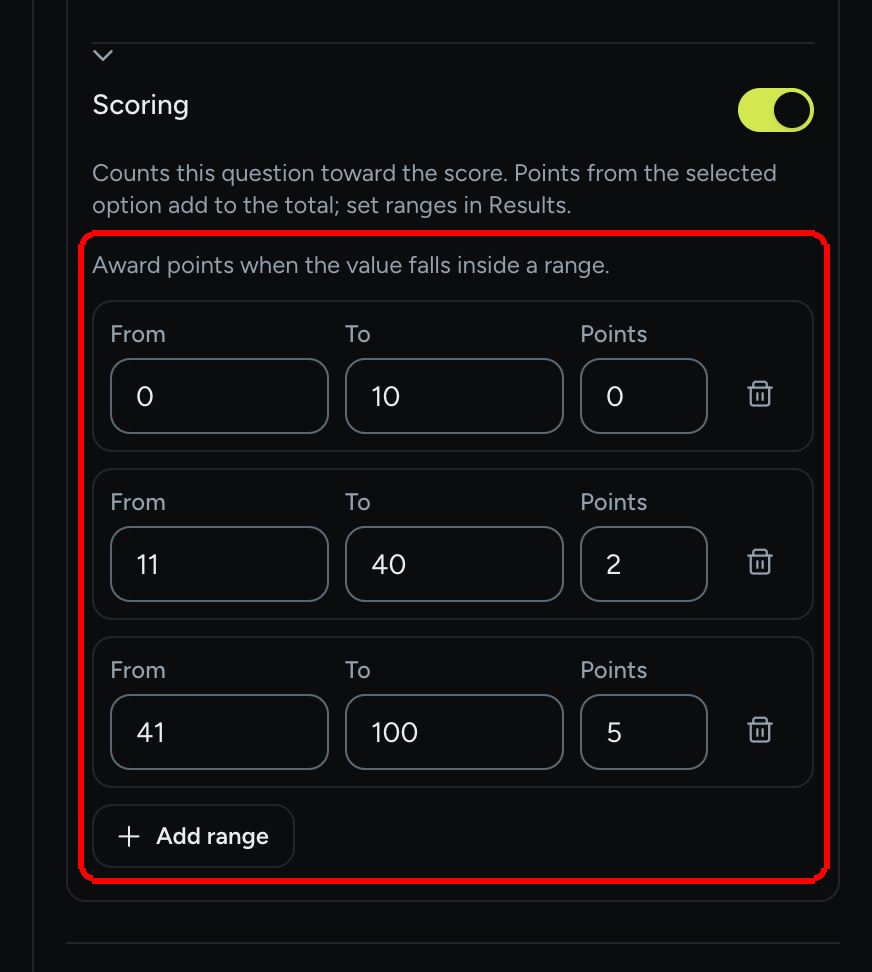
Step 1: Select the Slider question and open Advanced settings in the Question settings panel. Turn its Scoring switch on, and the Slider scoring section appears below it, with the hint Award points when the value falls inside a range.
Step 2: Click Add range and fill in From, To and Points. Add as many ranges as you need (for example 0 to 10 gives 0 points, 11 to 40 gives 2, 41 to 100 gives 5). Click the trash icon (Remove range) to delete one.

Two warnings can appear under a range:
Outside the slider's {min} to {max} range. This range can never award points.
The range lies outside the slider's Min and Max. Fix the bounds or the range.
Overlaps a range above it. When both match, the one listed first wins.
Two ranges share values. The upper range in the list takes precedence, so the lower one is partly dead.
A slider with no ranges shows No scoring ranges. The slider does not score. and contributes 0.
Step 3: Scoring per question and contact fields
Every scorable question has its own Scoring switch in the Question settings panel (under Options for choice questions, under Advanced settings for a slider). It reads Counts this question toward the score. Points from the selected option add to the total; set ranges in Results. Turn it off to keep the points on the options while ignoring them in the total, for example while you test a question.
If the form-wide switch is off, the per-question switch is disabled and says Scoring is off for the whole form: turn it on in Results to score individual questions.
Contact questions show no switch at all, only the note Contact field: doesn't affect the score.

Step 4: Review everything in the Scoring dialog
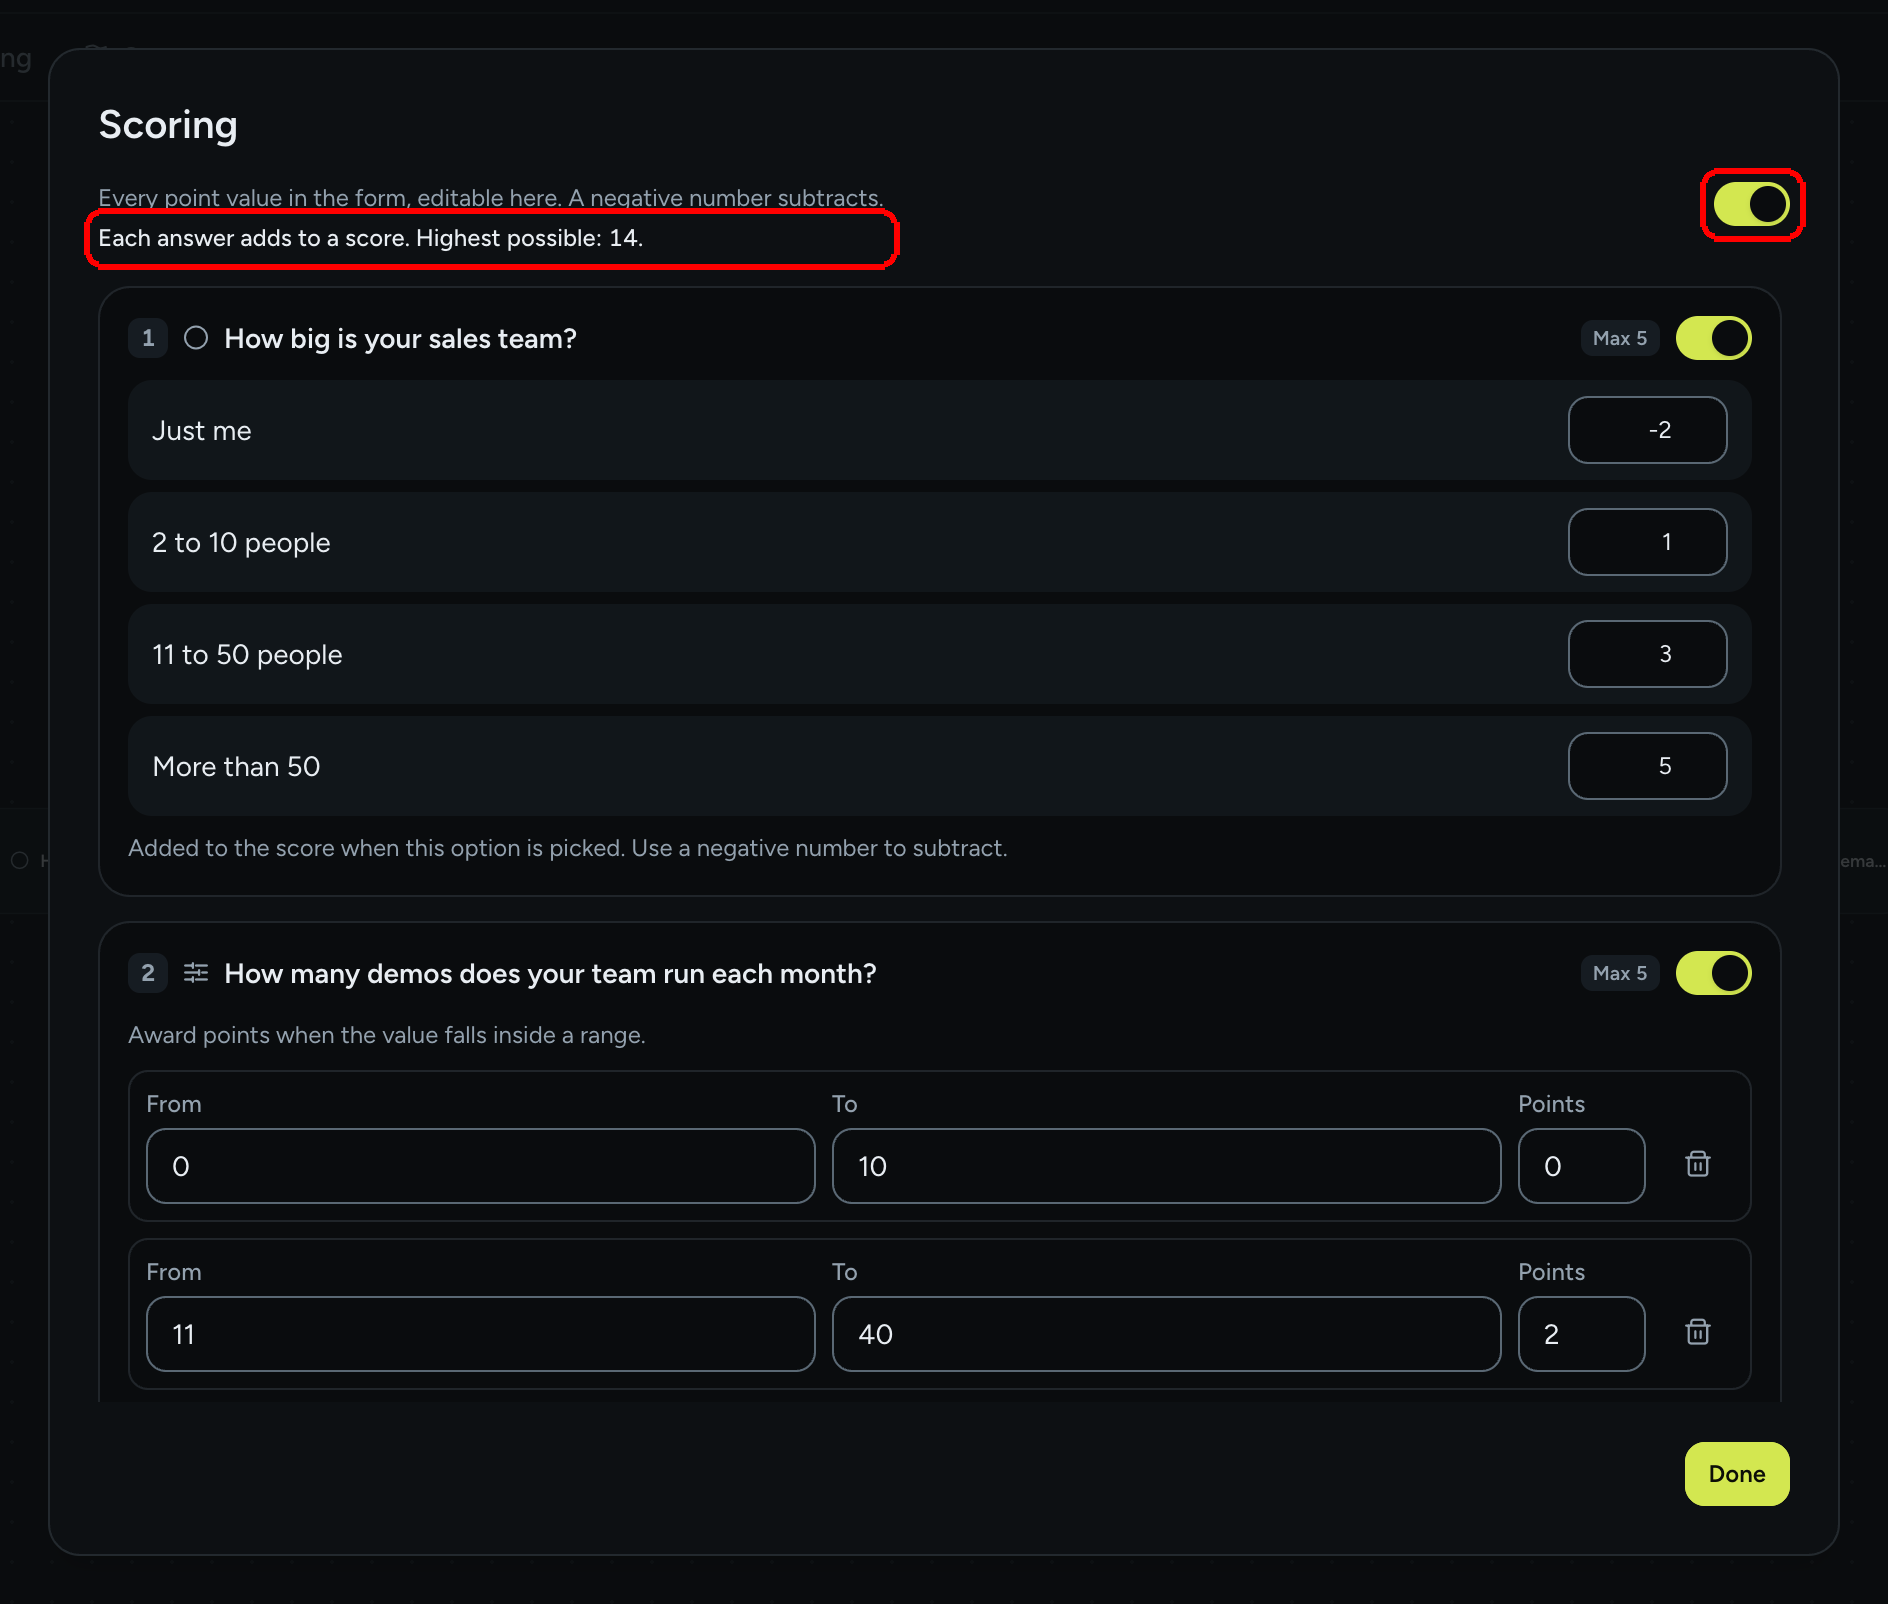
Step 1: Open the Logic tab and click Scoring in the toolbar. The Scoring dialog lists every scored question with all of its point values, editable in one place. Its subtitle reads Every point value in the form, editable here. A negative number subtracts.
Step 2: Check the line Each answer adds to a score. Highest possible: {n}. This is the maximum a respondent can reach: the best option of each scored question, or the best slider range, added up. Use it when you set your Outcomes ranges.
Step 3: The switch in the top right corner is Enable scoring, the master switch for the whole form. Each question row shows a Max {n} chip (the most that single question can contribute) and its own Scoring switch. Click Done when you are finished.

β οΈ Note: Scoring is on by default for a new form. When you turn Enable scoring off, the dialog says Scoring is off, so none of these points are awarded. They are kept exactly as they are: turn scoring on to use them again. Every submission then scores 0, no outcome range is resolved and the line at the top reads Scoring is off. No answer adds to a score right now.
Where the score shows up
Score ranges pick the ending a respondent sees.
A rule can read Score so far (the points collected before the current question).
A Score column per response, also in the CSV export.
The Score property mapping receives the total on completed submissions.
The payload carries submission.score.
The {{score}} variable in the submission emails.
Skipped questions (hidden by a condition or jumped over by branching) add nothing. The score is computed from the answers the respondent actually gave.
What's next
Map score ranges to different endings in Outcomes.
Use Score so far to show or hide questions in Show & hide conditions.
See how the editor handles option labels, values and icons in Choice fields.
Last updated