> For the complete documentation index, see [llms.txt](https://docs.dapta.ai/llms.txt). Markdown versions of documentation pages are available by appending `.md` to page URLs; this page is available as [Markdown](https://docs.dapta.ai/dforms/connect/scheduler-and-calendly.md).

# Scheduler: dCal and Calendly

Let respondents book a meeting without leaving your form. A Scheduler question books through dCal, Dapta's own scheduler, with nothing to connect, or through Calendly. Pick an event type, autofill the

A **Scheduler** question embeds a booking page inside the form. Respondents pick a time on the spot, and the booking counts as their answer to that question. No extra link, no second page, no lost leads between "interested" and "booked".

Each Scheduler question books through one of two schedulers, chosen in its **Scheduler** setting:

|                    | **dCal**                                                                                  | **Calendly**                                                                    |
| ------------------ | ----------------------------------------------------------------------------------------- | ------------------------------------------------------------------------------- |
| What it is         | Dapta's own scheduler.                                                                    | A Calendly account you connect.                                                 |
| Connecting         | Nothing to connect: your Dapta sign-in already lists your event types.                    | Once per workspace, with a Calendly token, on the **Integrations** page.        |
| Event types listed | Your own and your teams', in any workspace you can reach.                                 | The ones the connected account owns or hosts, or any event by pasting its link. |
| Autofill           | Name, email, notes and every question the event type adds.                                | Name, email and the event type's custom questions.                              |
| HubSpot            | Stage, booking date and meeting time on the contact the form's email question identifies. | The same, plus the invitee's email, name and phone read back from Calendly.     |

New Scheduler questions start on **dCal**. A Scheduler question saved before dCal existed keeps booking through Calendly: nothing changes on forms you already have.

***

## Add a Scheduler question

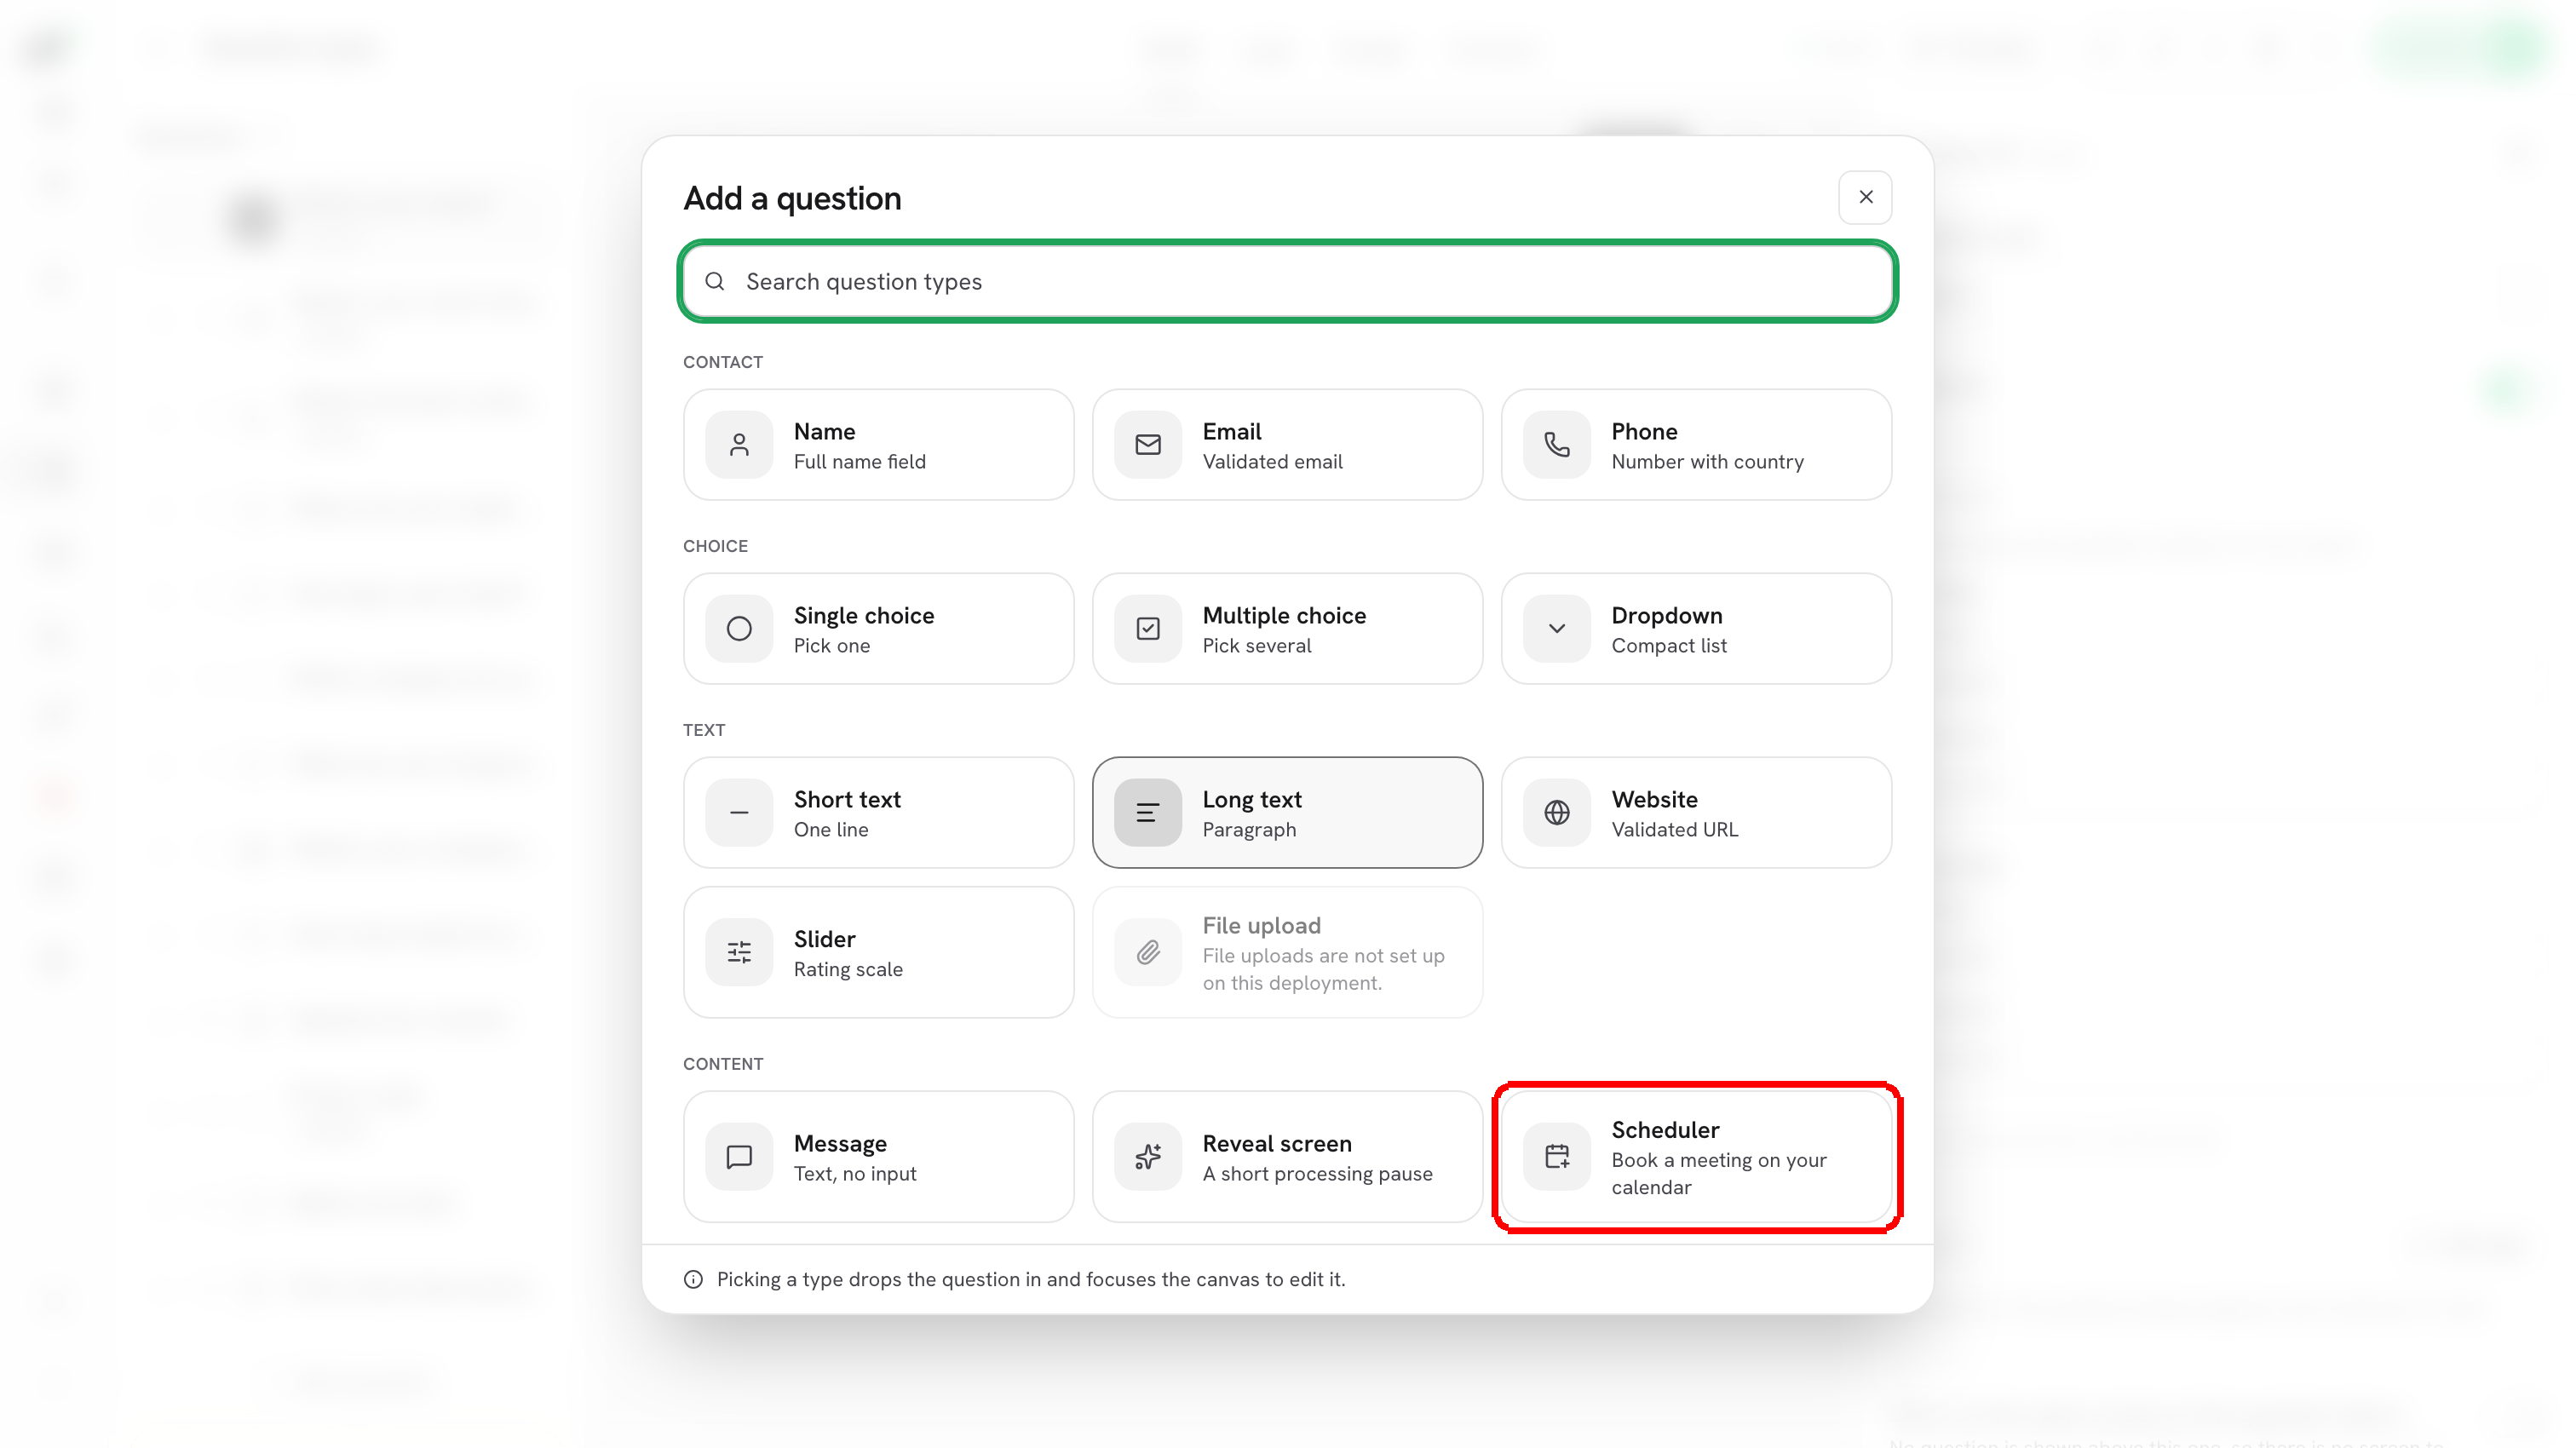
**Step 1:** Open the form in the editor, click **Add question** and pick **Scheduler** from the **Content** group.

<figure><img src="https://3835013762-files.gitbook.io/~/files/v0/b/gitbook-x-prod.appspot.com/o/spaces%2FCy5rSNtQmtqYCGzJlNEB%2Fuploads%2Fgit-blob-b654f95ef34c9b7b26588f995228210678c066a9%2Fforms-scheduler-and-calendly-02-add-scheduler.png?alt=media" alt="The Add a question gallery with the Scheduler type highlighted in the Content group"><figcaption><p><strong>Scheduler</strong>: "Book a meeting on your calendar". It sits with <strong>Message</strong> and <strong>Reveal screen</strong> under <strong>Content</strong>.</p></figcaption></figure>

Type the question text straight on the canvas, exactly as with any other step, for example "Pick a time that works for you". Then follow the section for the scheduler you use.

***

## Book through dCal

**Step 2:** Look at the canvas. Until you pick an event type, the question shows the dCal setup card: **Book the meeting without leaving the form**, with **Pick an event type** and **Create one in dCal**. In **Question settings** on the right, the **Scheduler** section reads *Pick a dCal event type. When someone books, it counts as their answer.* and its **Scheduler** picker is set to **dCal**.

<figure><img src="https://3835013762-files.gitbook.io/~/files/v0/b/gitbook-x-prod.appspot.com/o/spaces%2FCy5rSNtQmtqYCGzJlNEB%2Fuploads%2Fgit-blob-86bd05e40e67eda7775ba8b37319e52b042e96f2%2Fforms-scheduler-and-calendly-07-dcal-setup-card.png?alt=media" alt="The form editor with the dCal setup card on the canvas and the Scheduler picker set to dCal in Question settings"><figcaption><p>A new Scheduler question starts on dCal. The card on the canvas is where you meet it first.</p></figcaption></figure>

* **Pick an event type** scrolls the settings to the **Event type** picker and opens it.
* **Create one in dCal** opens dCal's event editor in a new tab, so the form you are building stays where it is.

***

**Step 3:** Open **Event type** and pick the event respondents will book.

<figure><img src="https://3835013762-files.gitbook.io/~/files/v0/b/gitbook-x-prod.appspot.com/o/spaces%2FCy5rSNtQmtqYCGzJlNEB%2Fuploads%2Fgit-blob-8b16391b62bbc43c47ab0e91d904aa8ae27a3c28%2Fforms-scheduler-and-calendly-08-dcal-event-types.png?alt=media" alt="The Event type picker open with two personal dCal events and a team event labelled Team: Sales"><figcaption><p>Your own event types and your teams' event types in one list. A team event carries its team's name.</p></figcaption></figure>

The list is what you can already see in dCal itself:

* your own event types, by name;
* the event types of every team you belong to, shown as **{event} · Team: {team}**;
* sorted by name. Event types hidden from your public booking page in dCal are left out.

Under the picker, a line says whose list it is: *Showing {email}'s own event types, and their teams'.*

**Workspace.** When you belong to more than one dCal workspace, a **Workspace** picker appears above **Event type**. Switch it to list the event types of another workspace. With a single workspace there is no picker.

<figure><img src="https://3835013762-files.gitbook.io/~/files/v0/b/gitbook-x-prod.appspot.com/o/spaces%2FCy5rSNtQmtqYCGzJlNEB%2Fuploads%2Fgit-blob-161e2a0b25fac5fe30b54c37524123970940e8bd%2Fforms-scheduler-and-calendly-09-dcal-workspace.png?alt=media" alt="The Workspace picker open, listing two dCal workspaces"><figcaption><p>The workspace switcher only lists workspaces you are an active member of.</p></figcaption></figure>

**No event type yet.** If the workspace has none, the picker is replaced by *This workspace has no event type yet.* with two ways forward:

<figure><img src="https://3835013762-files.gitbook.io/~/files/v0/b/gitbook-x-prod.appspot.com/o/spaces%2FCy5rSNtQmtqYCGzJlNEB%2Fuploads%2Fgit-blob-2df8da646b553dcb6b434623df348e27a57dde76%2Fforms-scheduler-and-calendly-10-dcal-empty.png?alt=media" alt="The empty state: This workspace has no event type yet, Pick another workspace above, Create one in dCal and I created it, load the list"><figcaption><p>The empty state. <strong>Pick another workspace above, or:</strong> only shows when you have another workspace to switch to.</p></figcaption></figure>

1. Click **Create one in dCal**. dCal opens in a new tab on its event types. Create the event there. See [Create an event](https://docs.dapta.ai/dcal/events/create-an-event.md).
2. Come back to the form and click **I created it, load the list**. The list is read again from dCal right away, so the new event shows up.

If the list cannot be loaded, you see **Could not load your event types.** and a **Try again** button. When dCal cannot answer at all, the section says why, and what to do:

| Message                                                                                 | What it means                                                             | What to do                                                                                             |
| --------------------------------------------------------------------------------------- | ------------------------------------------------------------------------- | ------------------------------------------------------------------------------------------------------ |
| **dCal needs your Dapta sign-in. Sign in again, then come back to this question.**      | dCal did not accept your session, usually because it expired.             | Sign in again and reopen the question.                                                                 |
| **You do not have a dCal booking page yet. Set it up in dCal, then refresh this list.** | Your dCal account has no booking page.                                    | Click **Set up your booking page** (it opens dCal in a new tab), then **I created it, load the list**. |
| **dCal could not answer right now. Try again in a moment.**                             | dCal did not answer, or answered with an error.                           | Click **Try again**.                                                                                   |
| **dCal is not available on this deployment.**                                           | dCal is not set up on this installation (a self-hosted one, for example). | Switch the **Scheduler** picker to **Calendly** to keep building.                                      |

***

**Step 4:** Check the canvas. As soon as you pick an event type, the setup card is replaced by the real dCal booking page, under a header with the dCal mark and the event's name.

<figure><img src="https://3835013762-files.gitbook.io/~/files/v0/b/gitbook-x-prod.appspot.com/o/spaces%2FCy5rSNtQmtqYCGzJlNEB%2Fuploads%2Fgit-blob-3ad83a38027ac37371f612d2e7f34fe56ac7721c%2Fforms-scheduler-and-calendly-12-dcal-canvas.png?alt=media" alt="The canvas showing the dCal booking page of the Intro call event, with Intro call picked in Event type"><figcaption><p>What you see on the canvas is the booking page respondents get.</p></figcaption></figure>

***

**Step 5:** Under **Autofill the booking form**, decide which earlier answer feeds each field of the booking page. The block appears once an event type is picked.

<figure><img src="https://3835013762-files.gitbook.io/~/files/v0/b/gitbook-x-prod.appspot.com/o/spaces%2FCy5rSNtQmtqYCGzJlNEB%2Fuploads%2Fgit-blob-a35b85c0114e27ca071c4baae410ccfab8793c9e%2Fforms-scheduler-and-calendly-11-dcal-autofill.png?alt=media" alt="Autofill the booking form with rows for Name, Email, Notes and the event&#x27;s own Company and Phone number fields"><figcaption><p>Three rows every dCal event has, then one row per question the event type adds.</p></figcaption></figure>

| Row                        | What it fills                                                                                                                                                                                                                                                        |
| -------------------------- | -------------------------------------------------------------------------------------------------------------------------------------------------------------------------------------------------------------------------------------------------------------------- |
| **Name**                   | The booking page's name. On **Automatic**, the form's Name question.                                                                                                                                                                                                 |
| **Email**                  | The booking page's email. On **Automatic**, the form's Email question.                                                                                                                                                                                               |
| **Notes**                  | The booking page's notes. On **Automatic**, only a question whose field key is `notes`, and the row says so: *Automatic fills this only when one of your questions has the key notes.* Pick a question, such as "What would you like to cover?", to send its answer. |
| One row per event question | Each question the event type asks on its own (see [Booking questions](https://docs.dapta.ai/dcal/events/booking-questions.md)), with its label from dCal. On **Automatic** the respondent fills it on the booking page.                                              |

Only questions that come **before** the scheduler are offered: an answer that has not been given yet cannot prefill anything. The rows are matched by the field's name in dCal, not by its position, so reordering the questions of the event in dCal does not send an answer to the wrong field.

> **⚠️ Note:** Picking a different event type, or switching the **Scheduler** between dCal and Calendly, clears the event and the autofill rows. Their fields belong to the old event.

dCal has no **Show event details** switch. That setting only exists for Calendly.

***

**Step 6:** Set **After booking** and **Required** (see [After someone books](#after-someone-books)), click **Publish** and open the public link to check the step end to end.

<figure><img src="https://3835013762-files.gitbook.io/~/files/v0/b/gitbook-x-prod.appspot.com/o/spaces%2FCy5rSNtQmtqYCGzJlNEB%2Fuploads%2Fgit-blob-6336cc943df43db63ad2897a8fe0a114f81dd70d%2Fforms-scheduler-and-calendly-13-dcal-public.png?alt=media" alt="The published form with the dCal booking page embedded and the name, email, notes and company already filled in"><figcaption><p>What the respondent sees: their name, email, notes and company already filled in. Most only pick a slot and confirm.</p></figcaption></figure>

***

## Book through Calendly

Set the question's **Scheduler** picker to **Calendly**. Calendly needs a connection first, made once for the whole workspace.

**Step 1:** In the left menu, open **Integrations** and find the **Calendly** card and click **Connect**. The card asks for **Paste your Calendly token**: paste your Calendly personal access token there and click **Connect** again.

<figure><img src="https://3835013762-files.gitbook.io/~/files/v0/b/gitbook-x-prod.appspot.com/o/spaces%2FCy5rSNtQmtqYCGzJlNEB%2Fuploads%2Fgit-blob-f67c16132ca49f3847635014cbec6119994f64f4%2Fforms-scheduler-and-calendly-01-connections.png?alt=media" alt="The Integrations page with the Calendly card connected, showing which event types forms can pick"><figcaption><p>Calendly is connected once for the account. The card then shows <strong>Connected</strong>, the account it belongs to, when it was connected, and which event types forms can pick.</p></figcaption></figure>

Once it is connected, the card reads **Connected as {your Calendly account}** and offers **Disconnect**. Connecting and disconnecting is limited to admins and owners; any member can then use the connection when building a form.

The card also says *Forms can pick the event types this account owns or hosts. To use a team event, connect an account that is one of its hosts.* That matters for team events such as a round robin: they only appear in the list when the connected account is one of their hosts. Any event can still be used by pasting its link, as Step 2 shows.

***

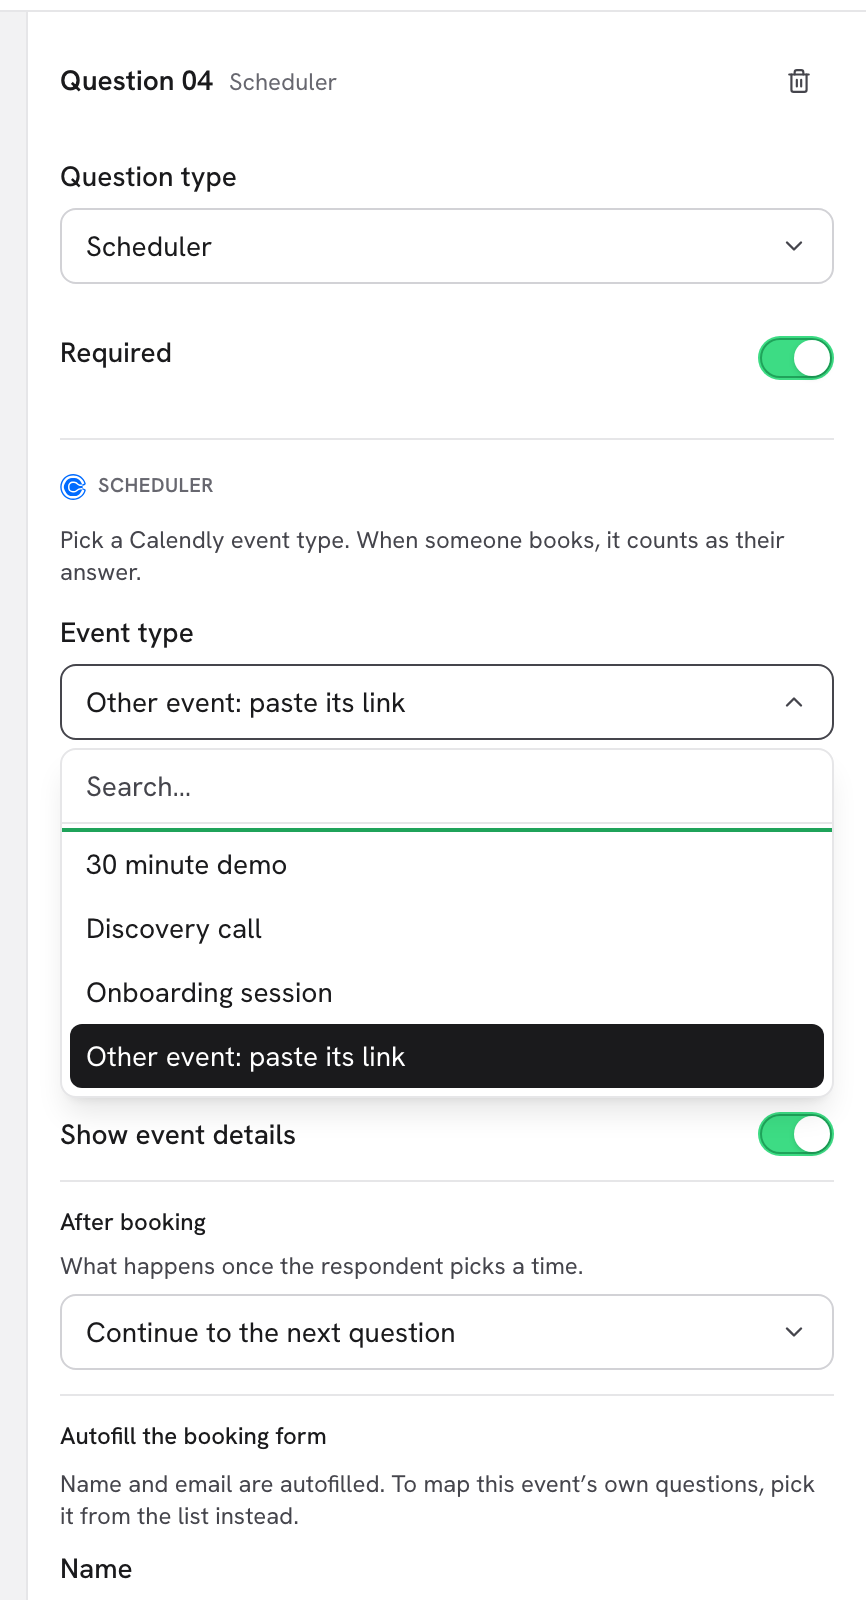
**Step 2:** In the question's **Scheduler** section, choose an **Event type**.

<figure><img src="https://3835013762-files.gitbook.io/~/files/v0/b/gitbook-x-prod.appspot.com/o/spaces%2FCy5rSNtQmtqYCGzJlNEB%2Fuploads%2Fgit-blob-0aa33cdf0848754e7d99fd6930dadf36ab1bd998%2Fforms-scheduler-and-calendly-03-event-type.png?alt=media" alt="The Event type picker open, listing the Calendly event types of the connected account and ending with Other event: paste its link"><figcaption><p>The picker lists your active Calendly event types, and its last option lets you paste a link instead. Type in the search box to filter a long list.</p></figcaption></figure>

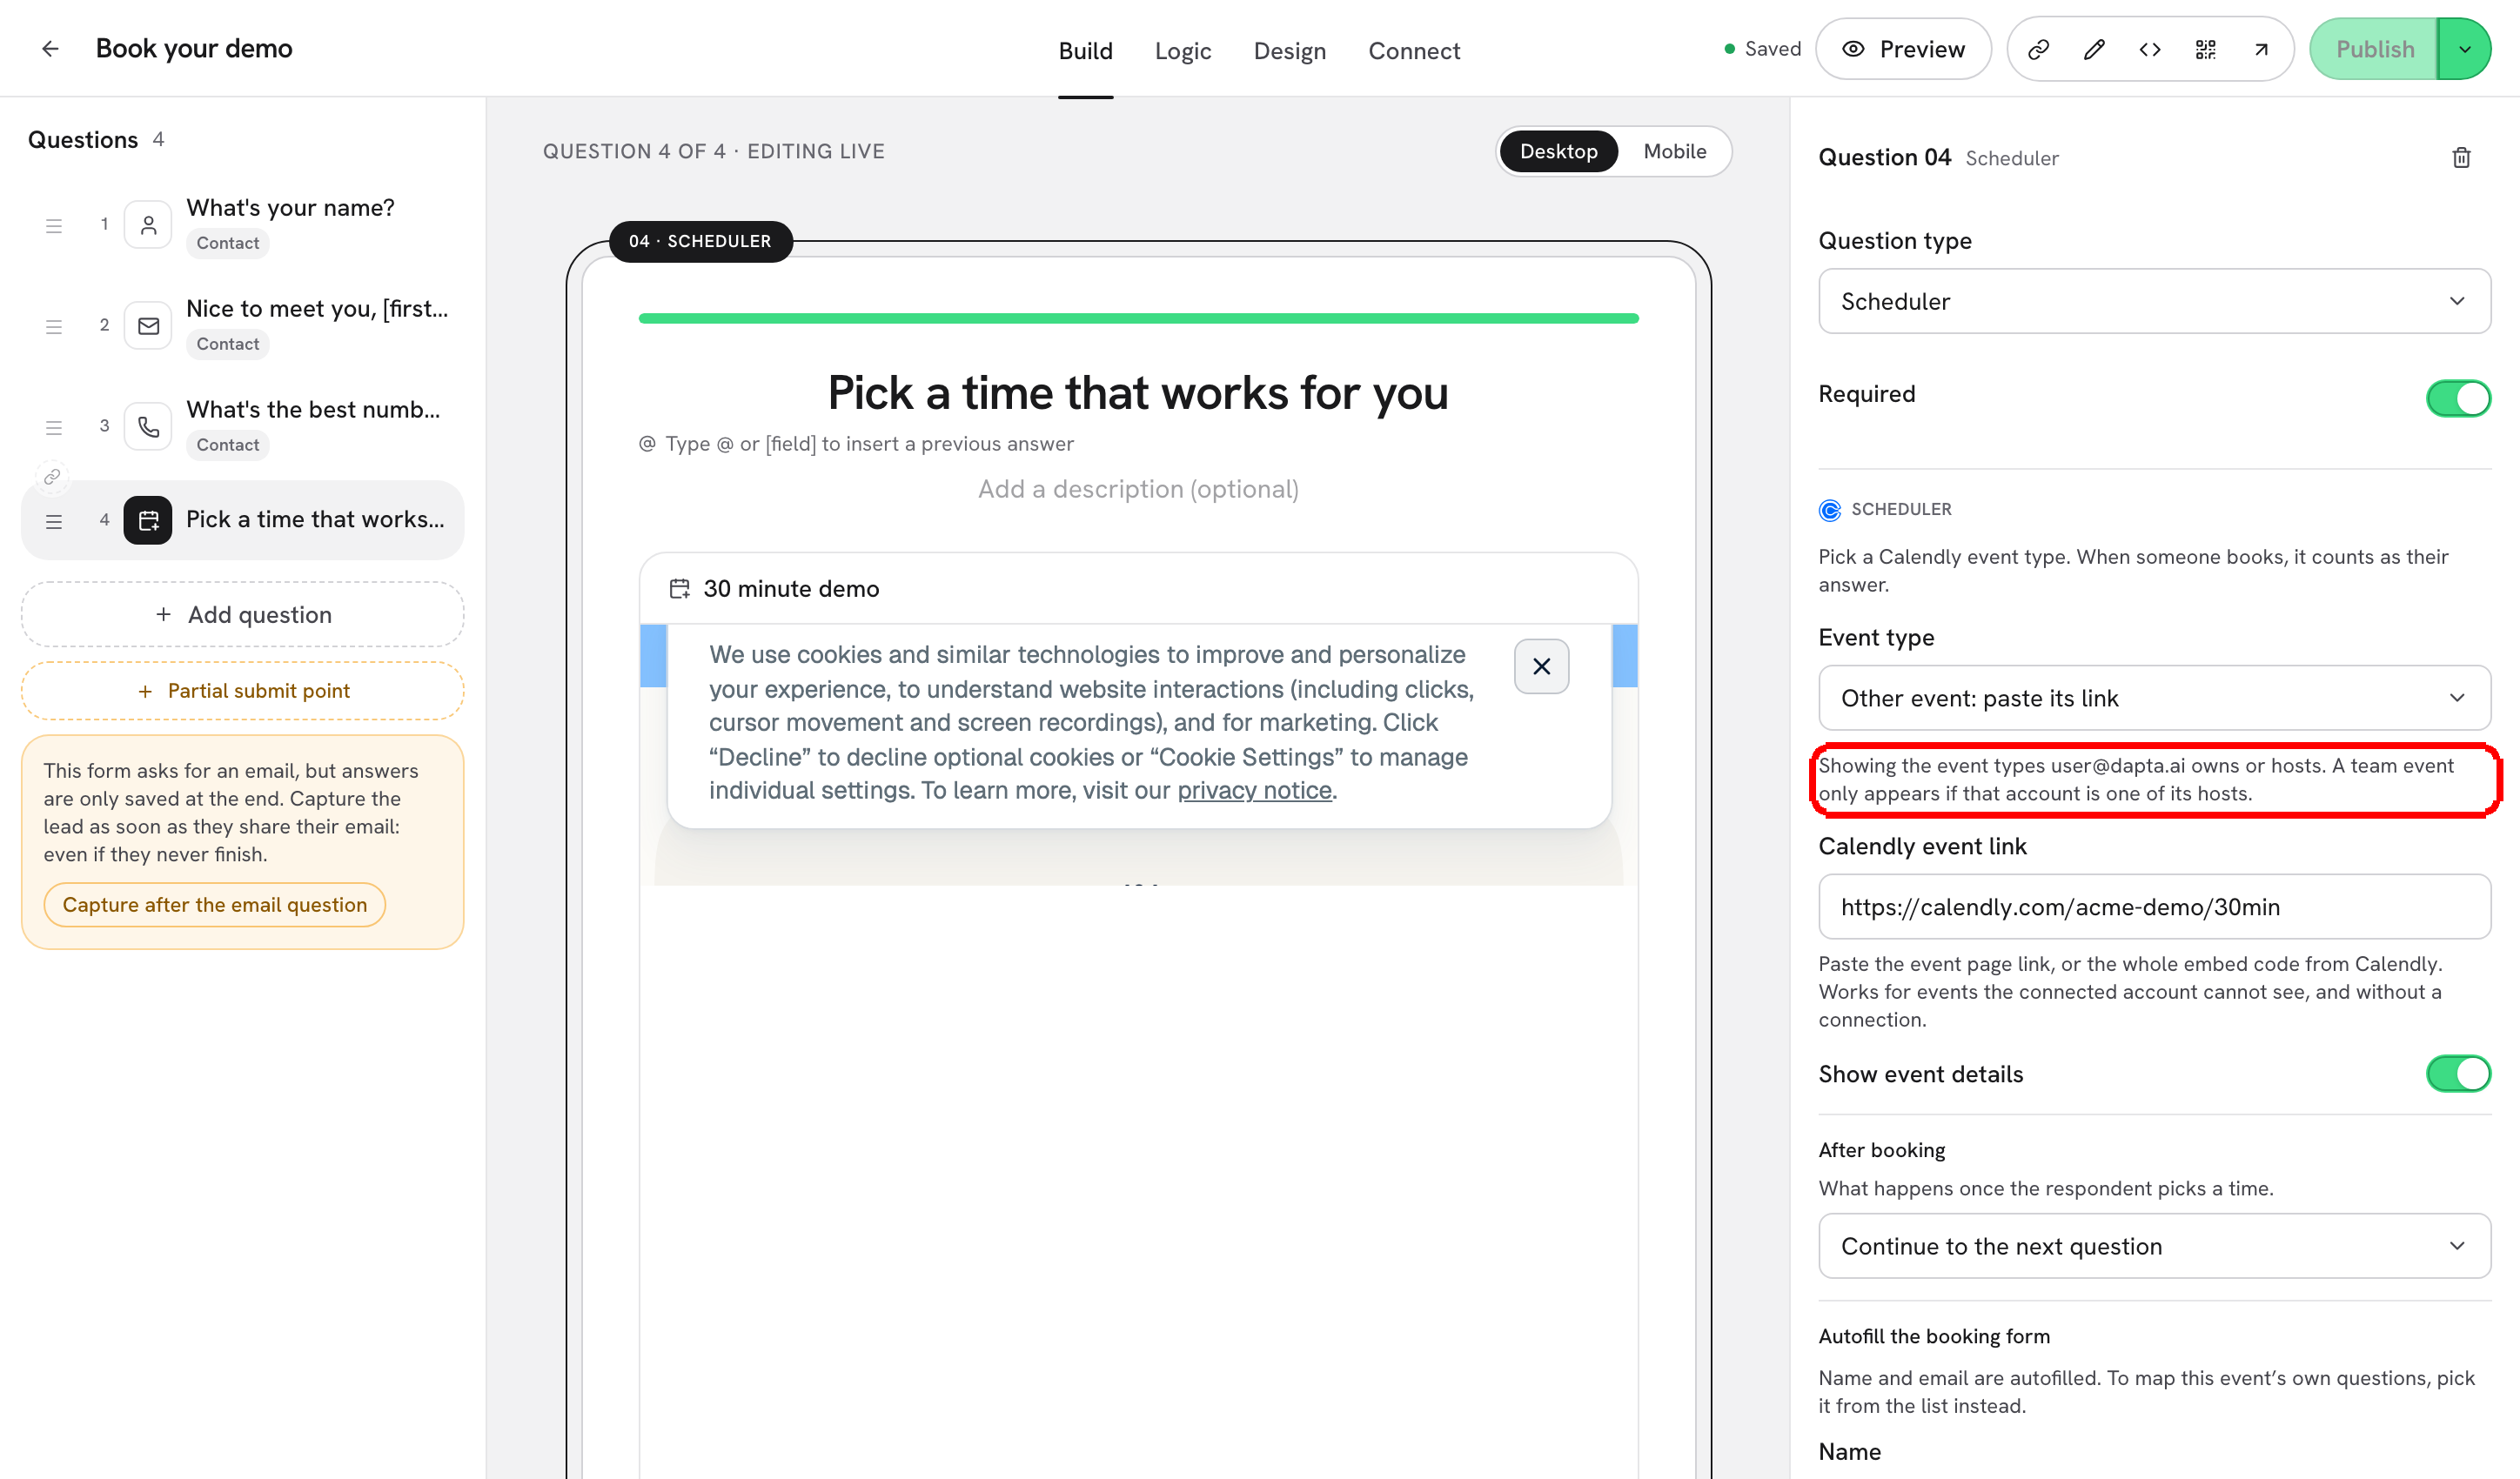
The list holds the active event types the connected Calendly account owns or hosts, sorted by name. Under the picker, a line names that account: *Showing the event types {email} owns or hosts. A team event only appears if that account is one of its hosts.*

While the list loads, the picker shows a grey placeholder. If it cannot load, you see **Could not load your event types.** and a **Try again** button.

As soon as you pick one, the canvas replaces **No event type picked yet** with the real booking page, so you can check the event, its duration and its description without leaving the editor.

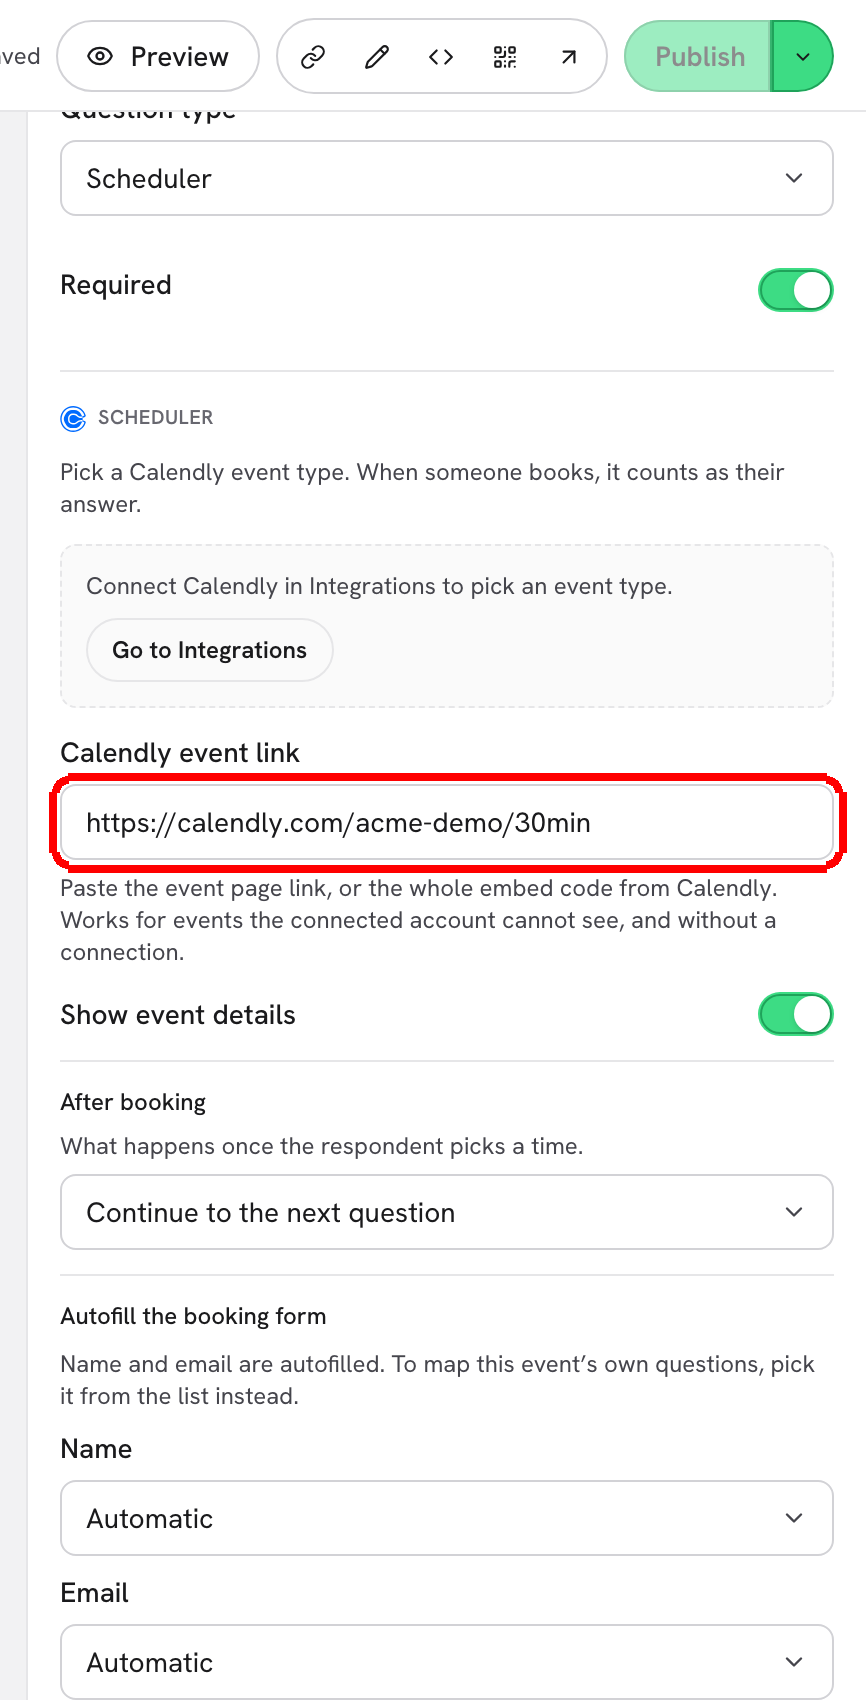
**An event that is not in the list.** Choose **Other event: paste its link**, the last option, and paste into **Calendly event link** one of these:

* the event page link, such as `https://calendly.com/your-team/intro-call`;
* that link with Calendly's own parameters after it;
* the whole embed code Calendly gives you.

<figure><img src="https://3835013762-files.gitbook.io/~/files/v0/b/gitbook-x-prod.appspot.com/o/spaces%2FCy5rSNtQmtqYCGzJlNEB%2Fuploads%2Fgit-blob-08b5e437beb7d2e3f74656defaff4016b8dbaf30%2Fforms-scheduler-and-calendly-06-event-link.png?alt=media" alt="The Scheduler section in link mode, with a Calendly event link pasted in the Calendly event link field"><figcaption><p>A pasted link works for events the connected account cannot see, and without a Calendly connection at all.</p></figcaption></figure>

When you leave the field, a pasted embed code turns into the clean event link. Anything that is not a Calendly event link shows *That is not a Calendly event link. It should look like <https://calendly.com/team/event>.* If you paste the link of an event that is in the list, that event is picked for you instead.

If Calendly is not connected yet you will see **Connect Calendly in Integrations to pick an event type.** and a **Go to Integrations** button, plus **Or paste the event link instead**: the step works with a link and no connection.

***

**Step 3:** Set **Show event details** and **Autofill the booking form**.

<figure><img src="https://3835013762-files.gitbook.io/~/files/v0/b/gitbook-x-prod.appspot.com/o/spaces%2FCy5rSNtQmtqYCGzJlNEB%2Fuploads%2Fgit-blob-f06ec44e7137cf98c38dc33c0cd97760b2042a3f%2Fforms-scheduler-and-calendly-04-scheduler-settings.png?alt=media" alt="The form editor with the live Calendly embed on the canvas and the Scheduler settings on the right, including the line that names the connected Calendly account"><figcaption><p>Left: the live embed on the canvas. Right: the whole <strong>Scheduler</strong> section, from <strong>Event type</strong> to the autofill rows.</p></figcaption></figure>

* **Show event details**. On: the embed shows the event header (name, duration, description). Off: the respondent goes straight to the calendar.
* **Autofill the booking form**. Calendly always asks for a **Name** and an **Email**, and the rows below them are the custom questions of the event type you picked, with the exact wording your Calendly event uses. An event added by its link only gets the **Name** and **Email** rows: *Name and email are autofilled. To map this event’s own questions, pick it from the list instead.* Each row offers **Automatic** (a Name question fills the name, an Email question fills the email) or any earlier question, picked by name.

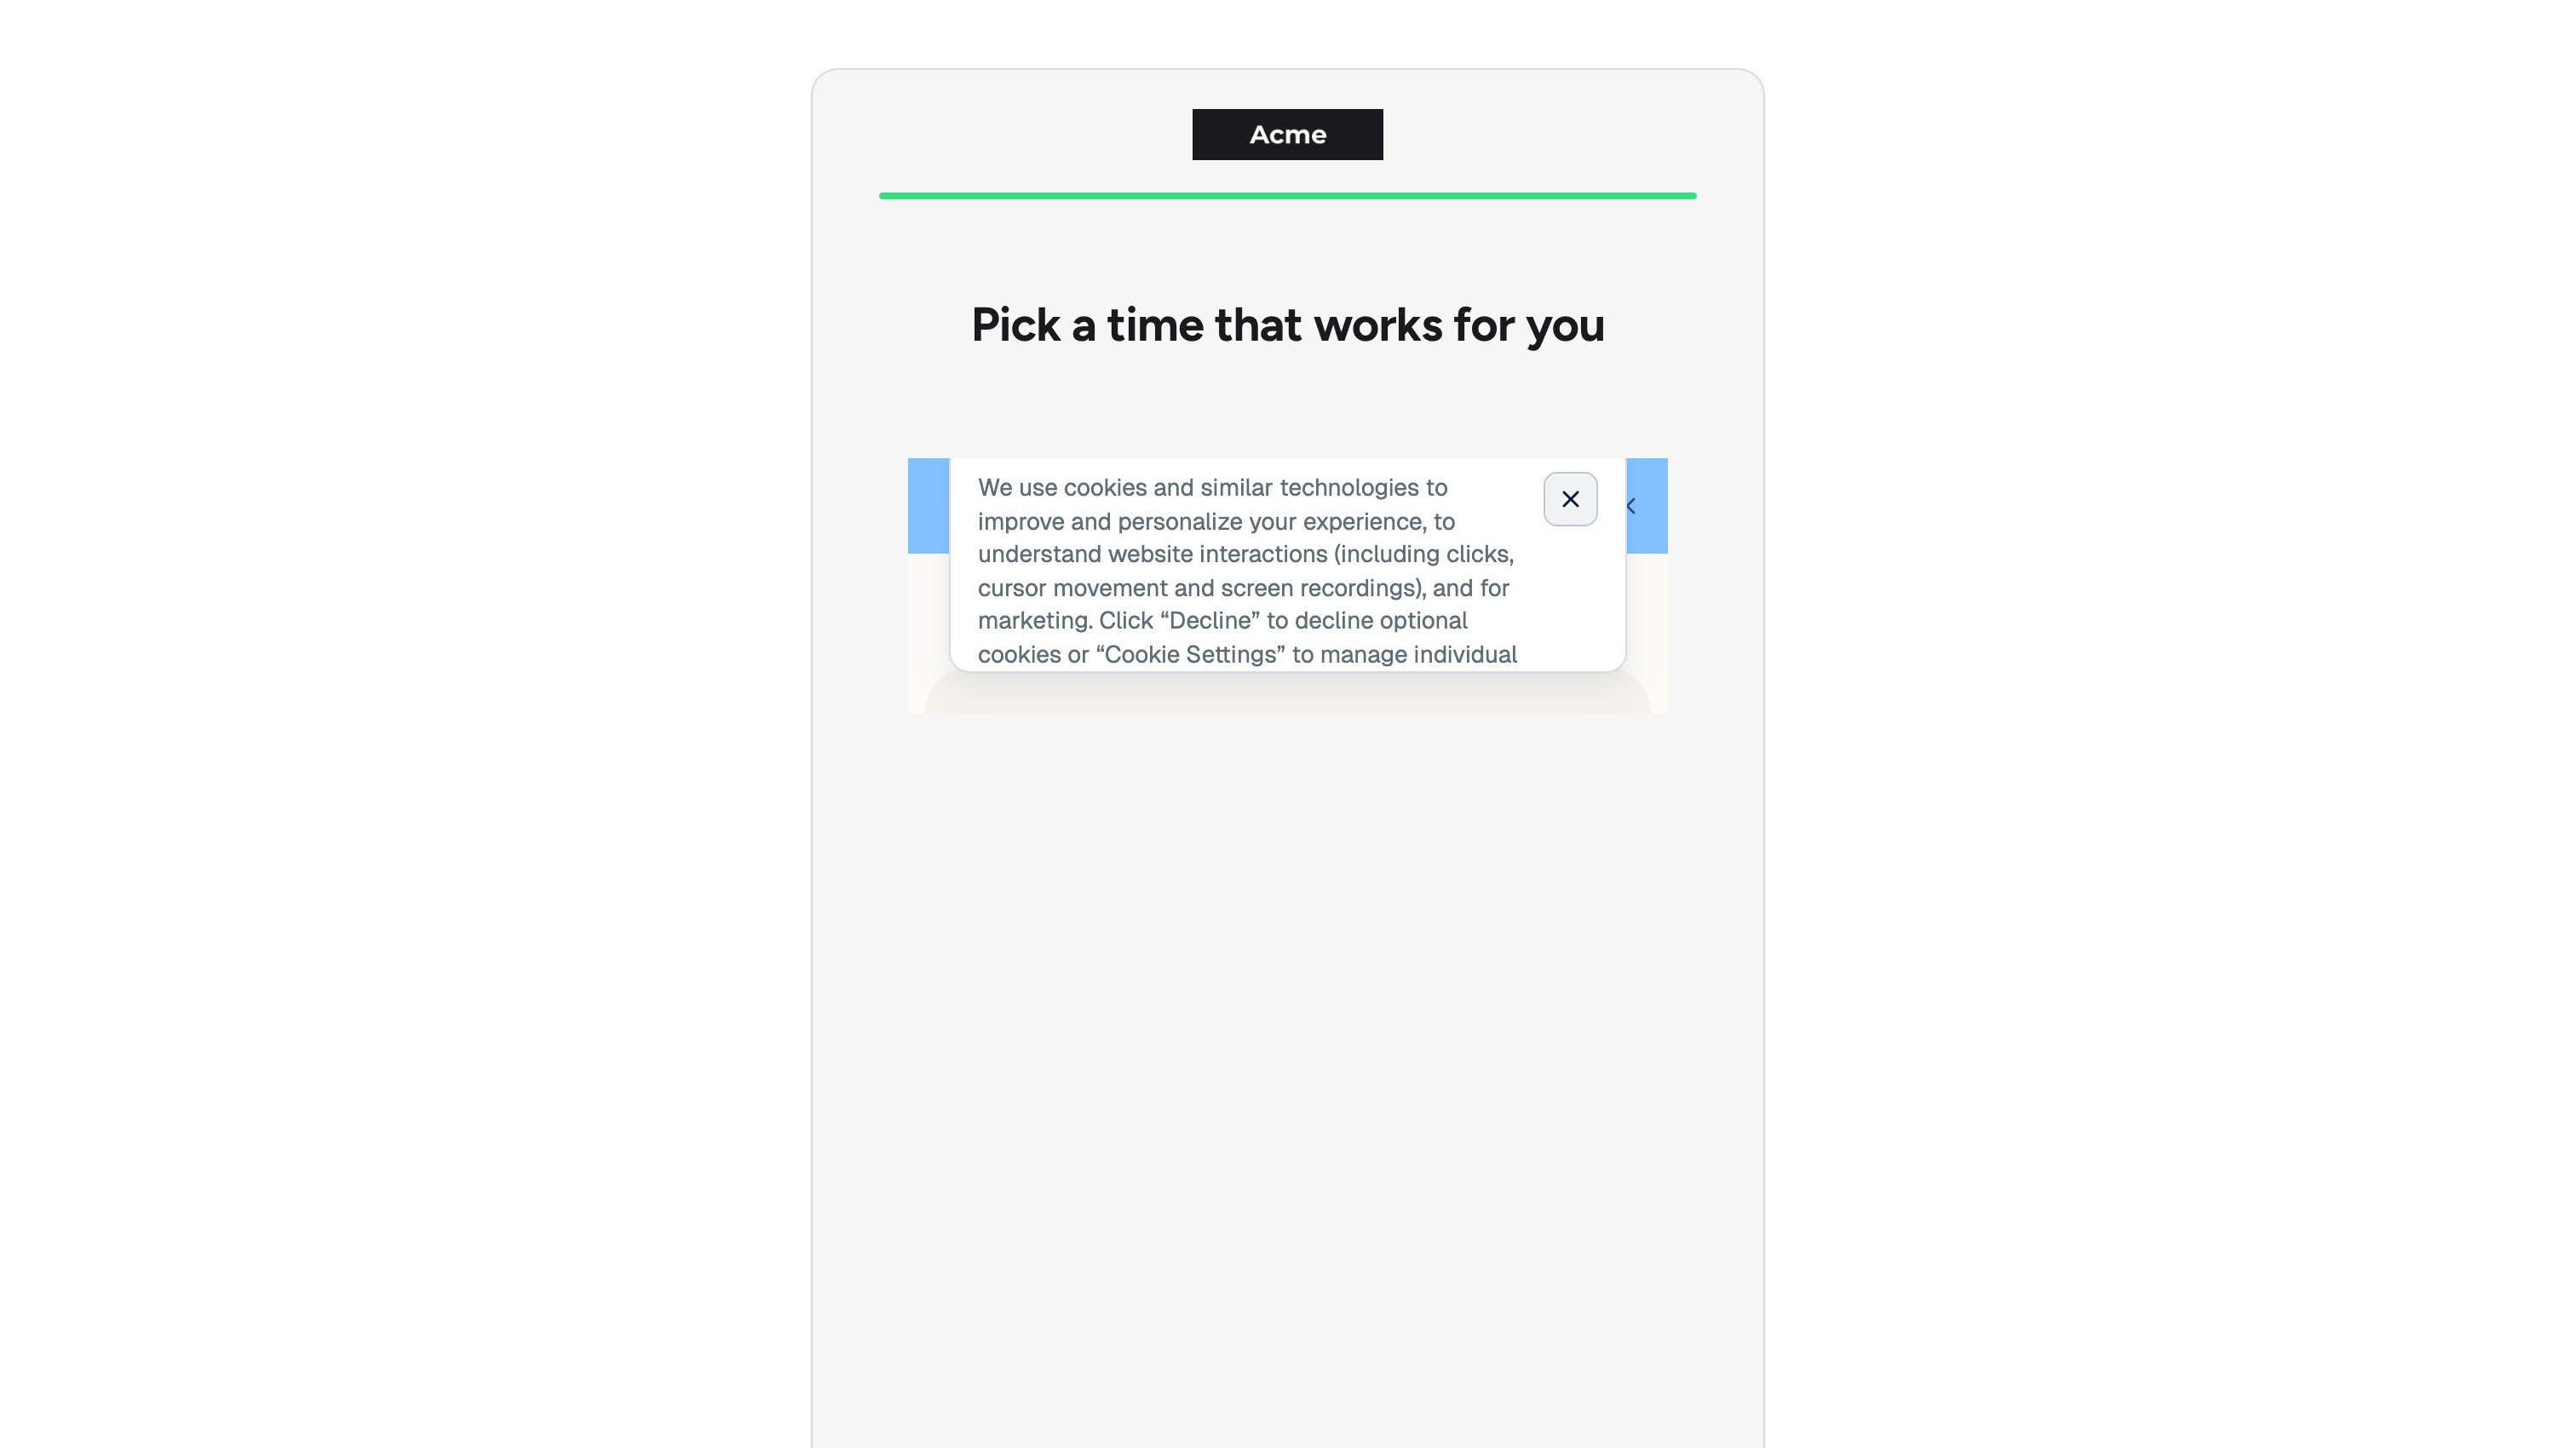
<figure><img src="https://3835013762-files.gitbook.io/~/files/v0/b/gitbook-x-prod.appspot.com/o/spaces%2FCy5rSNtQmtqYCGzJlNEB%2Fuploads%2Fgit-blob-52b0c579bf01b0952e2792d9458f7b34267fabe7%2Fforms-content-steps-08-public-scheduler.png?alt=media" alt="The published form showing the embedded Calendly calendar and the Skip for now link" width="400"><figcaption><p>A Calendly booking page in the published form, with <strong>Skip for now</strong> under it because the step is not required.</p></figcaption></figure>

***

## After someone books

Both schedulers end their section with **After booking**, which offers three kinds of destination:

* **Continue to the next question**: the form moves on in order. This is the default.
* **Submit the form and show the ending**: the booking is the last thing you ask for, and the respondent lands on the ending screen.
* Any later step in the form: jump straight to that question or screen, skipping what sits in between.

In **Question settings**, the **Required** toggle is on by default, and a required scheduler has no way out: the respondent books or stops. Turn **Required** off and the public form adds a **Skip for now** link under the calendar.

What a booking does to the rest of the form:

* The booking **is** the answer to that question. The answer value is the start time of the meeting the respondent chose.
* The step counts as completed, so **After booking** takes over and the form continues, submits or jumps.
* The meeting itself is created in dCal or in Calendly, with that scheduler's own confirmations and reminders. dForms does not send the invitation.
* A dCal booking is only believed when it comes from the booking page the form embedded. Another page cannot report a booking for your form.

### What reaches HubSpot

With [Booking sync](https://docs.dapta.ai/dforms/connect/hubspot/booking-sync.md) set up, a booking stamps the stage, the booking date and the meeting time on the HubSpot contact. Where the two schedulers differ is the contact itself:

* **Calendly** returns the invitee to dForms through your connection: their email, name and phone. That email can identify the lead even when the form never asks for one.
* **dCal** tells the form that a booking happened and when the meeting starts, and nothing about the person. The contact is the one the form's own **Email** question identifies. **A dCal scheduler is not a source of the respondent's email**: a form whose only email would come from the booking cannot sync to HubSpot. Add an **Email** question before the scheduler, and keep **Email** on **Automatic** in the autofill rows so the respondent does not type it twice.

> **⚠️ Note:** If Calendly is disconnected later, a form that already has a Calendly event type keeps letting people book, but dForms can no longer read the booking back, so the invitee's details are not stamped on the contact. The same happens with a pasted link to an event the connected account cannot see.

With [spam protection](https://docs.dapta.ai/dforms/connect/spam-protection.md) on and a scheduler as the last step, the human check runs on the submitting screen, right after the booking.

### Campaign parameters on the booking page

The booking page gets the visitor's campaign, so the booking is credited to the campaign they arrived with. That works the same for dCal and Calendly:

* **The visitor's own campaign travels.** dForms adds the `utm_source`, `utm_medium`, `utm_campaign`, `utm_term` and `utm_content` the response carries: the ones on the form's link, or, on a form embedded with the full snippet, the ones on your page's address. An empty value is left out.
* **Your own UTM wins.** A `utm_*` parameter you already wrote into the booking link (a pasted Calendly link, for example) is kept as written.
* **Nothing of dForms rides along.** The booking page gets no session id in `utm_content` or anywhere else: the booking is tied to its response by the form itself.

## Reference: what the respondent can see

| Copy                                        | When it appears                                                           |
| ------------------------------------------- | ------------------------------------------------------------------------- |
| **Loading the calendar…**                   | While the booking page is being embedded.                                 |
| **Open the scheduling page**                | When the embed cannot be shown, as a fallback link.                       |
| **Skip for now**                            | Only when the scheduler question is not **Required**.                     |
| **This scheduler has not been set up yet.** | The step was published without an event type. Pick one and publish again. |

## What's next

* [Booking sync](https://docs.dapta.ai/dforms/connect/hubspot/booking-sync.md): stamp the booking date, the meeting time and a stage on the HubSpot contact.
* [Create an event](https://docs.dapta.ai/dcal/events/create-an-event.md) and [Booking questions](https://docs.dapta.ai/dcal/events/booking-questions.md) in dCal: the event types a Scheduler question can embed.
* [Integrations (account level)](https://docs.dapta.ai/dforms/connect/connections.md): how the Calendly and HubSpot connections are made and revoked.
* [Question settings](https://docs.dapta.ai/dforms/builder/question-settings.md): **Required**, field keys and the rest of the per-question options.


---

# Agent Instructions
This documentation is published with GitBook. GitBook is the documentation platform designed so that both humans and AI agents can read, navigate, and reason over technical content effectively. Learn more at gitbook.com.

## Querying This Documentation
If you need additional information that is not directly available in this page, you can query the documentation by asking a question.

Perform an HTTP GET request on the following URL with the `ask` and `goal` query parameters:

```
GET https://docs.dapta.ai/dforms/connect/scheduler-and-calendly.md?ask=<question>&goal=<user_goal>
```

`ask` is the immediate question: it should be specific, self-contained, and written in natural language.
`goal` is what the user is ultimately trying to achieve, the reason they need the answer. Sharing it helps GitBook give you a better, more relevant answer. A goal is most helpful when it describes the outcome the user wants rather than restating the question. For example, with `ask=how do I create an API token`, a goal like `automate deployments from our CI pipeline` lets GitBook tailor the answer to that use case.

The response will contain a direct answer to the question and relevant excerpts and sources from the documentation.

Use this mechanism when the answer is not explicitly present in the current page, you need clarification or additional context, or you want to retrieve related documentation sections.