> For the complete documentation index, see [llms.txt](https://docs.dapta.ai/llms.txt). Markdown versions of documentation pages are available by appending `.md` to page URLs; this page is available as [Markdown](https://docs.dapta.ai/product-guides/data-studio-tables.md).
# Tables (Data Studio)
Browse, connect, and manage your data in Dapta. Create your own DaptaDB database, link tables from databases you already have, view and edit records, and manage each table's fields and settings.
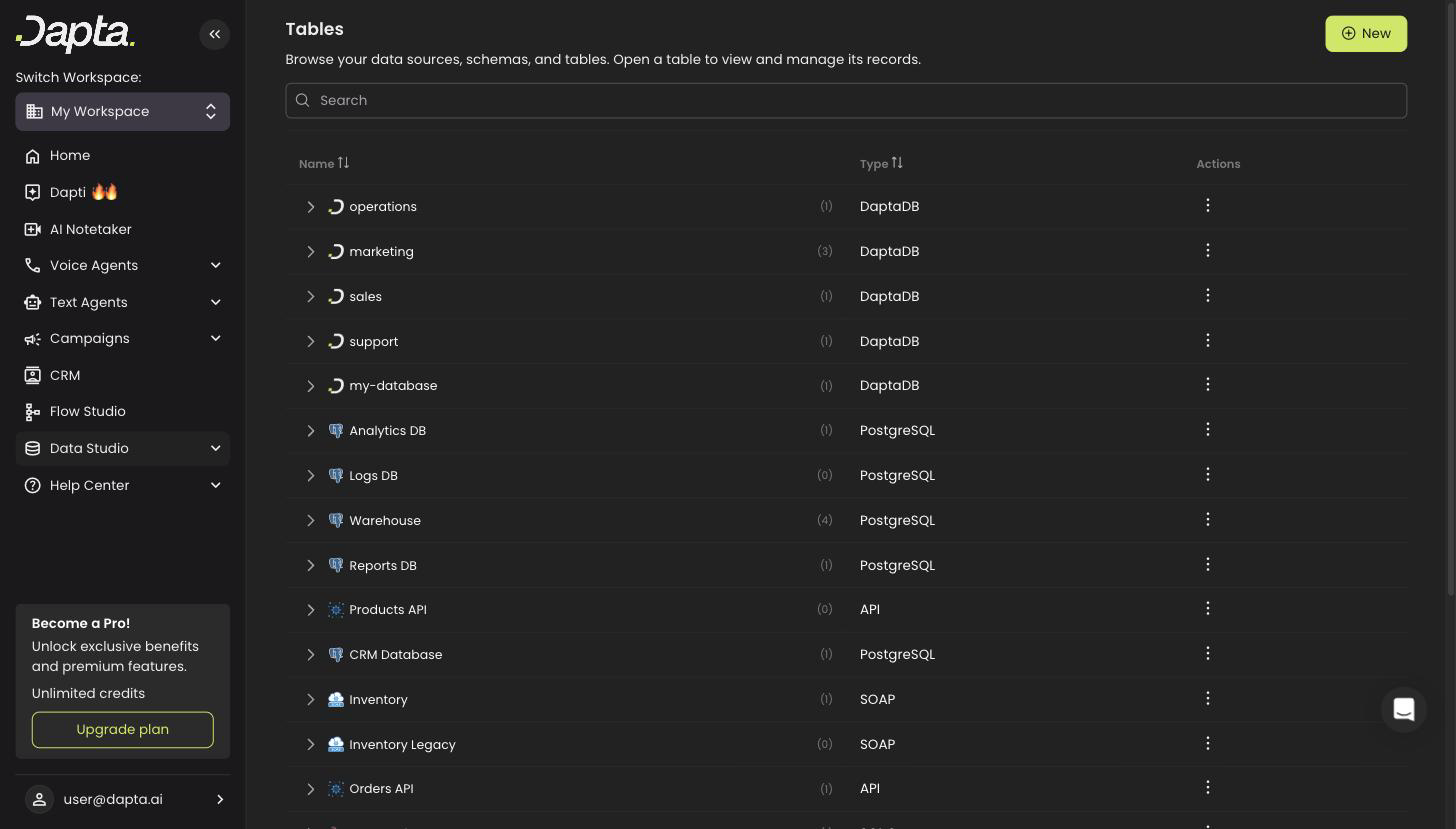
**Tables** is where all the data in your workspace lives. Go to **Data Studio → Tables** to browse your data sources, open any table to work with its records, and manage its fields and settings — whether the data lives in a database Dapta manages for you (**DaptaDB**) or in a database you already have.
## Explore your data sources
The Tables page lists every data source in your workspace. Expand a source to see its schemas and tables, or use the **search bar** to jump straight to a table by name.
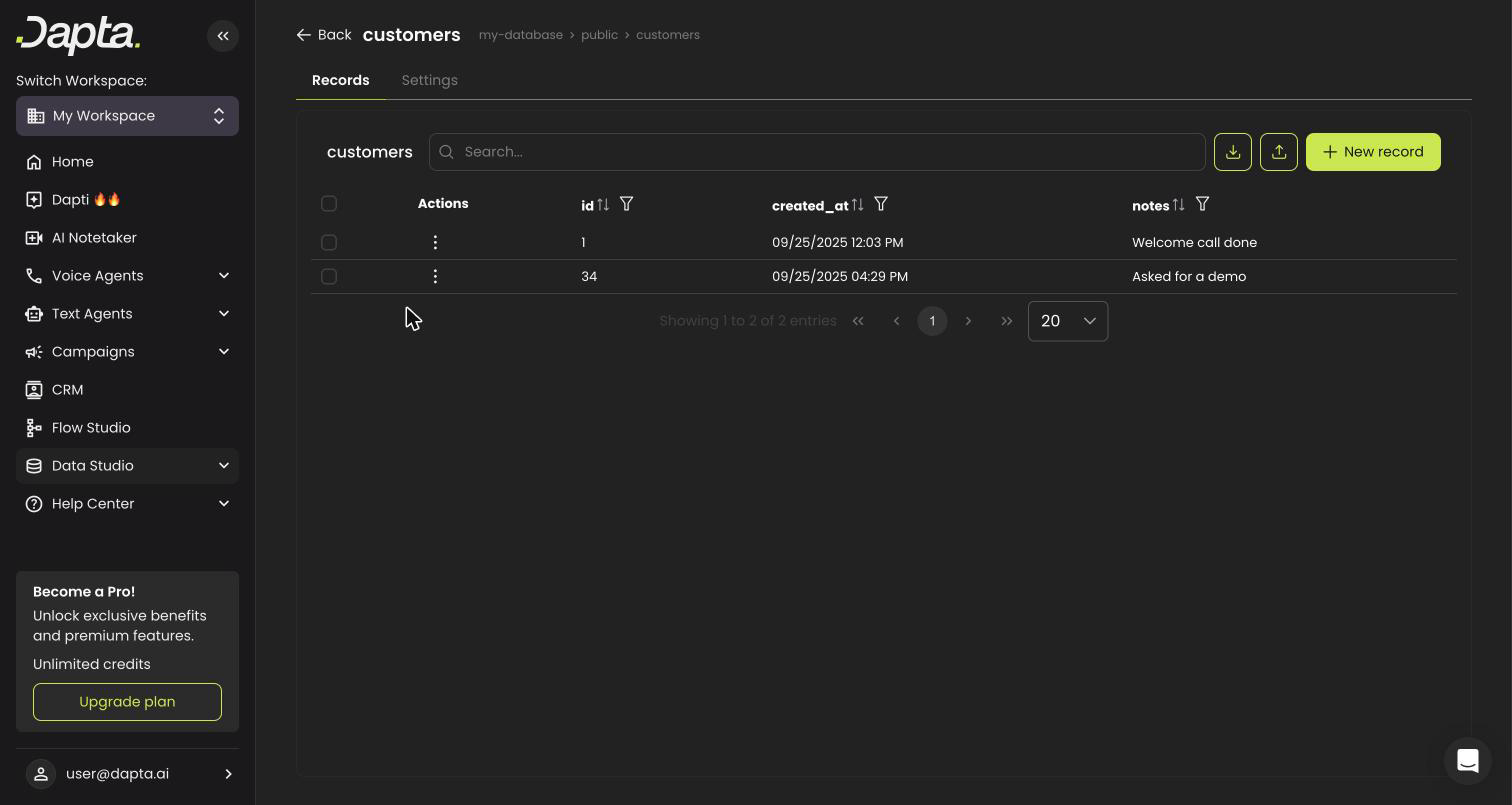
Click any table to open it full screen, with two tabs:
* **Records** — view, search, create, and edit the table's data.
* **Settings** — the table's name, description, fields, and advanced options.
***
## Create your own database (DaptaDB)
If you don't have a database yet, Dapta can host one for you.
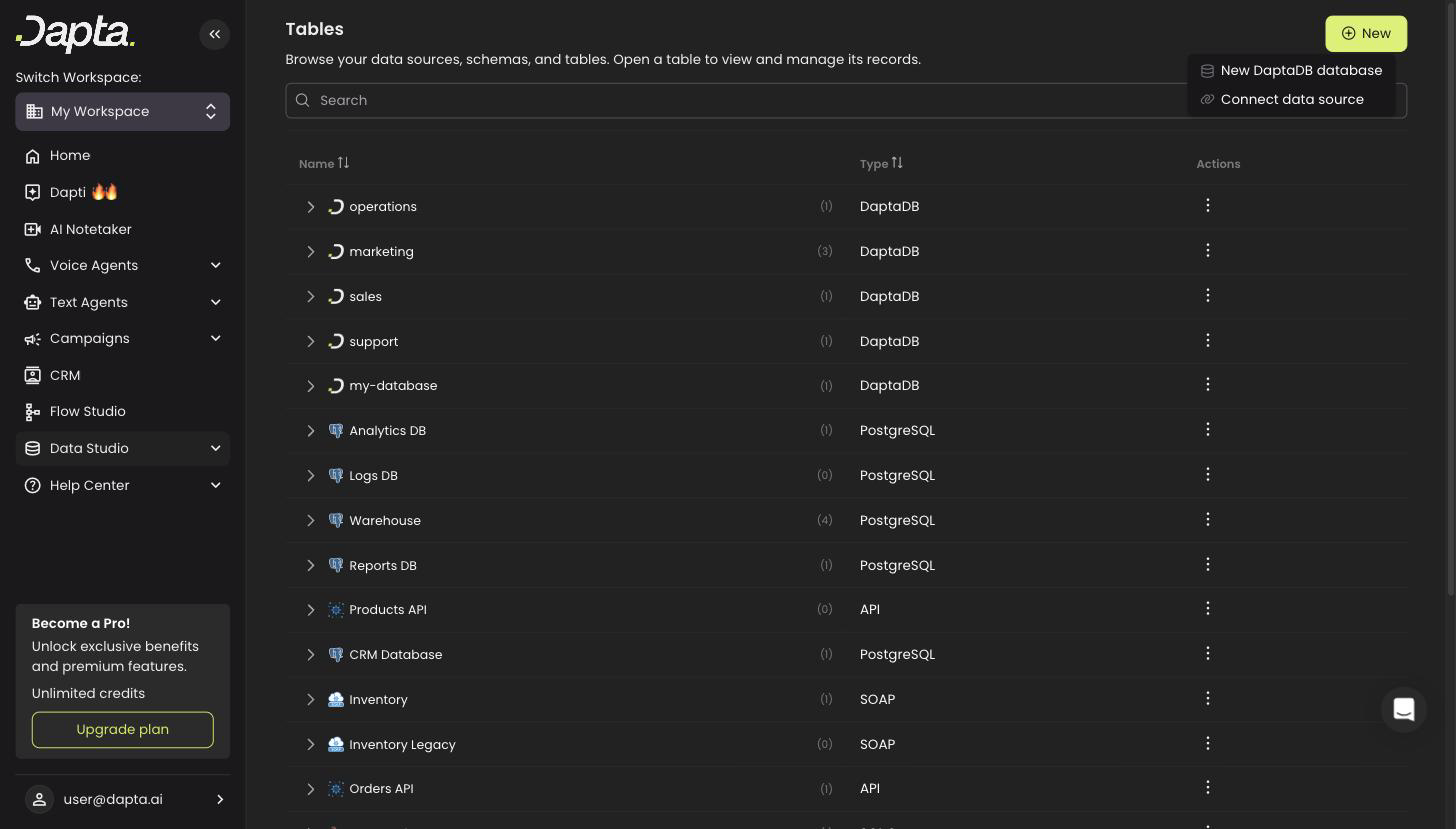
1. Click **New** in the top-right corner and choose **New DaptaDB database**.
2. Name your database and create your first table with its columns.
3. Your database appears in the explorer immediately, ready to store data.
To add more tables later, open the **⋮** menu on your DaptaDB database and choose **New table**.
{% hint style="info" %}
DaptaDB is a real database managed by Dapta — anything your agents and flows write to it is stored there, and you can browse it all from Tables.
{% endhint %}
***
## Connect a database you already have
1. Click **New** → **Connect data source**.
2. Pick your database type (PostgreSQL, MySQL, SQL Server, MongoDB, or an API) and enter its connection details.
3. Choose which tables to bring into Dapta.
{% hint style="success" %}
Dapta never modifies the structure of a connected database — it reads your existing tables so you can use them across the platform.
{% endhint %}
***
## Bring more existing tables into Dapta
Already connected a source but need another of its tables?
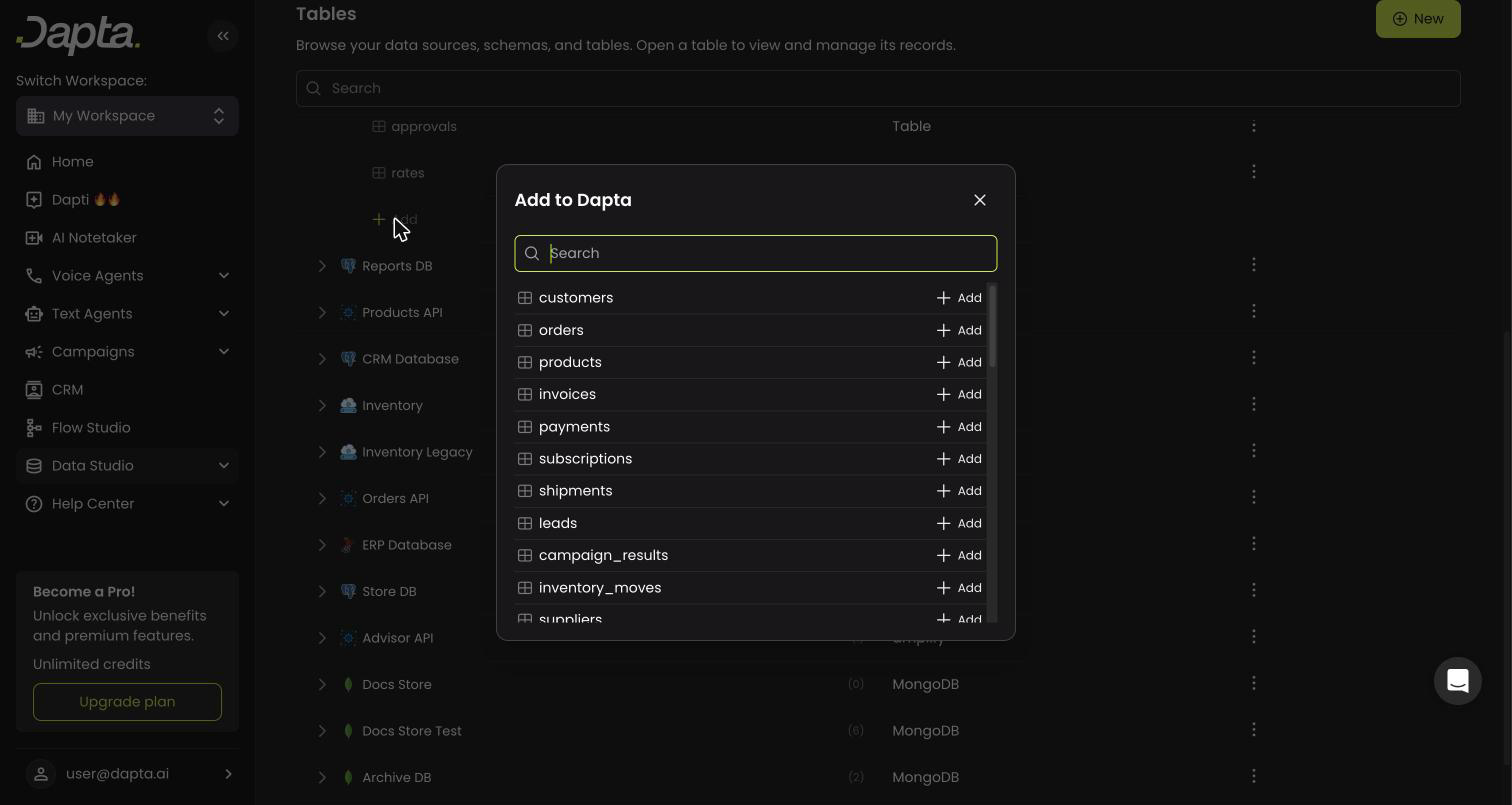
1. Expand the source in the explorer and click **+ Add** at the bottom of its table list.
2. Search for the table you want and click **Add**.
The table opens immediately with its columns detected automatically.
***
## Work with your data (Records)
The **Records** tab shows the table's data in a grid: search, sort, and filter any column, and use the toolbar to export or import CSV files.
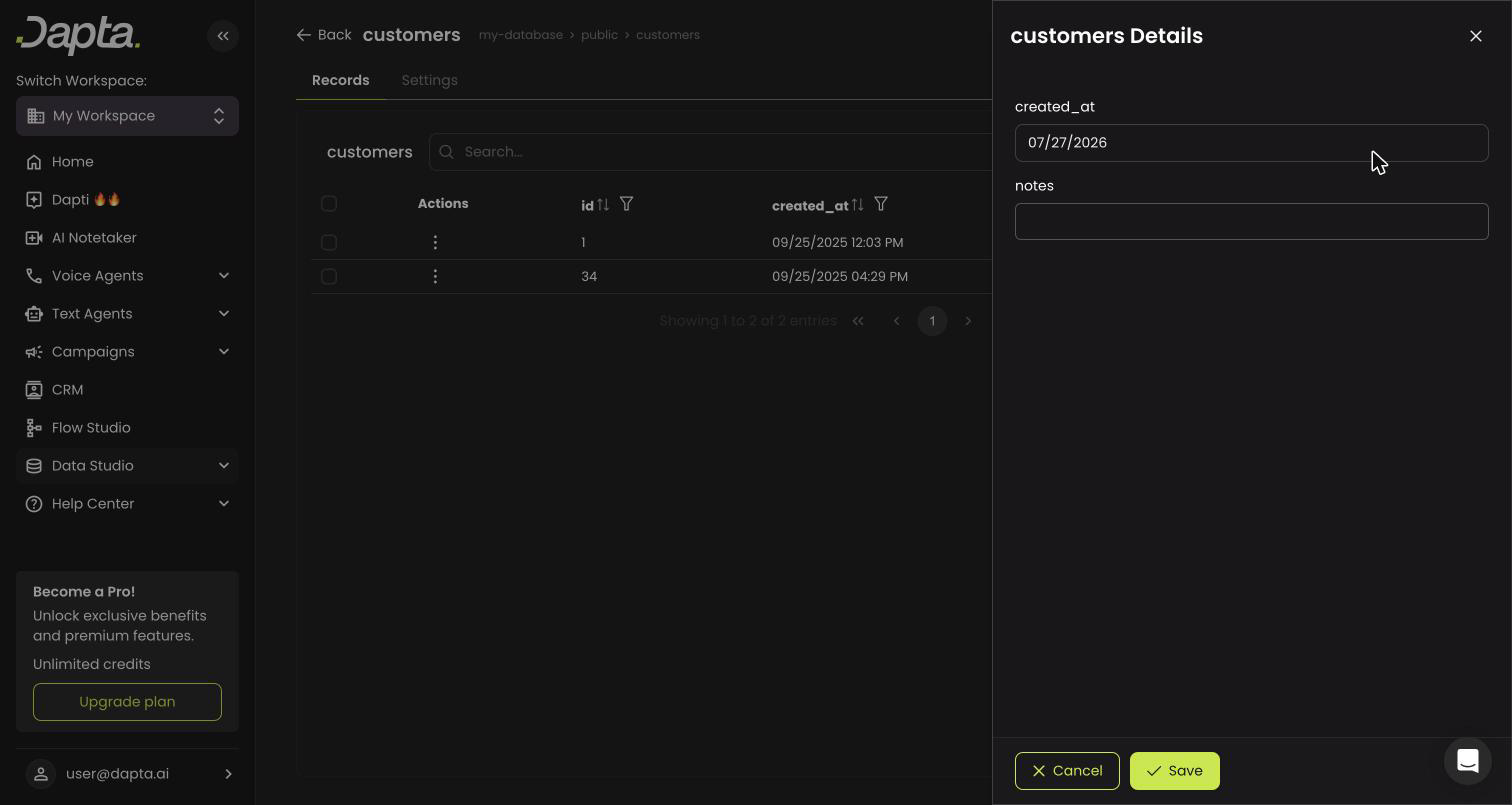
1. To create a record, click **New record**, fill in the fields, and press **Save**.
2. To edit a record, click its row — the record opens in a side panel where you can update any editable field.
### Choose and order the columns
Click **Columns**, the table icon above the grid next to export and import, to open the **Columns** panel:
* Drag a column by its handle to move it.
* Click the eye to show or hide it. The panel counts how many columns are hidden, and **Show all** brings them back. At least one column always stays visible.
You can also drag a column header in the grid to move it.
The order and the hidden columns are saved on the table, for everyone who uses it. They are the same as in **Settings** → **Fields**: change them in one place and the other follows. Only people who can edit the table can change its columns; everyone else sees the panel read-only.
***
## Table Settings
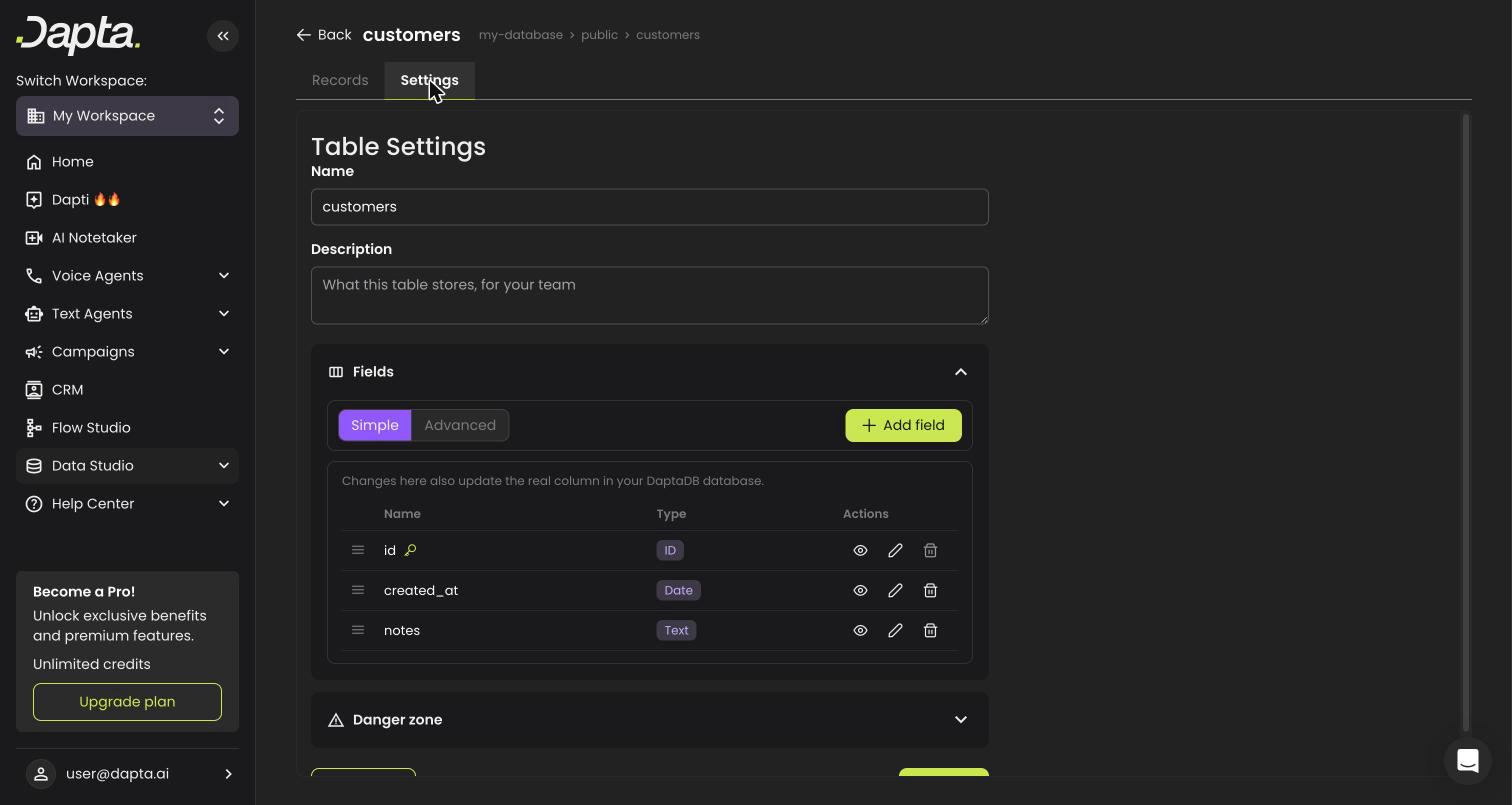
The **Settings** tab gathers everything about the table itself.
### Name & description
Rename how the table appears in Dapta and add a short description so your team knows what it stores.
### Fields
The **Fields** card lists the table's columns. From here you can:
* **Add field** — create a new field. On DaptaDB tables this also creates the real column in your database; on connected databases you pick from columns that already exist.
* **Edit** (✏️) — change a field's display name, type, and options.
* **Show/hide** (👁) — control whether the field appears in the records grid.
* **Reorder** — drag the handle on the left of each row; the grid columns follow this order.
* **Sync fields** (connected databases only) — compare your fields against the real database and add new columns or remove ones that no longer exist, in one click.
Use the **Simple / Advanced** toggle to switch between friendly field types (Text, Number, Date…) and the technical view with each field's database reference.
{% hint style="warning" %}
On DaptaDB tables, field changes update the real column in your database. Deleting a field there permanently deletes the column **and all its data** — Dapta asks for confirmation before doing it.
{% endhint %}
### Danger zone
At the bottom of Settings:
* **DaptaDB tables** — rename the real table, or delete it permanently (table and data).
* **Connected tables** — **Unlink table** removes it from Dapta. Your database is not modified, and you can add the table again anytime.
***
## Next steps
Use your tables everywhere in Dapta: give agents access to them, read and write rows from Flow Studio, and power sequences with your own data.
Need help with the connection details for a specific database type?
{% content-ref url="/pages/g3LGCwO3PmWTmPzIi8EM" %}
[Connecting Data Sources](/product-guides/connecting-data-sources.md)
{% endcontent-ref %}
---
# Agent Instructions
This documentation is published with GitBook. GitBook is the documentation platform designed so that both humans and AI agents can read, navigate, and reason over technical content effectively. Learn more at gitbook.com.
## Querying This Documentation
If you need additional information that is not directly available in this page, you can query the documentation by asking a question.
Perform an HTTP GET request on the following URL with the `ask` and `goal` query parameters:
```
GET https://docs.dapta.ai/product-guides/data-studio-tables.md?ask=&goal=
```
`ask` is the immediate question: it should be specific, self-contained, and written in natural language.
`goal` is what the user is ultimately trying to achieve, the reason they need the answer. Sharing it helps GitBook give you a better, more relevant answer. A goal is most helpful when it describes the outcome the user wants rather than restating the question. For example, with `ask=how do I create an API token`, a goal like `automate deployments from our CI pipeline` lets GitBook tailor the answer to that use case.
The response will contain a direct answer to the question and relevant excerpts and sources from the documentation.
Use this mechanism when the answer is not explicitly present in the current page, you need clarification or additional context, or you want to retrieve related documentation sections.